Embarking on the journey of mastering embroidery, one stitch that I’ve found to be versatile and effective is the split stitch.
This classic technique, often used for outlining and detailed work in both modern and historical embroideries, is a fantastic tool to have in your embroidery arsenal. But how exactly do you go about mastering the split stitch?
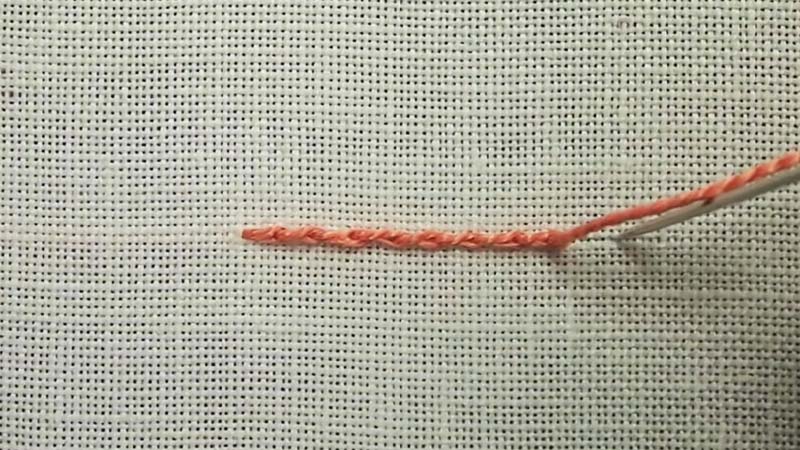
I’ll start by saying it’s easier than you might think! The fundamental concept involves coming up through your fabric, making a small forward stitch then bringing your needle back up through the middle of that first stitch – essentially ‘splitting’ it.
This creates a line with a slightly textured appearance similar to twisted rope or chain, hence its frequent use for outlines.
Interestingly enough, there’s also an alternative method known as split back stitch, which adds an extra step. Instead of splitting from front to back like traditional split stitching, this modification involves going backward onto the previous stitch – creating an effect similar to stem stitching.
Both techniques are great depending on what kind of look you’re aiming for in your project.
In my experience with these stitches, practice has been key. And while they might seem tricky at first glance, I assure you they’re not as daunting as they may appear! Therein lies their beauty: simple process yielding intricate results.
What is Split Stitch Embroidery?
Split stitch embroidery is a hand embroidery technique that involves creating delicate, textured lines by splitting the thread from a previous stitch.
It is achieved by making a simple straight stitch and then bringing the needle up through the middle of that stitch, splitting the thread.
This process is repeated to create continuous, unbroken lines in the design. Split stitch embroidery can be used for various types of designs, from simple outlines to intricate details, and it provides depth and dimension to the finished piece.
Additionally, there is a variation called split backstitch where each new stitch goes backward rather than forward on the fabric surface, further enhancing the texture of the embroidery.
Materials Needed for Split Stitch Embroidery
To embark on your journey into the world of split stitch embroidery, you’ll need a few essential materials. Here’s a breakdown of what you’ll need to get started:
Thread
The most common thread used in split stitch embroidery is 6-strand cotton floss. This thread is available in a wide range of colors, allowing you to create vibrant and intricate designs. You can separate the strands according to your desired thickness for the stitches.
Fabric
Choose a sturdy yet flexible fabric for your embroidery project. Linen and cotton are popular choices due to their texture and durability. Avoid overly stretchy fabrics, as they may distort the stitches.
Needles
Use embroidery needles in size 7 or 8 for split-stitch embroidery. These needles have large eyes, making it easier to thread them with the embroidery floss. They also have sharp points that allow for precise stitching.
Embroidery Hoop
An embroidery hoop is essential for keeping the fabric taut while you work. This helps to prevent puckering and ensures neater stitches.
Opt for a hoop that is about 4-6 inches in diameter, as it provides a comfortable size for stitching, especially for beginners.
Scissors
Small, sharp scissors are necessary for cutting the embroidery floss neatly without fraying. Keep them handy for trimming the thread as you work on your project.
Water-Soluble Marking Pen/Pencil
If you plan on transferring designs onto your fabric before stitching, consider using water-soluble marking pens or pencils. These tools allow you to mark the design on the fabric temporarily and disappear with water or when washed.
Step-by-Step Guide to Split Stitch Embroidery
Embarking on the journey of split stitch embroidery can be an exciting and fulfilling endeavor. This age-old technique, cherished for its timeless charm, adds depth and texture to any fabric it adorns.
Here’s a step-by-step guide to mastering this art at home:
Preparation
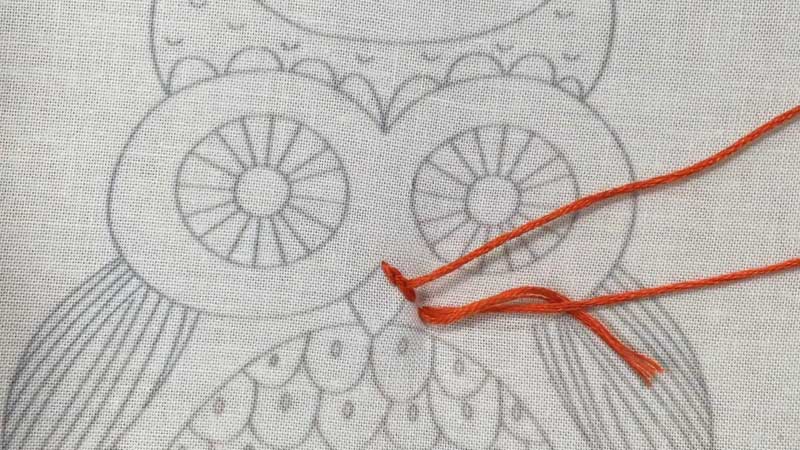
Gather your essential tools, including an embroidery hoop, thread, needle, and a piece of fabric. Lightly sketch your design onto the fabric with a pencil to serve as a guide for your stitching.
Threading the Needle
Thread your needle with a manageable length of thread, typically not exceeding 18 inches. Longer threads may lead to unnecessary tangling during stitching.
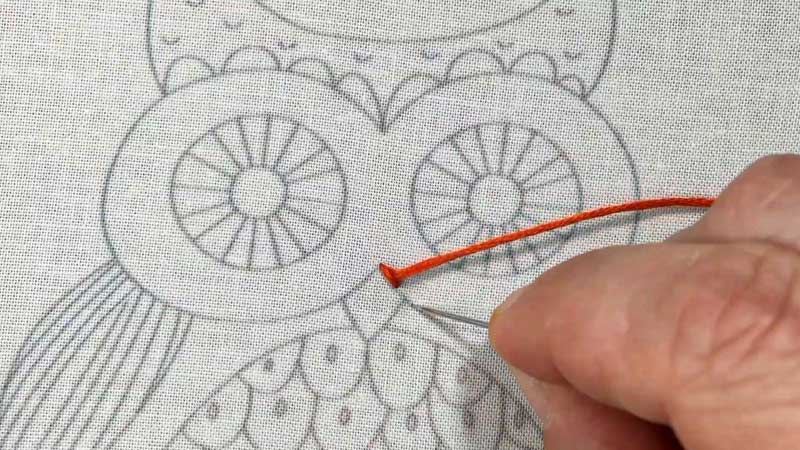
Starting off
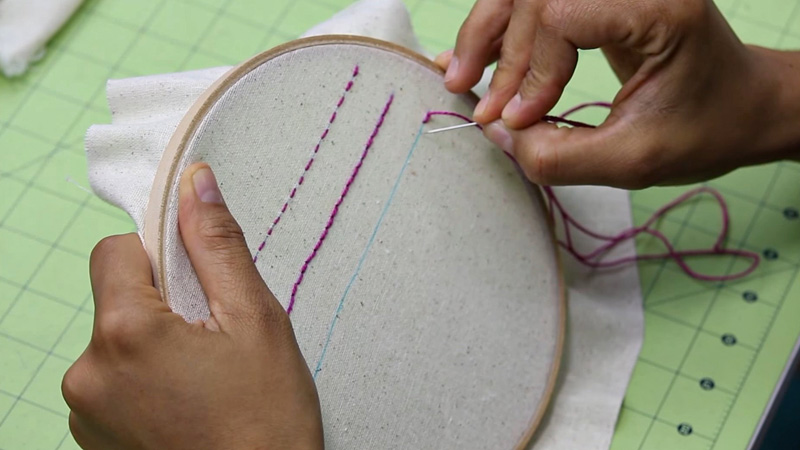
Begin by bringing the needle up through the backside of the fabric at one end of your drawn design (point A). Then, move the needle down at a short distance ahead (point B), creating a single straight stitch.
The ‘Split’ in Split Stitch
To create the characteristic split stitch, bring the needle up again between points A and B, effectively splitting the original straight stitch. Pull the needle up entirely to secure the stitch.
Continuing Onward
Repeat the previous step for each subsequent stitch in your design. Bring the needle up from within the previous stitch and move forward, maintaining consistent spacing and tension.
Exploring Variations
If you wish to experiment with variations like the split backstitch, make a slight adjustment. Instead of moving forward after bringing the needle up from previous stitches, take a step backward. This simple tweak creates a unique texture and visual appeal.
Practice Makes Perfect
As with any skill, practice is key to mastering split stitch embroidery. Start with simple designs and gradually challenge yourself with more intricate patterns. Don’t be discouraged by initial roughness; consistent practice and experimentation will lead to improvement over time.
Different Techniques in Split Stitch Embroidery
Split stitch embroidery offers a versatile range of techniques that allow embroiderers to experiment and create unique effects.
Here are some different techniques and variations within split stitch embroidery:
Basic Split Stitch
This is the fundamental technique where a single straight stitch is made, and then the needle is brought up through the center of that stitch, splitting the thread. Repeat this process for each subsequent stitch to create a continuous line.
Split Backstitch
Similar to traditional backstitching, instead of coming up ahead as in classic backstitching, the needle is brought up within the previous stitch, splitting it apart. This technique adds texture and depth to the embroidered line.
Thread Variation
Experimenting with different thread thicknesses can result in varied textures. Thicker threads create more prominent, textured lines, while thinner threads offer finer details and delicate lines.
Curved Lines vs. Straight Lines
Split stitch embroidery is flexible enough to accommodate both curved and straight lines. Adjust the spacing and angle of the stitches to create smooth curves or crisp straight lines, depending on your design needs.
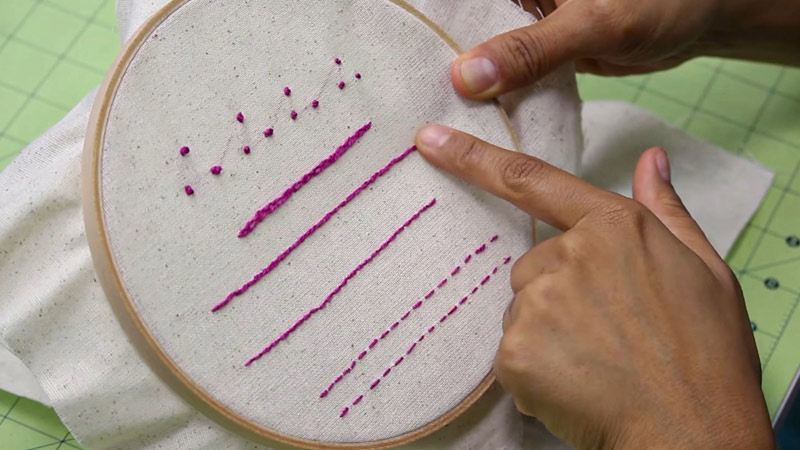
Stitch Spacing
Varying the spacing between stitches can alter the appearance of the embroidered line. Wider spaced stitches create a lacy, open effect, reminiscent of chain stitching, while closely packed stitches result in a denser, solid line.
Layering and Blending
Layering different colors of thread or blending shades within the same stitch can add dimension and depth to the embroidery. Experiment with blending techniques to create subtle gradients and shading effects.
Stitch Direction
By changing the direction of the stitches, you can create different textures and visual effects. For example, stitching diagonally or in a zigzag pattern can add interest and dimension to your design.
Combining with Other Stitches
Split stitch can be combined with other embroidery stitches to create intricate patterns and textures. Experiment with combining split stitch with satin stitch, French knots, or seed stitch to add variety and complexity to your embroidery.
Tips and Tricks for Successful Split Stitch Embroidery
Mastering split stitch embroidery requires practice, patience, and a few helpful tips and tricks to achieve successful results consistently.
Here are some insider tips to help you nail split stitch embroidery every time:
Master the Basic Technique
Start by understanding the basic split stitch technique. Push the needle up through the fabric, then insert it back into the fabric a short distance away, splitting the previous stitch.
This creates a subtle texture and beautiful line of stitching perfect for outlining or adding detail to your embroidery projects.
Explore Variations
Experiment with variations like the split backstitch for even more defined lines and clarity in your designs. Practice both traditional split stitch and split backstitch to see which technique works best for your specific project.
Use Sharp Needles
Sharp needles make a significant difference in the quality of your stitches. They can pierce through threads more accurately without causing excessive fraying, resulting in cleaner and more precise embroidery.
Prevent Thread Twisting
Twisting thread can lead to uneven stitches or knots in your embroidery. To avoid this, use slightly thicker embroidery floss and let your threaded needle dangle freely every few stitches to allow any twists to unwind naturally.
Practice Consistently
Like any skill, mastering split stitch embroidery takes practice. Start with simple designs and gradually progress to more complex patterns. Don’t be discouraged by initial imperfections; embrace the learning process and celebrate your progress over time.
Pay Attention to Tension
Maintain consistent tension on your stitches to ensure uniformity in your embroidery. Avoid pulling the thread too tightly, which can distort the fabric and create puckering. Experiment with different tensions to achieve the desired effect.
Experiment with Threads and Fabrics
Try different types of threads and fabrics to see how they affect the appearance of your split-stitch embroidery.
Thicker threads will create more textured lines, while finer threads will produce delicate details. Similarly, different fabrics will yield varying textures and finishes.
Take Breaks and Rest Your Eyes
Embroidery can be intricate work, so remember to take breaks and rest your eyes periodically to prevent eye strain and fatigue. This will help you maintain focus and accuracy in your stitching.
Conclusion
Split stitch embroidery offers a timeless and versatile technique that elevates any embroidery project. Mastering the split stitch and its variations, such as the split backstitch, allows for endless creative possibilities and adds depth and detail to designs.
Embroidery is more than just a hobby; it’s a form of self-expression and meditation. Through understanding the interaction of threads and the nuances of stitching techniques, embroiderers can transform simple threads into intricate works of art.
With patience, practice, and a creative eye, split-stitch embroidery opens doors to a world of creativity and expression, reminding us that every masterpiece begins with individual threads waiting to be woven together.
Leave a Reply