3D printing is a manufacturing process that involves creating a physical object by building it up layer by layer from a digital file. It has a wide range of applications, from prototyping and product development to custom manufacturing and end-use parts.
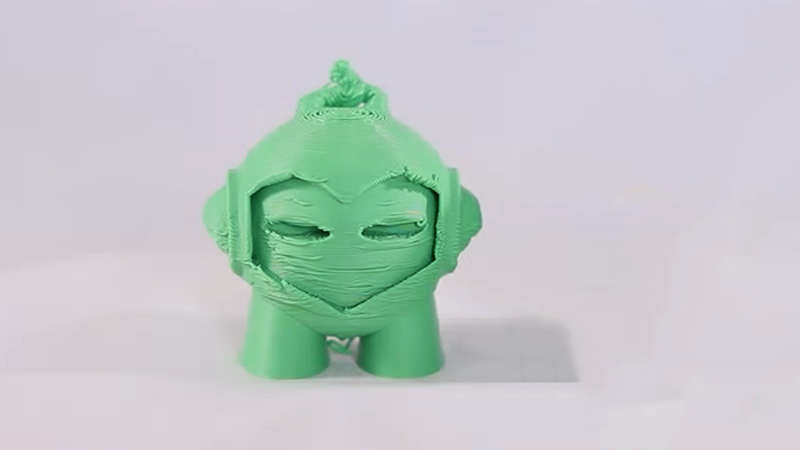
One of the key factors in achieving professional-quality 3D prints is smoothness. Smooth prints have a polished, finished look, and are less prone to visible layer lines or other imperfections.
They are also typically stronger and more durable than rough prints, as the smooth surface allows for better adhesion between layers.
As a result, achieving smooth prints is important for a variety of applications, including aesthetic projects, functional parts, and end-use products.
Possible Causes of Rough Prints
Rough or uneven 3D prints can be caused by a variety of factors, including issues with the filament, print bed, nozzle temperature, print speed, flow rate, retraction settings, and slicing software, as well as mechanical issues with the 3D printer itself. Here are a few possible causes in more detail:
Filament Issues
Low-quality filament or using the wrong type of filament for your printer can result in rough prints. Running out of filament during a print can also cause defects on the surface.
Print Bed Issues
An uneven print bed can cause the first layer of your print to stick poorly, resulting in rough prints. Poor adhesion or bed temperature also causes layer shifting and warping, resulting in rough prints
Nozzle Temperature Issues
The nozzle temperature should be set correctly for the filament you’re using. If the temperature is too high or too low, it can result in rough prints.
Print Speed Issues
Sometimes, printing too quickly can result in rough prints. Slowing down the print speed may help improve the surface finish.
Flow Rate Issues
The flow rate for the filament should be set correctly. A flow rate that is too low can cause the filament to be extruded in strings, which can result in rough prints.
Retraction Settings Issues
If the retraction settings are not set correctly, it can cause stringing and result in rough prints.
Slicing Software Issues
Sometimes, an issue with the slicing software can result in rough prints. Slicers can have bugs, or create errors in the G-code that can affect the print.
Mechanical Issues
Check for any mechanical issues with the printer such as a clogged or dirty extruder or worn-out parts, they can cause layer shifting, resulting in rough prints.
Model Issues
The model itself might have some issues like overhangs, holes, or not enough supports, they may cause the print to fail, resulting in rough prints.
It’s important to take a systematic approach to troubleshooting the issues, by checking each of the possible causes, one by one. This will help you to identify the specific cause of the problem and take the necessary steps to correct it.
Strategies for Achieving Smooth Prints
Achieving smooth prints with a 3D printer can be a challenging task, but there are a variety of strategies that you can use to improve the surface finish of your prints. Here are a few strategies to try:
Experiment With Different Layer Heights
Changing the layer height can affect the surface finish of your prints. Try using a thinner layer height to achieve a smoother finish.
Adjust the Temperature
Experiment with the nozzle temperature to find the best setting for your filament. A higher temperature can result in a smoother finish, but it also may lead to warping.
Use a Cooling Fan
A cooling fan can help to cool the filament as it is extruded, which can help to improve the surface finish of your prints.
Experiment With Print Speed
Slowing down the print speed can help to improve the surface finish, but it also increases the print time.
Play With a Flow Rate
Increasing the flow rate can result in a smoother finish but can also affect the final shape and size of your prints.
Use the Right Bed Surface
Some materials require certain bed surfaces like a heated bed or special coatings, using the right one can improve adhesion and surface finish.
Use a Brim
A brim is an additional layer around the base of your print, which can help to improve adhesion to the print bed, resulting in a smoother finish.
Use Support Structures
using support structures can help to prevent warping and improve surface finish on overhangs or complex geometries.
Check the Mechanical Integrity
maintain your printer, and check for worn-out parts, clogged nozzles, and dirty or loose cables, they can affect the overall accuracy and smoothness of the print.
It’s important to keep in mind that the optimal settings will vary depending on the specific filament and printer you are using, and it may take some experimentation to find the perfect settings for your prints.
Here is a Table Summarizing the Different Causes and Solutions for Rough 3d Prints
| Cause of roughness | Solution |
|---|---|
| Extrusion problems (over- or under-extrusion) | Adjust printer settings (e.g. flow rate, retraction distance) and ensure that the extruder is working properly (e.g. unclogged nozzle, correct filament diameter) |
| High printing temperatures | Lower the printing temperature to ensure that the filament cools properly as it is printed |
| Excessive vibration in the 3D printer | Tighten any loose components (e.g. belts, bearings) and ensure that the printer is placed on a stable, level surface |
Table: Causes and Solutions for Rough 3D Prints
FAQ
One way to tell if your printer is over or under-extruding filament is to look at the appearance of the layers. If the layers are too thick and contain excess material, it may be a sign of over-extrusion. On the other hand, if the layers are thin or have gaps between them, it may be a sign of under-extrusion. Other indicators of extrusion problems can include filament breaking or grinding, or nozzle clogging or jamming.
Sanding can be an effective way to smooth out rough prints, but it may not always be sufficient on its own. Depending on the severity of the roughness, it may be necessary to use other techniques, such as priming and painting, applying solvents, or using a heat gun, in addition to sanding.
Additionally, sanding may remove material from the print and alter its dimensions, so it is important to be careful and test the results before committing to sanding a large or complex print.
Yes, it is possible to smooth out rough prints after they have already been printed. There are a variety of techniques that can be used to improve the surface finish of a 3D print, including sanding, polishing, priming, and applying solvents or epoxy resin. Some of these techniques may be more effective on certain types of prints or materials, so it is important to consider the specific characteristics of your print and choose the most appropriate method.
The necessity of smoothing out rough prints depends on the intended use and appearance of the print. In some cases, roughness may be acceptable or even desired, such as for prototypes or rough drafts. On the other hand, if you are trying to achieve a professional-quality finish or are using the print for functional purposes, it is generally recommended to smooth out the surface as much as possible.
Conclusion
Rough prints are a common problem in 3D printing and can be caused by a variety of factors, including extrusion problems, high printing temperatures, and excessive vibration in the 3D printer.
To achieve smooth prints, it is important to carefully troubleshoot and diagnose the specific cause of the roughness, and to experiment with different strategies and techniques to fix the problem.
Some potential strategies for achieving smooth prints include sanding and polishing, using primers and epoxy resin, applying solvents or vapor smoothing, and using a heat gun to smooth out imperfections.
It may be necessary to try multiple approaches and adjust printer settings and other variables to achieve the desired level of smoothness.
Overall, achieving smooth prints requires careful attention to detail and a willingness to experiment and try different techniques. With the right approach and a bit of practice, you can produce professional-quality 3D prints with a smooth, polished finish.
Leave a Reply