Velcro, the ingenious hook-and-loop fastener, has seamlessly integrated itself into countless aspects of our lives.
Its simplicity and versatility have made it a staple in industries ranging from fashion and apparel to healthcare and manufacturing.
However, while using Velcro is effortless, sewing it can sometimes present unexpected challenges, particularly for those new to the world of sewing.
This comprehensive guide will provide you with the knowledge, techniques, and troubleshooting tips needed to confidently sew Velcro, ensuring professional-level results for every project
Understanding the Basics of Velcro
Before we explore the intricacies of sewing Velcro, let’s take a closer look at its fundamental structure. Velcro consists of two integral components:
- The Hook Side: This side features a dense array of tiny, stiff hooks designed to securely grip the loops on the opposing side.
- The Loop Side: This side is composed of soft, pliable loops that readily interlock with the hooks.
The secure yet reversible bond of Velcro is formed when these two sides are pressed together.
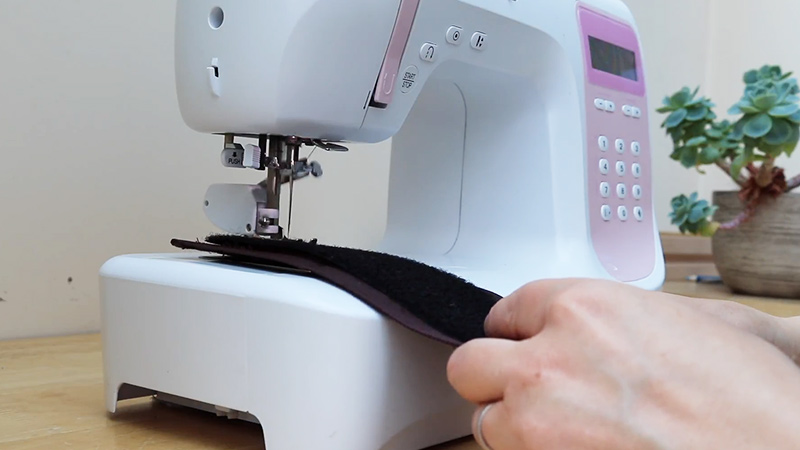
Navigating the Challenges of Sewing Velcro
While Velcro’s ease of use is undeniable, sewing it onto fabric can sometimes pose difficulties due to the unique characteristics of both the material and the sewing process itself. Some of the most common challenges include:
Thread Tension
Incorrect thread tension can lead to a range of issues, including puckering fabric, loose stitches, and even thread breakage. Finding the optimal tension for your specific fabric and Velcro combination is crucial for a smooth and durable stitch.
Thread Weight
Selecting a thread weight that is either too thin or too thick for the fabric and Velcro can compromise the quality and durability of your stitching.
A thread that is too thin may break under stress, while a thread that is too thick can create bulky seams and hinder the smooth feeding of the fabric through the sewing machine.
Needle Selection
Using a needle that lacks the strength and sharpness required for sewing Velcro can lead to frustrating needle bending or breakage, especially when stitching through the dense hooks.
A denim needle or a strong universal needle is generally recommended for most Velcro sewing applications.
Machine Limitations
Older sewing machines may struggle to effectively handle the thinness and flexibility of certain Velcro types. If you’re using an older machine, it’s essential to test its compatibility with your chosen Velcro before proceeding with your project.
Velcro Characteristics
Some Velcro types, particularly those with adhesive backings or a high degree of stiffness, can be difficult to feed smoothly through a sewing machine. Properly preparing the Velcro and using appropriate sewing techniques can help mitigate these challenges.
Expert Tips for Sewing Velcro with Precision and Confidence
Sewing with Velcro can be challenging, but with the right techniques and tools, you can achieve precision and confidence in your projects. Here are expert tips to help you sew Velcro effectively.
1. Prepping Your Project for Success:
- Needle Selection: Opt for a denim needle or a strong universal needle to minimize the risk of bending or breaking while sewing through the dense hooks of the Velcro.
- Thread Tension Adjustment: Always test your thread tension on a scrap of fabric similar to the one you’ll be using for your project. Aim for a smooth and balanced stitch, free from puckering or looseness on both the top and bottom sides of the fabric.
- Thread Weight Consideration: Choose a thread weight that complements both the fabric and the Velcro. The thread should be strong enough to withstand the stresses of use, yet thin enough to prevent bulky seams.
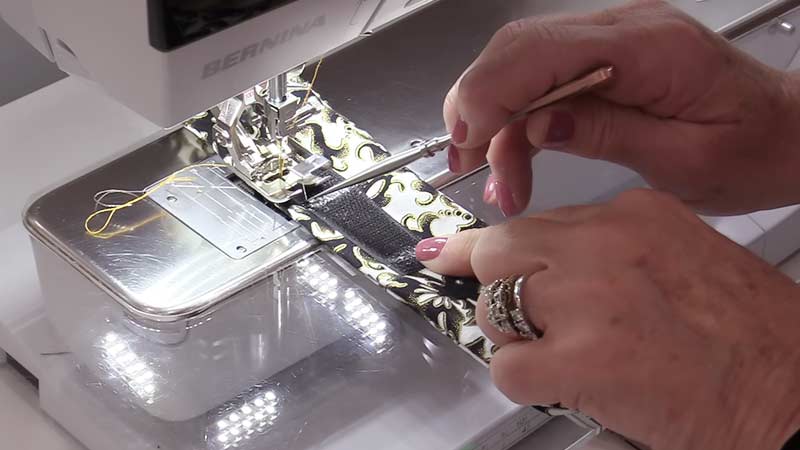
- Zipper Foot Utilization: A zipper foot is an invaluable tool for sewing Velcro. It helps guide the fabric evenly and prevents the Velcro from creeping as you stitch, ensuring a neat and professional finish.
- Accurate Placement Marking: Before you begin sewing, precisely mark the area where the Velcro will be attached to your fabric. This step guarantees accurate placement and helps prevent misaligned or crooked Velcro pieces.
2. Effective Stitching Strategies:
- Zig-Zag Stitch: A zig-zag stitch is the go-to stitch for sewing Velcro. Its back-and-forth motion creates a strong and durable seam that effectively secures the Velcro to the fabric and minimizes skipped stitches, especially when sewing through the densely packed hooks.
- Straight Stitch: A straight stitch can be used to secure the edges of the Velcro pieces, preventing them from fraying and extending their lifespan.
3. The Importance of Testing:
- Practice on Scraps: Before committing to sewing Velcro onto your final project, always practice on scraps of fabric similar to the one you’ll be using. This practice session allows you to fine-tune your machine settings, test your chosen thread and needle combination, and refine your sewing technique, ensuring a smooth and successful final outcome.
Troubleshooting Common Velcro Sewing Issues
Even with meticulous preparation and attention to detail, occasional hiccups can occur during the Velcro sewing process. Here are some common issues you might encounter, along with their solutions:
Skipped Stitches
Skipped stitches can be caused by a dull or incorrect needle, improper thread tension, or an incompatible combination of fabric, thread, and Velcro.
To troubleshoot this issue, check your needle’s sharpness and ensure it’s appropriate for sewing Velcro. Adjust the thread tension if needed, and consider testing different thread and needle combinations on a scrap of fabric to find the optimal combination for your project.
Puckering Fabric
Fabric puckering typically arises from thread tension that is too tight. To remedy this, slightly loosen the thread tension and test the stitching on a scrap of fabric until the puckering disappears.
Needle Breakage
Needle breakage can be a result of using a needle that is too thin or weak for the task of sewing through dense Velcro hooks. Switch to a heavier-duty needle, such as a denim needle, to prevent further breakage.
Velcro Feeding Issues
Velcro that has an adhesive backing may encounter difficulties feeding smoothly through the sewing machine. Trim any excess adhesive backing that may be hindering the feeding process, ensuring a smooth and consistent flow of fabric.
Conclusion
Sewing Velcro, while potentially presenting a few challenges, doesn’t have to be a daunting undertaking.
By understanding the nuances of Velcro, selecting the appropriate tools and settings, and applying the expert tips outlined in this guide, you can confidently and expertly sew Velcro onto any project, achieving professional-level results that enhance both the functionality and aesthetics of your creations.
Remember, practice makes perfect! With time and experience, you’ll develop the skills and finesse needed to sew Velcro like a seasoned professional, tackling any project with ease and precision.
Leave a Reply