Embroidering the charming and intricate chain stitch is a delightful journey into textile artistry. In this guide, “How Do You Embroider Chain Stitch,” we unravel the steps to master this versatile embroidery technique.
Whether you’re a novice eager to explore the art of stitching or an experienced hand-seeking inspiration, this comprehensive tutorial provides a detailed roadmap.
From preparing your fabric and threading the needle to creating elegant chain stitches, our step-by-step instructions, tips, and creative suggestions ensure a seamless and rewarding embroidery experience.
Unleash your creativity as we delve into the captivating world of chain stitch embroidery together.
What Is a Chain Stitch in Embroidery?
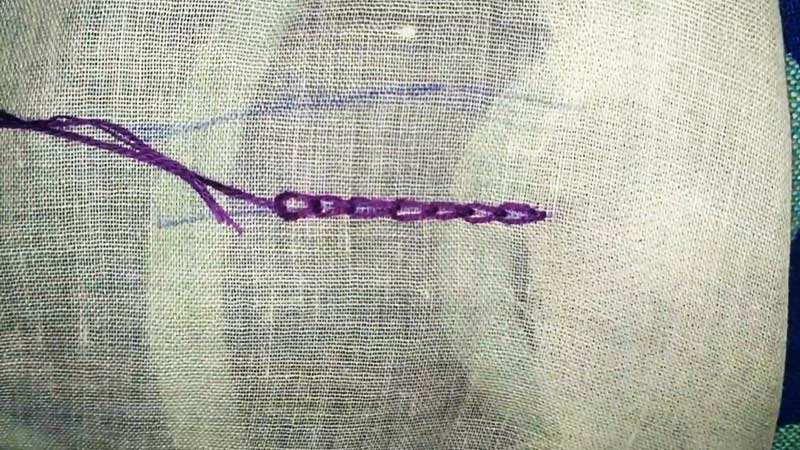
In embroidery, a chain stitch is a basic, versatile technique with a series of interlinked loops forming a continuous chain-like pattern. It is characterized by a single, connected line of stitches, resembling a chain.
To create a chain stitch, the needle is brought up through the fabric and inserted back into the same hole, leaving a loop on the surface. The needle is then passed through this loop, creating the first link in the chain.
This stitch is widely used for outlining, filling, and decorative purposes, offering a fluid and textured effect in embroidery designs.
How Do You Embroider Chain Stitch? A Step-By-Step Guide
Embroidering chain stitch is a straightforward process, and it’s a great starting point for beginners in embroidery.
Here’s a step-by-step guide on how to embroider chain stitch:
Materials Needed
- Embroidery Hoop: Keeps the fabric taut.
- Fabric: Choose a fabric of your preference.
- Embroidery Needle: A needle with a large eye to accommodate embroidery floss.
- Embroidery Floss: Strands of thread; you can separate the floss according to your desired thickness.
- Scissors: For cutting the floss.
- Water-Soluble Marker or Pencil: For drawing your design on the fabric.
Follow these steps to embroider chain stitch:
Step 1: Prepare Your Fabric and Hoop
Secure your fabric in an embroidery hoop, ensuring it is taut. Use a water-soluble marker or pencil to draw your design on the fabric, providing a visual guide for your chain stitch.
Step 2: Thread Your Needle
Cut an 18-inch length of embroidery floss, separate it into strands, and thread your needle. Knot the end of the floss to secure it.
Step 3: Start Your Chain Stitch
Position your needle at the starting point of your design. Bring the needle up from the back of the fabric, then insert it back into the same hole, leaving a small loop on the surface.
Step 4: Make Your First Chain Stitch
Extend the chain by bringing the needle up from the back, about 1/4 inch away. Pull the needle through the loop, tightening it to create the first chain stitch.
Step 5: Continue Making Chain Stitches
Repeat the process, bringing the needle up through each loop before tightening. Maintain even size and spacing, following the curves of your design smoothly.
Step 6: End Your Chain Stitch
Make a small stitch over the last loop to secure it. Bring the needle down just beyond the previous loop from the front and up inside the loop. Pull the needle through and cut off the excess floss.
Step 7: Enjoy Your Chain Stitch Embroidery
Congratulations! You’ve successfully embroidered a chain stitch. Customize your project further with additional stitches or leave it as is. Remove markings with a damp cloth or follow fabric care instructions.
Tips and Tricks for Chain Stitch Embroidery
Mastering chain stitch embroidery involves understanding the basic technique and incorporating tips and tricks to enhance your skills.
Here are some valuable tips to help you achieve neat and beautiful chain stitch embroidery:
Maintain a Consistent Needle Angle
To create uniform and neat chain stitches, try to keep the angle of your needle consistent as you bring it up through each loop. Consistency in the angle contributes to a smoother and more professional look.
Experiment with Stitch Size and Spacing
Varying the size and spacing of your chain stitches can add texture and visual interest to your embroidery. Experiment with different stitch lengths and gaps between stitches to achieve the desired effect.
Adapt Stitch Size for Curves
When embroidering curves, adjust the size of your stitches. Use smaller stitches on inner curves and larger stitches on outer curves to maintain a smooth and natural appearance.
Explore Different Thread Thicknesses
Depending on your project, try using different thread thicknesses to achieve varied effects. Thicker threads can create bolder and more pronounced chain stitches, while thinner threads can result in delicate and intricate designs.
Use Contrasting Colors for Dimension
Create a dimensional look by using a contrasting color for the outline and a lighter color for the fill. This technique adds depth and makes your chain stitch stand out.
Practice on Scrap Fabric
Before working on your main project, practice the chain stitch on scrap fabric. This allows you to familiarize yourself with the tension, spacing, and overall technique, ensuring a more polished result on your final piece.
Secure the Last Loop
To prevent your chain stitch from unraveling, make a small stitch over the last loop to secure it in place before finishing the embroidery. This adds durability to your work.
Combine Chain Stitch with Other Stitches
Get creative by combining chain stitches with other embroidery stitches. Experiment with variations like twisted chain stitch or use it alongside different stitches to create unique and intricate designs.
Keep Fabric Taut in Hoop
Maintain the fabric’s tautness in the embroidery hoop to ensure even and consistent stitches. A tight fabric surface provides a stable base for your embroidery work.
Embellish with Beads or Sequins
Add extra flair to your chain stitch embroidery by incorporating beads or sequins. This can enhance the overall visual appeal and create a more decorative effect.
Creative Examples of Chain Stitch Embroidery Projects
Chain stitch embroidery offers a versatile canvas for creative expression. Here are some inspiring examples of projects where chain stitch is used creatively:
Floral Wreath on a Canvas Bag
Create a charming floral wreath on a canvas tote bag using chain stitch. Use different colors for the flowers and leaves to add vibrancy.
Vintage-Inspired Bookmark
Craft a delicate and vintage-inspired bookmark with chain stitch embroidery. Choose a motif like a key, lock, or an ornate border to give it an antique feel.
Monogrammed Handkerchiefs
Personalize handkerchiefs with monogram initials using chain stitch. This classic and elegant embroidery adds a sophisticated touch to a practical accessory.
Bohemian Dreamcatcher Hoop Art
Embroider a bohemian-inspired dreamcatcher on fabric stretched in an embroidery hoop. Utilize chain stitches for the intricate patterns within the dreamcatcher.
Cactus Garden on a Denim Jacket
Transform a denim jacket into a trendy fashion statement by embroidering a desert landscape with a chain stitch. Cacti, sun, and clouds can be beautifully depicted using this technique.
Whimsical Animal Nursery Decor
Embroider cute and whimsical animals on fabric for nursery decor. A chain stitch can be used to create soft and cuddly creatures like bears, rabbits, or elephants.
Geometric Patterns on a Cushion Cover
Explore geometric patterns on a cushion cover using chain stitch. This modern and stylish design adds a contemporary flair to your home decor.
Sunflower Field Wall Hanging
Capture the beauty of a sunflower field by embroidering the flowers and stems with chain stitches on the fabric. Frame the finished piece for a stunning wall hanging.
Abstract Landscape on a Quilt Square
Use chain stitch to create an abstract landscape on a quilt square. Experiment with colors and shapes to depict mountains, rivers, or other scenic elements.
Vintage Travel Postcard Tea Towels
Embroider vintage-style travel postcard motifs on tea towels using chain stitch. Illustrate destinations with iconic landmarks, adding a touch of nostalgia to your kitchen.
Rainbow-Colored Butterfly on Jeans Pocket
Embroider a vibrant and colorful butterfly on the jeans pocket using chain stitch. This whimsical design adds a playful element to your denim.
Inspirational Quote Wall Art
Stitch an inspirational quote or phrase on fabric using chain stitch. Frame the finished piece for motivational wall art that combines words and artistry.
FAQs
Is chain stitch suitable for fashion projects?
Absolutely! Chain stitch is ideal for fashion projects. It adds a trendy and personalized touch to items like denim jackets, jeans, and accessories.
How do I prevent fabric puckering while embroidering chain stitches?
To prevent fabric puckering, securely tighten the fabric in the embroidery hoop, use a stabilizer or interfacing, and ensure smooth, even stitching during chain stitch embroidery.
Can I wash chain stitch-embroidered items?
Yes, chain stitch-embroidered items can be washed. Follow fabric and floss care instructions, use a gentle detergent, and consider hand washing or a delicate cycle.
How do I troubleshoot if my chain stitch looks uneven?
To troubleshoot uneven chain stitches, ensure even fabric tension, maintain consistent thread tension, and practice on a scrap piece to refine your stitching technique.
Can I use chain stitch for 3D or raised embroidery?
Yes, chain stitches can be adapted for 3D or raised embroidery experiments by incorporating padding stitches beneath the chain stitches for added depth and texture.
To Recap
Mastering the art of chain stitch embroidery opens a gateway to limitless creative possibilities. Following our detailed guide, take pride in the intricate patterns and personalized designs adorning your fabric as you conclude your stitching journey.
The beauty of chain stitch lies in its simplicity and the unique touch you impart to each creation.
Whether you embellish daily essentials or embark on ambitious artistic projects, the skills acquired in this tutorial serve as a foundation for further exploration of the rich embroidery tapestry.
Celebrate your newfound proficiency, and may each chain stitch be a testament to your skill and artistic expression. Happy stitching!
Leave a Reply