Embarking on an embroidery project is a delightful creative journey, but the frustration of discovering that your meticulously planned embroidery outline is off can be disheartening.
This common challenge perplexes both beginners and seasoned crafters alike, prompting a quest for solutions.
Understanding the root causes of misaligned outlines is crucial to restoring precision and achieving professional results.
In this exploration, we delve into the various factors contributing to this issue, providing insights and practical tips to address the question, “Why is my embroidery outline off?”
From hooping techniques to digitizing errors, we’ll unravel the complexities, empowering embroidery enthusiasts to troubleshoot and enhance the quality of their stitching.
Why Is My Embroidery Outline Off?
Embroidery enthusiasts often encounter frustration when their projects don’t meet expectations. Why is my embroidery outline off?
Several factors can contribute to this issue, and understanding them can help troubleshoot and improve the quality of your embroidery work.
Incorrect Hooping Technique
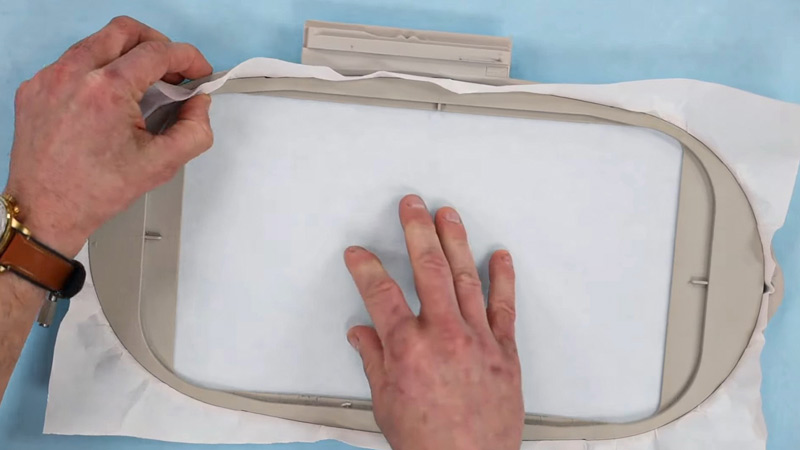
Proper hooping is crucial for precise embroidery. If the fabric isn’t stretched taut or if it’s unevenly hooped, the design may shift during the embroidery process. Ensure the fabric is securely hooped and the stabilizer is appropriately placed to maintain alignment.
Digitizing Errors in Design
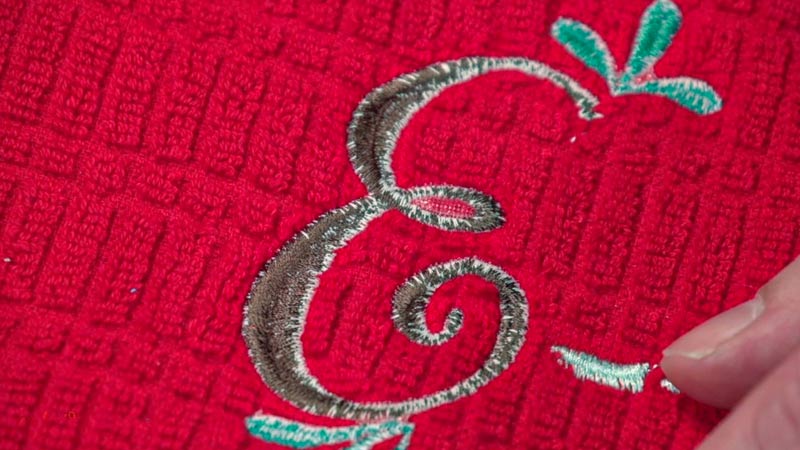
The embroidery design itself plays a significant role in how well it stitches out. Digitizing errors, such as inconsistent stitch density or poorly defined outlines, can cause the embroidery to veer off-course. Double-check the design file for any issues and consider re-digitizing if necessary.
Thread Tension Problems
Inconsistent thread tension can result in uneven stitches, leading to an embroidery outline that doesn’t align properly.
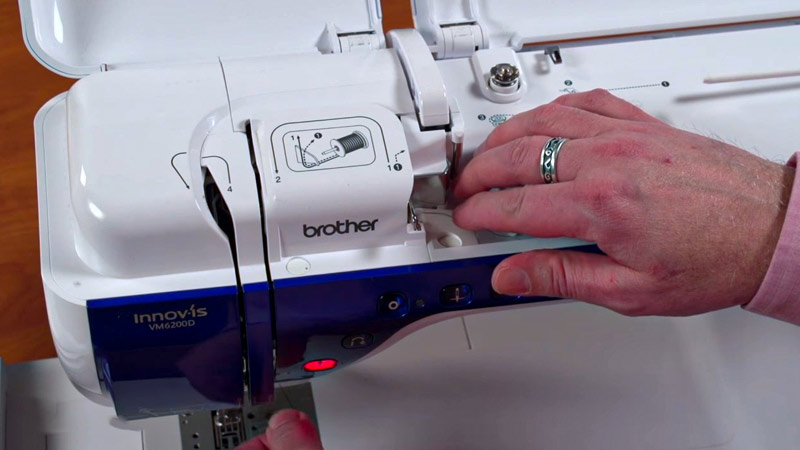
Check your machine’s tension settings, and make sure the thread is properly threaded through the machine, including the tension discs and guides.
Needle Issues
A damaged or dull needle can negatively impact the embroidery outcome. Needles should be changed regularly to ensure they are sharp and in good condition. Using the correct needle size for the fabric type can also improve stitching.
Stabilizer Selection

The stabilizer provides support to the fabric during the embroidery process. Using the wrong stabilizer or not using any at all can lead to fabric distortion and misalignment. Choose an appropriate stabilizer based on the fabric type and the complexity of the design.
Machine Calibration Problems

A misaligned or poorly calibrated embroidery machine can result in design placement errors. Regularly check and calibrate your machine to ensure it is operating accurately. Refer to your machine’s manual for guidance on calibration procedures.
Fabric Distortion
Different fabrics react differently to the embroidery process. Stretchy or delicate fabrics may distort under the tension of the stitches, causing the outline to be off. Consider using additional stabilizers or adjusting the tension to accommodate the fabric type.
If you wonder, “Why does my embroidery look bad?” or “Why is my embroidery outline off,” carefully assess these potential issues to identify and address the specific challenges affecting your embroidery projects.
By addressing these factors, you can enhance your embroidery work’s precision and overall quality.
How To Fix Outline Embroidery?
Achieving a flawless embroidery outline is crucial for a professional and polished finished product. If you’re facing issues with misaligned or imperfect outlines, you can employ several straightforward methods to address and fix the problem.
Re-Hoop Your Fabric
Adjusting the hoop placement is often a quick and effective solution. Ensure the fabric is hooped evenly and securely.
If the design is consistently off in a particular direction, repositioning the fabric within the hoop may correct the alignment.
Check and Adjust Tension Settings
Uneven tension in your machine can lead to stitch appearance and misalignment variations. Regularly inspect and adjust the thread tension according to your machine’s specifications. Balanced tension ensures a more accurate and clean embroidery outline.
Use the Right Stabilizer
Choosing the correct stabilizer for your fabric is essential. The stabilizer provides support during the embroidery process, preventing distortion.
Experiment with different stabilizer types and weights to find the one that best suits the fabric and design you’re working with.
Inspect and Change Needles
A damaged or dull needle can cause stitching issues and impact the embroidery outline. Check the needle regularly and replace it if there are any signs of wear. Using the appropriate needle for your fabric type also contributes to cleaner outlines.
Verify Design Placement in Software
Before stitching, double-check the design placement within your embroidery software. Ensure that the design is centered and aligned correctly. Making adjustments in the software can prevent misalignment issues during the stitching process.
Consider Redigitizing the Design
If the outline issues persist, reevaluate the digitized design file. Inconsistent stitch density, poorly defined outlines, or other digitizing errors may contribute to the problem. Redigitize or make necessary modifications to improve the overall design quality.
Experiment with Machine Speed
Adjusting your embroidery machine’s speed can impact the stitching’s precision. Slower speeds may provide more control, especially when dealing with intricate outlines. Experiment with different speeds to find the optimal setting for your specific design.
Troubleshooting and fixing embroidery outline issues involve a combination of adjusting machine settings, using the right materials, and ensuring a well-prepared design.
By implementing these simple methods, you can enhance your embroidered outlines’ accuracy and visual appeal.
Trendy Outline Embroidery Designs
Embrace the latest trends in the world of embroidery with these seven trendy outline embroidery designs that effortlessly combine style and simplicity.
These designs showcase the beauty of embroidery design outlines and provide a contemporary touch to your creations.
Minimalist Floral Borders
Embodying the essence of simplicity and elegance, these outline embroidery designs feature delicate floral borders. Perfect for various projects, these minimalist florals add a touch of sophistication to any fabric, making them an ideal choice for modern fashion statements.
Geometric Precision Patterns
Incorporate a modern flair into your embroidery projects with geometric precision patterns. Clean lines and sharp angles create visually appealing designs that are versatile and perfect for adding a contemporary touch to accessories, home decor, or even apparel.
Whimsical Animal Outlines
Bring charm to your embroidery with whimsical animal outlines. These playful designs capture the essence of beloved creatures in a simplified, stylish manner. Ideal for children’s clothing or quirky accessories, these designs add a touch of whimsy to any project.
Abstract Nature Silhouettes
Explore the beauty of nature through abstract silhouettes. These outline embroidery designs portray trees, mountains, or landscapes in a minimalist style, creating a captivating blend of simplicity and artistic expression. Perfect for nature-inspired fashion or decor.
Modern Typography Borders
Elevate your embroidery with modern typography borders. Clean and sleek outlines featuring stylish fonts add a contemporary edge to monogramming or embellishing accessories. These designs offer a personalized and on-trend touch to your creations.
Fashionable Abstract Art Lines
Stay on trend with abstract art-inspired lines that create a fusion of sophistication and artistic expression. These outline embroidery designs play with abstract shapes and lines, providing a fashionable and unique aesthetic to enhance any textile project.
Botanical Sketches
Capture the essence of botanical beauty with intricate outline sketches. These designs feature detailed outlines of leaves, branches, or flowers, creating a delicate and organic feel. Perfect for bohemian-inspired fashion or adding a touch of nature to your home decor.
Incorporating these outlined simple embroidery designs into your projects allows you to stay at the forefront of embroidery trends while embracing the beauty of clean lines and stylish simplicity.
Explore the versatility of these designs to add a contemporary and fashionable twist to your embroidery creations.
FAQs
Does the choice of stabilizer affect the embroidery outline?
Yes, the stabilizer is crucial. Using the wrong type or none at all can lead to fabric distortion. Select an appropriate stabilizer based on the fabric and design complexity to enhance the stability and alignment of the embroidery outline.
Can needle issues contribute to an off-embroidery outline?
Absolutely. A damaged or dull needle can impact stitching. Regularly change needles, ensuring they are suitable for the fabric. Using a sharp needle enhances precision, creating a cleaner and more aligned embroidery outline.
How does fabric distortion affect embroidery outlines?
Fabric distortion, common with stretchy or delicate fabrics, can lead to misaligned outlines. Additional stabilizers or tension adjustments can help counteract distortion, ensuring a more accurate and aesthetically pleasing embroidery outcome.
Is machine calibration essential to prevent an off-embroidery outline?
Yes, machine calibration is crucial. A misaligned or poorly calibrated machine can result in design placement errors. Regularly check and calibrate your embroidery machine according to the manufacturer’s guidelines to ensure accurate and aligned stitching.
Can experimenting with machine speed improve the embroidery outline?
Yes, adjusting machine speed can impact the precision of stitching. Slower speeds provide more control, especially for intricate designs.
Experiment with different speeds to find the optimal setting for your specific design, contributing to a more accurate and aligned embroidery outline.
Conclusion
In the intricate world of embroidery, the quest for perfection is perpetual. As we conclude our exploration into the question, “Why is my embroidery outline off?” it becomes clear that precision in stitching requires a meticulous consideration of numerous factors.
Whether adjusting tension settings, re-hooping fabric, or fine-tuning digitized designs, the key lies in a systematic approach to troubleshooting.
By acknowledging the interconnected nature of embroidery variables, crafters can overcome the challenges posed by misaligned outlines and elevate their projects to new levels of artistry.
As we navigate the intricacies of this creative pursuit, mastering the art of precise outlines becomes not just a skill but a testament to the dedication and passion that define the world of embroidery.
Leave a Reply