Displaying an embroidery frame is a gratifying endeavor that transforms your meticulously crafted needlework into a captivating piece of art.
The method you choose for presenting your embroidery frame reflects your style and the ambiance you seek to create.
Whether you opt for the timeless elegance of a photo frame, the contemporary flair of a canvas wrap, the charming simplicity of a hoop, or the structured appeal of mounting on a board, each approach adds a unique touch to your living space.
In this guide, we’ll explore step by step how to effectively showcase your embroidered masterpiece, turning it into a focal point that captures both attention and admiration.
How Do You Display an Embroidery Frame?
Displaying an embroidery frame is a creative and personalized way to showcase your artistic work. Here’s a concise guide on how to effectively display an embroidery frame:
Prepare the Embroidery
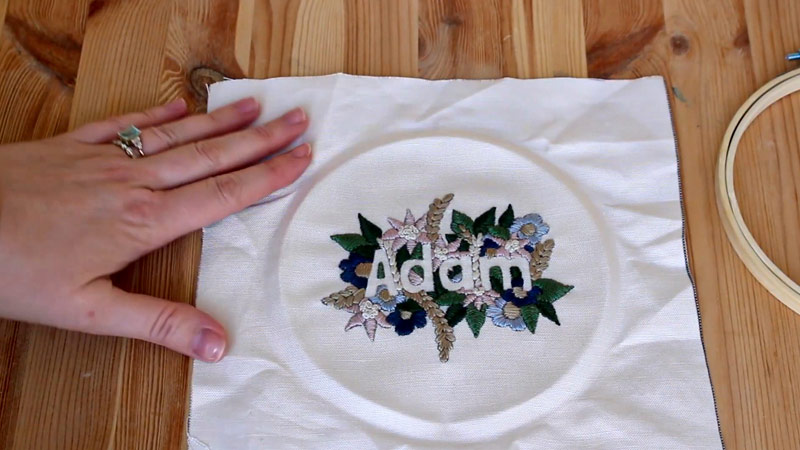
Ensure your finished embroidery piece is clean and free from wrinkles. If needed, gently iron the fabric on a low setting to remove any creases, allowing your work to be presented at its best.
Choose Your Display Method
Decide on the display method that best suits your style and the aesthetic you want to achieve. Options include framing in a photo frame, wrapping around a canvas, displaying in a hoop, or mounting on a board.
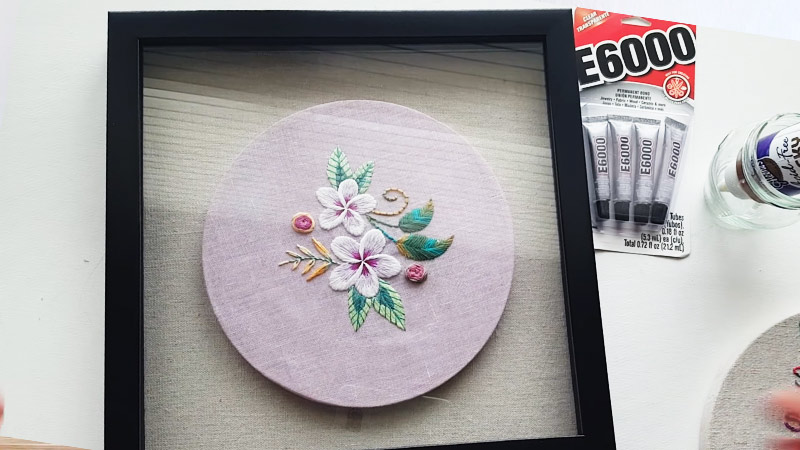
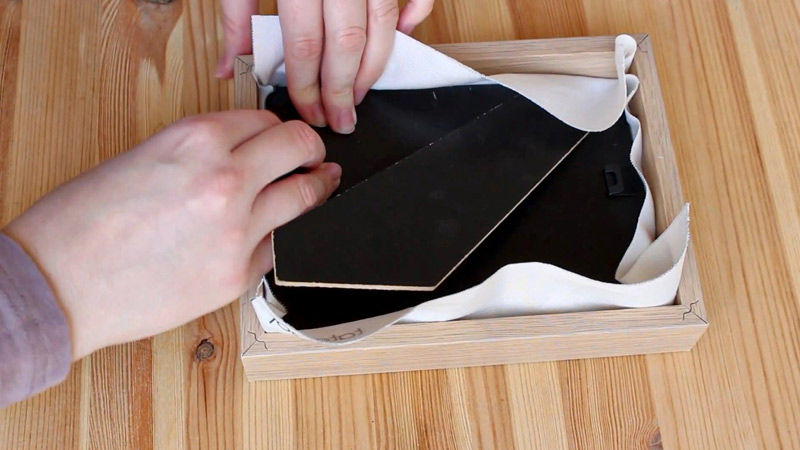
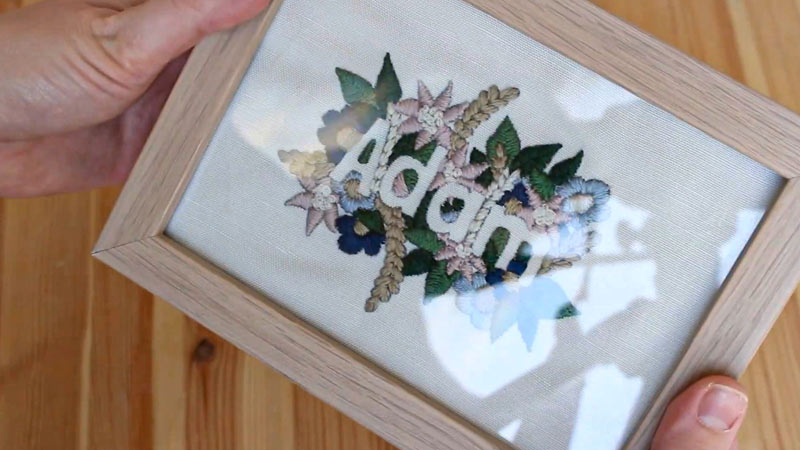
Framing in a Photo Frame
Disassemble the photo frame, position your embroidery on the backing board, and secure it. Reassemble the frame, ensuring the embroidery is centered and taut within the frame for a classic presentation.
Wrapping Around a Canvas
Stretch the embroidery fabric around a canvas frame, securing it to the back with a staple gun or adhesive. Trim any excess fabric for a neat finish, turning your embroidery into a stylish piece of wall art.
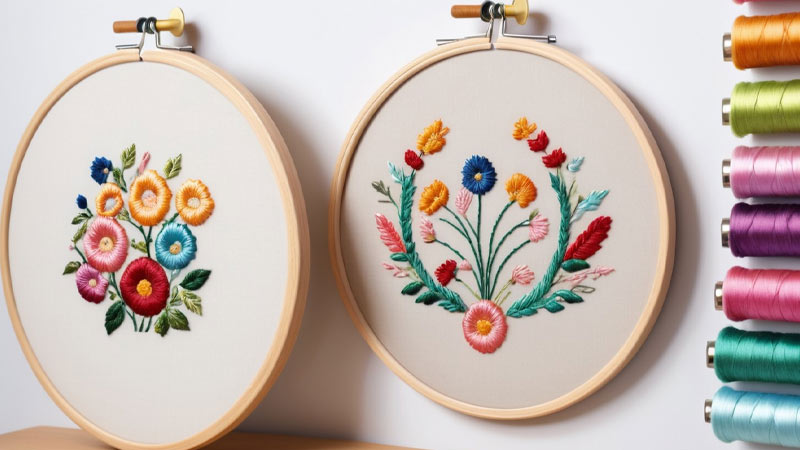
Framing in the Hoop
If you used an embroidery hoop during stitching, consider displaying the finished piece in the hoop. Ensure the fabric is taut within the hoop, trim any excess fabric, and add decorative elements like a ribbon for a charming, crafty display.
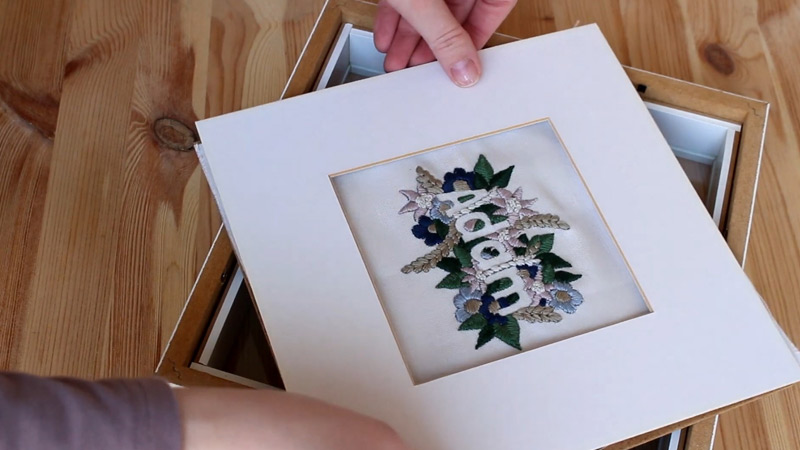
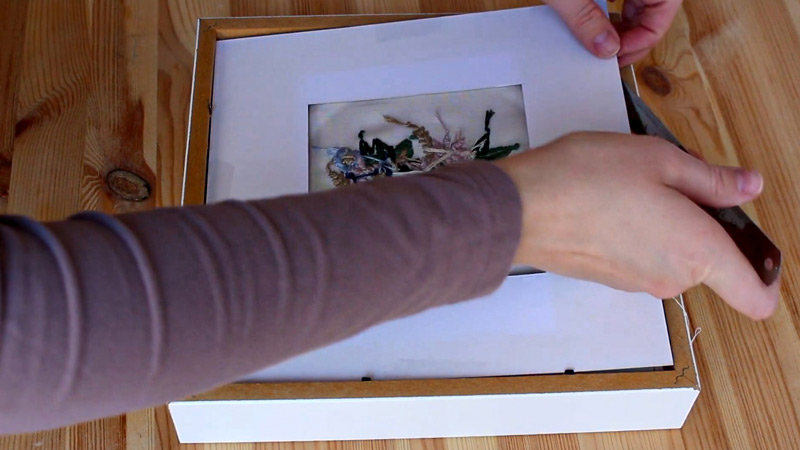
Mounting on a Board
Follow a guide or instructions for professionally mounting your embroidery on a board. Attach the embroidery securely to the board using a staple gun or adhesive, providing a clean and structured presentation.
Adding a Backing Fabric (Optional)
For an extra touch of sophistication, cut a piece of backing fabric to size and secure it to the back of the frame or board. This optional step provides a polished and finished appearance.
Final Touches
Ensure the embroidery is securely fastened and centered within the chosen display method. Add any desired decorative elements or embellishments to enhance the overall presentation and complement the design.
Choose a Display Location
Select a suitable location that complements the room’s overall decor and ensures your embroidery is easily visible. Consider factors such as lighting and visibility for an optimal display.
Admire Your Finished Display
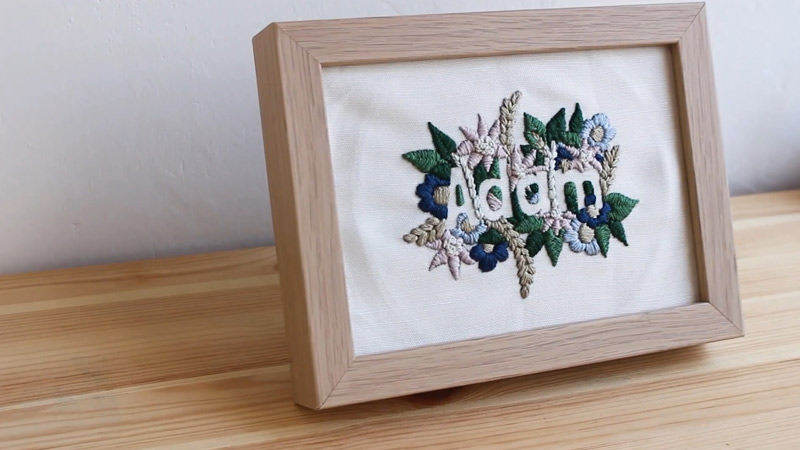
Step back and appreciate the beauty of your displayed embroidery frame. Take a moment to enjoy the intricate details and the personal touch it adds to your living space. Your completed display is a testament to your creativity and craftsmanship.
What Are Some Creative Ways to Display Embroidery Frames? Top 20 Techniques
Displaying embroidery frames creatively can enhance the visual impact of your handcrafted pieces.
Here are some creative ways to showcase your embroidery frames:
1. Gallery Wall
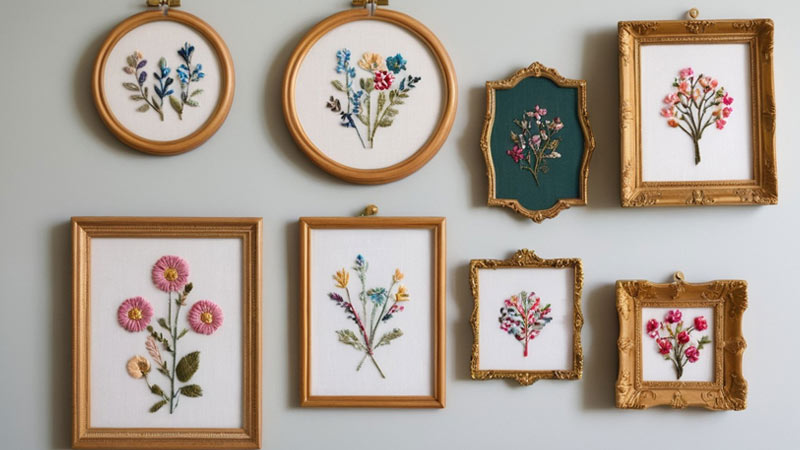
Create a gallery wall by grouping multiple embroidery frames of different sizes and designs. Mix in other artwork or framed photographs for a diverse and visually interesting display.
2. Floating Shelves
Install floating shelves and arrange embroidery frames along with other decorative items. This allows for an ever-changing and dynamic display that can be easily updated.
3. Shadow Boxes
Use shadow boxes to display embroidery along with 3D elements or small objects related to the design. This creates depth and adds an interactive aspect to the display.
4. Vintage Window Frames
Hang embroidery frames from vintage window frames for a shabby-chic or rustic look. This creates a charming and unique display reminiscent of a bygone era.
5. Clothesline Display
String a thin wire or twine across a wall and use clothespins to hang embroidery frames. This method provides a casual and playful display for a craft room or creative space.
6. Magnetic Display
Attach small magnets to the back of embroidery hoops and display them on a magnetic board or a metal surface. This allows for easy rearrangement and adds a modern touch.
7. Vintage Ladder Display
Learn a vintage ladder against the wall and hang embroidery frames from the rungs. This unconventional display adds character and a touch of nostalgia to your space.
8. Inside an Open Frame
Use an empty or open frame as a decorative border around your embroidery. This framing method adds a focal point without completely covering the embroidered design.
9. Seasonal Displays
Change your embroidery displays according to seasons or holidays. For example, showcase spring-themed embroideries during the warmer months and switch to winter-themed ones for the colder season.
10. Inside a Wreath
Incorporate your embroidery frames into a decorative wreath. Arrange the frames in a circular pattern, adding a unique and charming touch to your wall.
11. Cabinet Display
Display embroidery frames inside a glass-fronted cabinet or hutch. This protects them from dust while allowing you to showcase your collection in a controlled environment.
12. Grid Pattern
Arrange multiple identical or coordinating embroidery frames in a grid pattern on the wall. This organized display works well for a modern and clean aesthetic.
13. Incorporate Mirrors
Hang embroidery frames around mirrors to create a reflective display. This can make your space feel larger and add an artistic element to the room.
14. Custom Embroidery Rack
Create a custom rack or hanger specifically designed to display embroidery frames. This could involve a hanging rod or a purpose-built wooden structure that showcases your pieces elegantly.
15. Repurposed Window Shutters
Mount embroidery frames on repurposed window shutters for a unique and rustic display. The slats of the shutters add an exciting backdrop, creating a visually appealing arrangement.
16. Hanging Flower Pots
Attach embroidery frames to the wall and place small potted plants or flowers within them. This juxtaposition of nature and craftsmanship adds a refreshing and lively atmosphere to your space.
17. Quilted Display
Arrange several embroidery frames on a wall to create the illusion of a quilt. Vary the colors and designs to mimic the patchwork of a quilt, offering a cozy and comforting display.
18. Washi Tape Frames
Use colorful washi tape to create frames directly on the wall around your embroidery pieces. This method is perfect for a temporary or customizable display, allowing you to experiment with different layouts.
19. Tiered Shelving
Install tiered shelving units on the wall and place embroidery frames on different levels. This adds depth and dimension to the display, creating a visually interesting focal point.
20. Hanging Mobile with Embroidery Hoops
Suspend embroidery hoops from a ceiling-mounted mobile. This dynamic and whimsical display adds movement and can be particularly enchanting in a craft room or creative studio.
What Are Some Common Mistakes to Avoid When Displaying Embroidery Frames

When displaying embroidery frames, avoiding inevitable common mistakes is essential to ensure that your beautiful handiwork is showcased effectively.
Here are some pitfalls to steer clear of:
Direct Sunlight
Avoid placing your embroidery frames in direct sunlight for prolonged periods. Sun exposure can cause fading and damage to the fabric and thread over time. Choose a location that receives indirect or diffused light to preserve the vibrant colors.
Humidity and Moisture
Displaying embroidery in areas prone to high humidity, like bathrooms or near kitchen sinks, can lead to mold or mildew growth on the fabric. Choose a dry and well-ventilated location to protect your embroidery from potential damage.
Overcrowding
Resist the temptation to overcrowd the display area with too many embroidery frames. Giving each piece enough space allows for better appreciation and prevents a cluttered and chaotic appearance.
Improper Cleaning
Be cautious when cleaning your embroidery frames. Avoid harsh chemicals or abrasive materials, as they can damage the delicate fabric and threads. Dust the frames gently or use a soft brush to maintain their cleanliness.
Inadequate Mounting
If using a mounting board or canvas, ensure it is sturdy and adequately supports the embroidery. Inadequate mounting may lead to sagging or warping over time, affecting the overall appearance of your display.
Ignoring Framing Quality
When using traditional frames, choose high-quality frames that complement your embroidery. Low-quality frames may detract from the visual appeal of your work. Ensure the frame materials and colors enhance the embroidery rather than competing with it.
Mismatched Décor
Consider the overall décor of the room when choosing a display location. Mismatched styles or colors can make the display seem out of place. Aim for a cohesive look that integrates well with the existing interior design.
Lack of Lighting Consideration
Inadequate lighting can diminish the impact of your embroidery. Ensure there is sufficient ambient or accent lighting to highlight the details. Avoid harsh or overly dim lighting that may obscure the intricacies of your work.
Neglecting Rotation
If you have a collection of embroidery frames, consider rotating them periodically. Neglecting rotation can result in uneven wear and fading, especially if some pieces are exposed to light more frequently than others.
Ignoring Safety Measures
If you use hooks or brackets to hang your embroidery frames, ensure they are securely anchored to the wall. Neglecting proper installation can lead to accidents, potentially damaging the embroidery and the wall.
FAQs
What materials do I need to display an embroidery frame?
Materials needed to display an embroidery frame include the finished piece, frame or canvas, adhesive or staple gun, scissors, and optional backing fabric or decorative elements.
Can I use a regular frame for my embroidery project?
Yes, you can use a regular frame for your embroidery project. Ensure it fits the dimensions, disassemble for fitting, and secure the fabric for a polished display.
Is there a dynamic way to display multiple embroidery frames?
Create a mobile by suspending embroidery hoops from the ceiling. This dynamic and whimsical display adds movement and interest, perfect for a creative studio or craft room.
How to display embroidery frames without a frame?
Utilize embroidery hoops, shadow boxes, or floating shelves for a frameless display. Arrange them in clusters, use decorative pins, or suspend them for an artistic and distinctive presentation.
What is the process for displaying an embroidery frame in a shadowbox-style frame?
Secure your embroidery on the backing for a shadowbox-style display, place it in the shadowbox frame, and seal it to create a three-dimensional, visually appealing presentation.
To Recap
Displaying an embroidery frame is an artful expression that goes beyond mere presentation – it’s a celebration of creativity and craftsmanship.
Each carefully chosen method, from framing in a photo frame to mounting on a board, adds a distinctive character to your space.
As you step back to admire the finished display, you witness the intricate details of your embroidery and the personal touch it imparts to your surroundings.
The culmination of these steps transforms your work into a focal point that enriches your living environment and serves as a testament to the artistry and dedication embedded in every stitch.
Leave a Reply