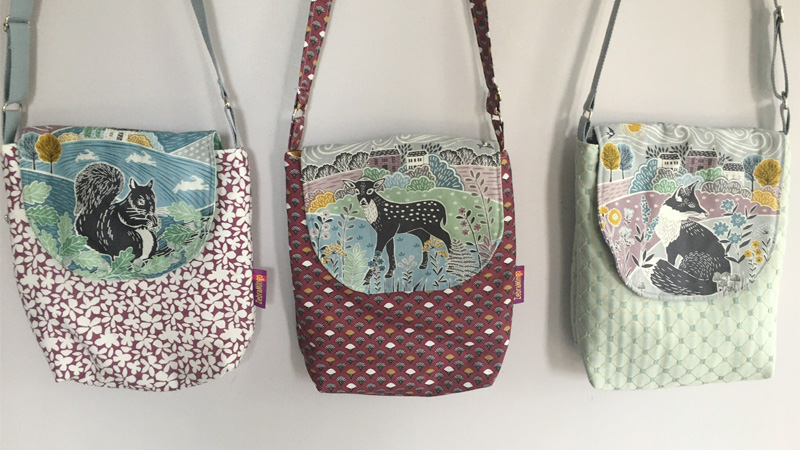
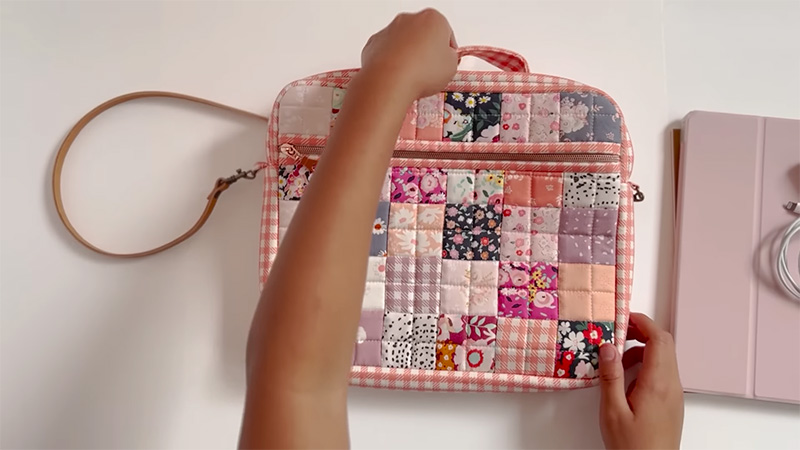
Creating a messenger bag adorned with mosaic tiles is a captivating fusion of artistry and practicality, allowing you to carry your unique style wherever you go.
In this comprehensive guide, we will embark on a creative journey that transforms a simple messenger bag into a stunning work of functional art. The intricate steps detailed here will empower you to design, assemble, and embellish your very own mosaic tile messenger bag, replete with colors, patterns, and textures that reflect your individuality.
With a careful selection of materials, precise craftsmanship, and a dash of creativity, you can fashion an accessory that not only showcases your personality but also serves as a functional and eye-catching addition to your daily life.
How to Make a Messenger Bag With Mosaic Tiles?
Creating a messenger bag adorned with mosaic tiles is a captivating and artistic endeavor that seamlessly merges functionality with imaginative expression.
This guide will take you through the step-by-step process of crafting your very own mosaic tile messenger bag, a unique accessory that reflects your creativity and style.
Materials You’ll Need
- Messenger Bag Base
- Mosaic Tiles
- Mosaic Adhesive
- Grout
- Fabric for Lining
- Sewing Machine
- Scissors, Measuring Tape, and Pins
- Grout Sealer
Step-by-Step Guide:
Step 1: Design Your Mosaic Pattern
In the artistic journey of creating a mosaic tile messenger bag, the first step is to design your mosaic pattern. This initial stage sets the tone for your unique creation, inspiring creativity and imagination.
Gather Inspiration
Begin by collecting images, color swatches, and ideas that inspire your mosaic design. This will serve as the foundation for your artistic vision.
Sketch Your Design
Translate your inspiration into a concrete design by sketching it on paper. Consider the size and shape of the messenger bag, and determine where the mosaic tiles will be placed.
Play around with colors, shapes, and arrangements until you are satisfied with the design.
Step 2: Prepare the Messenger Bag Base
As you embark on the creative process of crafting a mosaic tile messenger bag, the second step involves preparing the messenger bag base. Whether custom-made or store-bought, this pivotal phase forms the canvas upon which your artistic vision will come to life.
Acquire or Make the Base
Either acquire a ready-made messenger bag or create one from your chosen fabric. Ensure that the fabric is robust enough to support the mosaic tiles.
Cut and Sew the Base
Cut the fabric pieces for the messenger bag base according to your design, allowing for seam allowances. Utilize your sewing machine to stitch these base pieces together, leaving the top open.
This creates the fundamental structure of your messenger bag.
Step 3: Apply the Mosaic Tiles
With your messenger bag’s foundation in place, the journey of artistic expression continues in the third step: applying the mosaic tiles. This phase transforms your canvas into a vibrant masterpiece, allowing your unique design to flourish.
Lay Out Your Bag
Place your messenger bag flat with the fabric side facing up. This will serve as the canvas for your mosaic tiles.
Apply Mosaic Adhesive
Using a palette knife or adhesive spreader, apply a layer of mosaic adhesive to the areas of the bag where you intend to attach the tiles. Ensure an even and generous application.
Arrange the Tiles
Start placing the mosaic tiles on the adhesive based on your design. Gently press each tile onto the adhesive, ensuring they are evenly spaced and aligned.
Take your time to create a visually appealing pattern.
Adjust as Needed
If necessary, trim or cut mosaic tiles to fit the edges or specific shapes within your design. Utilize tile nippers or a glass cutter for precision.
Dry and Cure
Allow the adhesive to dry completely, following the manufacturer’s instructions. Typically, this process takes 24-48 hours.
Step 4: Grout and Finish
As your mosaic masterpiece takes shape, the fourth step, grouting and finishing, adds the final touches of durability and cohesion. This stage ensures that your mosaic tiles seamlessly blend into a unified work of art on your messenger bag.
Mix the Grout
Prepare the grout as per the manufacturer’s instructions, achieving a paste-like consistency.
Fill the Gaps
Use a grout float or your fingers to apply the grout and fill the gaps between the mosaic tiles. Press the grout firmly into the spaces without disturbing the tile placement.
Clean Excess Grout
After approximately 15-30 minutes (adjust based on the grout manufacturer’s recommendations), gently wipe off excess grout from the tile surfaces using a damp sponge or cloth.
Avoid removing grout from between the tiles.
Allow Grout to Cure
Let the grout cure for the recommended duration, typically 24-48 hours. Refrain from touching or disturbing the grouted surface during this period.
Seal the Grouted Surface
Safeguard your mosaic by applying grout sealer following the manufacturer’s guidelines. Ensure even coverage for maximum durability.
Step 5: Assemble and Enjoy Your Bag
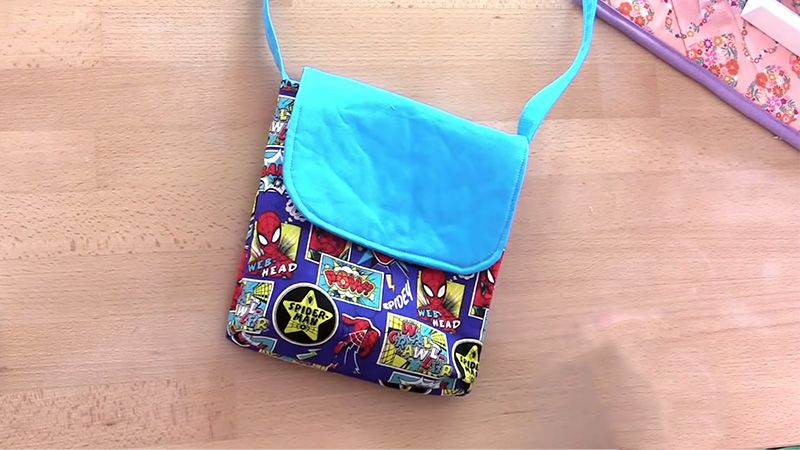
The culmination of your artistic journey in creating a mosaic tile messenger bag arrives in the fifth step: assembling and enjoying your bag. This phase adds functionality to your masterpiece, allowing you to proudly showcase and utilize your unique creation.
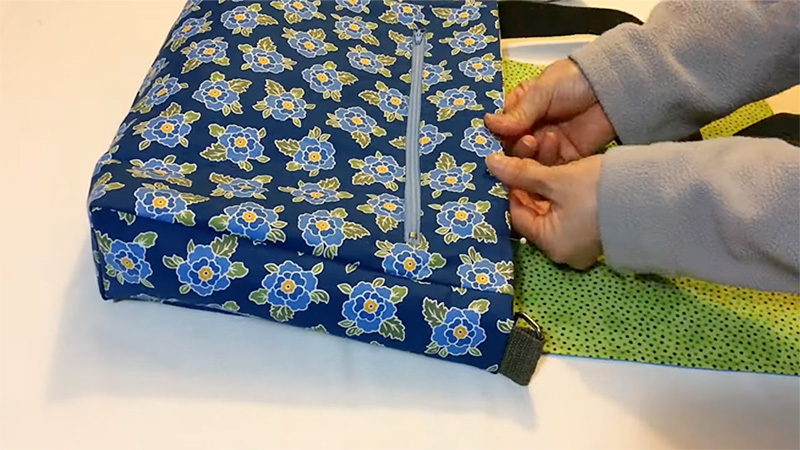
Create a Bag Lining
Measure and cut fabric for the bag’s lining according to the bag’s dimensions. Sew the lining, leaving an opening for turning it right side out. Turn the lining right side out and stitch the opening closed.
Attach the Lining
Position the lining inside the mosaic bag, aligning the top edges. Secure the lining to the bag along the top edge with pins. Topstitch the lining to the bag along the top edge, ensuring it stays in place.
Add Straps and Hardware
Attach any necessary straps, buttons, or hardware to complete your mosaic tile messenger bag.
Test Functionality
Verify that all components, including closures and straps, operate smoothly.
Final Touches
Examine your mosaic tile messenger bag for any lingering grout residue or imperfections, and clean as necessary.
Tips for Making a Beautiful Messenger Bag With Mosaic Tiles
Creating a beautiful messenger bag adorned with mosaic tiles is a delightful and artistic endeavor. To ensure a stunning outcome, consider these valuable tips:
Design Your Mosaic Pattern
Before you dive into the mosaic work, start with careful planning. Sketch your mosaic design on paper, considering color combinations, tile placement, and overall aesthetics.
A well-conceived design serves as the blueprint for your bag’s beauty.
Choose High-quality Mosaic Tiles
The foundation of a stunning mosaic bag lies in the quality of your tiles. Opt for tiles that are uniform in size and thickness. Quality tiles not only ensure a polished appearance but also simplify the application process.
Select the Right Adhesive
Select a mosaic adhesive tailored to your tile material (e.g., glass, ceramic) and the bag’s surface. A strong adhesive is the key to securely bonding the tiles to the bag, ensuring durability and longevity.
Work in Small Sections
Applying adhesive and tiles in small, manageable sections is a smart approach. This prevents the adhesive from drying too quickly, giving you precise control over tile placement.
It also helps maintain an organized workflow.
Maintain Even Tile Spacing
Achieving balanced and visually pleasing tile spacing is crucial. Use tile spacers to ensure uniform gaps between tiles. Even spacing adds to the overall harmony and aesthetic appeal of your mosaic design.
Cut Tiles With Precision
If you need to trim or cut tiles to fit specific edges or shapes, do so meticulously with tile nippers or a glass cutter. Precision in tile cutting ensures a seamless look in your mosaic.
Clean Tile Surfaces Promptly
As you work, wipe off excess adhesive from the tile surfaces promptly with a damp cloth or sponge. This practice maintains the tiles’ appearance and makes the final cleanup easier.
Allow Adequate Adhesive Drying Time
Patience is crucial. Ensure that the adhesive dries completely before moving on to the grouting step. Following the recommended drying time provided by the adhesive manufacturer is essential for a strong bond.
Grout Carefully
Mix the grout to the right consistency—neither too runny nor too dry. When filling the gaps between the tiles, press the grout firmly into place. Paying attention to grouting details ensures a clean and polished finish.
Clean Grout Residue Immediately
During grouting, frequently clean excess grout from the tile surfaces using a damp sponge. This ongoing cleaning minimizes the effort required for the final cleanup and enhances the tiles’ appearance.
Seal the Grout for Durability
Apply a grout sealer to protect both the grout lines and the tiles. This step helps prevent staining and maintains the durability of your mosaic masterpiece.
Preserve Bag Functionality
Ensure that the bag remains functional after adding mosaic tiles. Check that straps, zippers, and closures operate smoothly without any interference from the mosaic.
Review and Adjust Alignment
Before the grout sets completely, review your mosaic for proper tile alignment. Make any necessary adjustments to achieve the desired look.
Embrace the Creative Process
Lastly, remember that mosaic work is an artistic journey. Enjoy each step, savor the creative process, and take your time crafting a beautiful messenger bag that reflects your unique style and vision.
FAQs
Can I use any type of fabric for the messenger bag base?
While you have some flexibility, choose a sturdy fabric like canvas or denim to support the mosaic tiles.
What kind of mosaic tiles should I use?
You can use glass, ceramic, or other materials based on your design preference.
How do I choose the right adhesive for the tiles?
Select an adhesive suitable for your tile material and the bag’s surface. Refer to the manufacturer’s recommendations.
What if I make a mistake while placing the tiles?
If needed, carefully remove tiles while the adhesive is still wet and reposition them.
How do I clean grout residue from the mosaic tiles?
During grouting, clean excess grout with a damp sponge or cloth. For stubborn residue, use a tile and grout cleaner.
To Recap
Crafting a mosaic tile messenger bag is a labor of love, a blend of craftsmanship and artistic expression that results in a unique accessory. Through meticulous design, careful tile selection, and expert application, you’ve transformed a simple bag into a work of functional art.
As you’ve discovered, the creative process is not just about the finished product; it’s also about the journey, the satisfaction of bringing your vision to life, and the pride in carrying an accessory that truly reflects your style and personality.
Whether you’re keeping it for yourself or gifting it to a friend, your mosaic tile messenger bag is a testament to your creativity and dedication. Now, carry it with pride and let it inspire others to embark on their own artistic journeys.
Leave a Reply