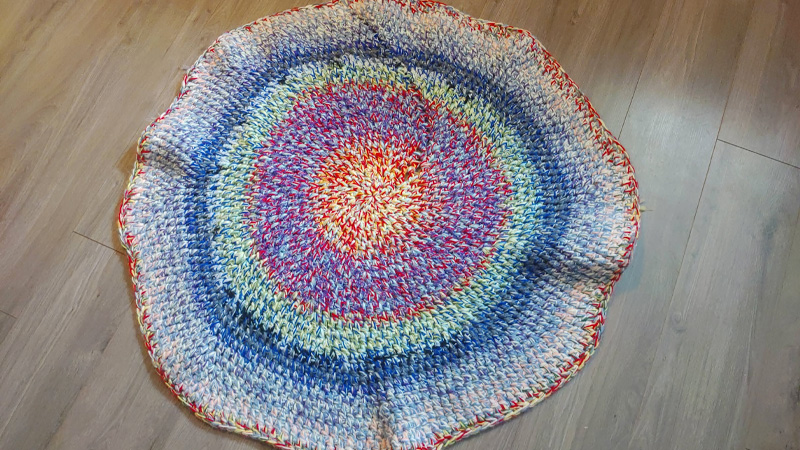
Once you have mastered the basics of sewing, it’s time to play with creativity. A yarn rug can be the very first thing to try. But do you know how to make a rug with yarn?
Don’t worry! We have been here with useful sewing tips and we’ll cover this one too. Today, let’s learn how to create a yarn rug with our step-by-step guide.
It’s time to put your sewing skills into effect!
What Do I Need to Make A Rug with Yarn?
You will need a few elements to start making a beautiful rug. Collect the few materials mentioned here,
1) Yarn: The first thing you need is a suitable yarn. Select the ideal color you prefer in color & texture.
It’s important to note, the amount of yarn you need depends on the size and density of the rug.
You can start with bulky or super bulky yarn for rugs. It delivers a thick and plush appearance. Light yarns won’t do the trick!
2) Rug Canvas: VVI! It’s the foundation of your rug. Generally made from jute or cotton, it is available in different sizes. First, determine the size of the rug, you want to make and go for the same size of the rug.
3) Hooks: You need a latch hook or rug hooking tool for pulling the yarn through the canvas. Hooks are available both in wooden and plastic.
The wooden hooks can be more sturdy and long-lasting. But beginners can start with plastic hooks.
4) Scissors: Select a high-quality scissors. You will need it to cut the yarn and trim the rug.
5) Needle: You can’t sew the rug with regular needles. You need darn needles that are bigger and have dull edges and wide eyes.
6) Rug Backing: To finish your rug and secure the yarn, you’ll need rug backing material, such as latex backing or a rug gripper, glue stick, glue gun, or rug pad.
The components will help you secure a non-slip rug. However, it’s optional but allows you to be one step ahead to ensure the quality of the rug.
7) Marker or Chalk: Every rug canvas has the grids. However, beginners can use chalk or markers to ensure the size and patterns to outline the rug. Markers/ chalks are especially applicable to circular, or triangular rugs.
8) Rug Pattern (If necessary): You can create your design or, buy a rug pattern. Plenty of pre-built rug patterns are available in the market.
Gather the elements we mentioned here and now, we can start to work on creating the rug!
How to Make a Rug with Yarn?
Follow the steps with us to find out how you can make a beautiful yarn rug. The process may seem long at first but we have made it simpler for you.
Step 1: Prepare Your Work Space
Set up a comfortable and well-lit workspace. You can select a clean table or workbench to use as a flat surface. Collect all the materials beforehand to have a break-free work time.
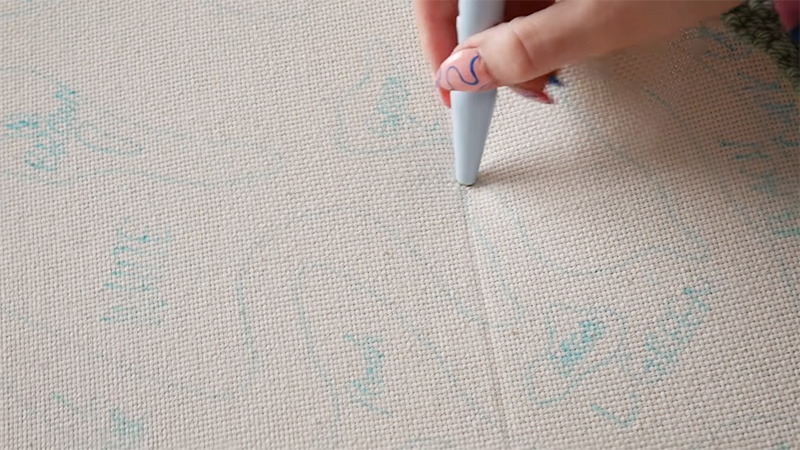
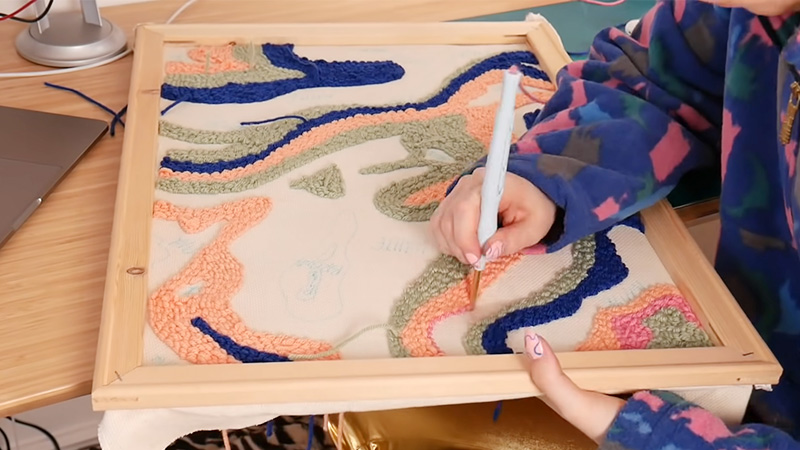
Step 2: Outline the Design
Before you mark the design, ensure that it also vibes the same with your interior style.
Take your marker/ chalk and start outlining the future rug. Any design you prefer, draw it on the rug canvas. It will also serve as your guide for hooking the yarn.
You can also use rug patterns to add variations to your rug. However, don’t forget to use paper underneath your marker. It will prevent ink from reaching the surface.
Step 3: Manage the Yarn

Now, you need to work with the yarn. Cut the yarn into even lengths, typically 3 to 4 inches long. Organize the yarn by color and keep them nearby. You have to use the yarn strips to create the rug’s pile.
Step 4: Start Hooking
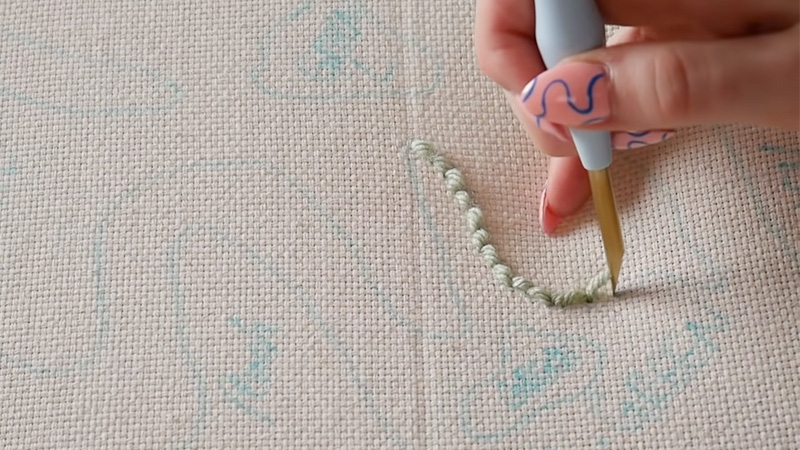
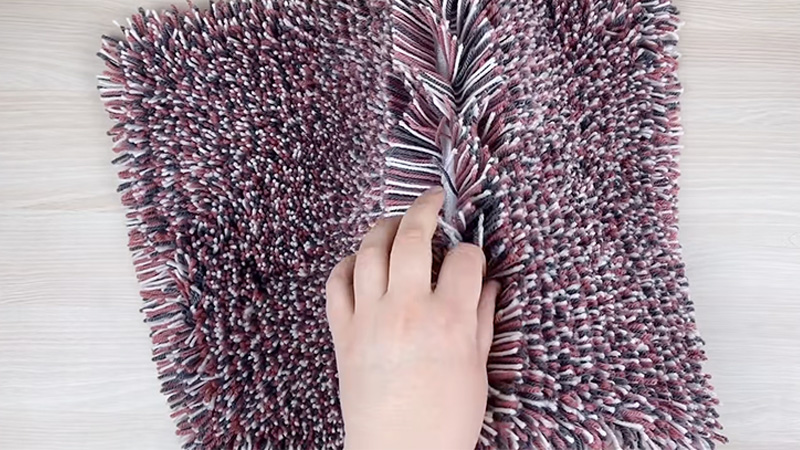
Start with the basic latch hooking technique. Start by folding one of the yarn strips in half to create a loop. Place the hook through a hole in the canvas from the front to the back and catch the loop with the hook.
Finally, leave a small tail on the front side by pulling the loop through. Follow your pattern and repeat the process for each square. Continue until you have fully covered the entire canvas.
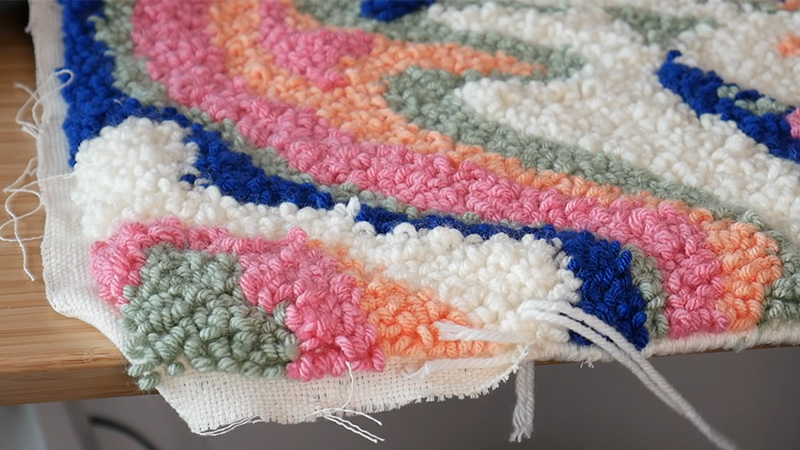
Step 5: Finish Hooking
After you have hooked all the yarn pieces, go over the rug canvas. Go through the loops and check out if any of the loops are loose. Fasten the loose loops and trim any excess yarn tails from the front side.
Step 6: Make it Non-Slip(Optional)
To increase the rug’s stability and durability, apply a rug backing material. It will also prevent the yarn from unraveling. You can use any of the rug backing agents mentioned above, or brush your rug with a rug backing solution.
Step 7: Finish Your Work
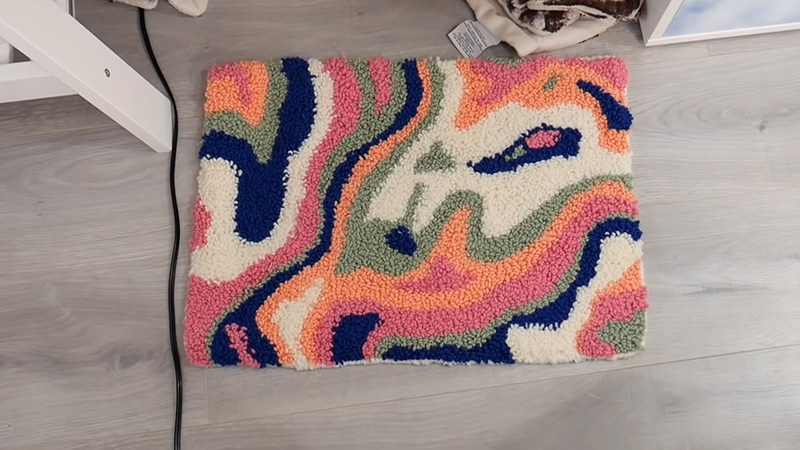
It’s time to show off! In case you have applied any rug backing, leave it for a while to dry. Once it has all dried up, trim any excess backing material and yarn tails. Enjoy a clean and neat look.
Types of Yarns to Use for A Rug
You can generally use any ideal bulky yarn to make a rug. Rug yarns should be thick and resilient. Types of rugs available in the market are,
- Wool Yarn
- Acrylic Yarn
- Cotton Yarn
- Nylon Yarn
- Jute Yarn
- Polyester Yarn
- Blend Yarn
How Long Do Yarn Rugs Last?
It mostly depends on the type of yarn you are using to make the rug. Rugs made with woolen yarn are the most durable ones. With proper care, wool rugs can last up to 30 – 50 years. Synthetic rugs, however, won’t last more than 3-5 years.
It also depends on the heavy use of rugs. Harsh and rough uses can reduce the durability and life span of your rug.
Last Words
Congratulations! You have successfully made your first rug with yarn. Don’t feel sad if it’s not perfect yet. The first time is always hard.
We suggest you make at least 2-3 rugs for practice before commercially putting the rugs for a show. It will help you deliver some solid work!
Do you like our article? Did our steps help you make your very first yarn rug? Leave a comment below and let us know.
Also, don’t forget to share our article with people around you who need serious help to make their first yarn rug! Keep an eye on our blog section for more.
Leave a Reply