In the world of crafting and design, precision and customization are paramount. Cricut Design Space offers a powerful tool to achieve just that: the Contour tool.
This versatile feature allows creators to fine-tune their projects by selectively hiding or revealing specific elements within images or text.
Whether you’re a seasoned Cricut enthusiast or a newcomer to the world of digital crafting, mastering the Contour tool can take your creative endeavors to new heights.
This guide will delve into the intricacies of using Contour in Cricut Design Space, offering step-by-step instructions and valuable tips to help you harness its potential and craft stunning, personalized designs with confidence.
What Is the Contour Tool in Cricut Design Space?
The Contour tool in Cricut Design Space is a powerful feature that allows users to refine and customize their designs with precision. It enables you to selectively hide or reveal specific portions of an image or text.
By clicking on individual contour lines, users can choose which elements to display, giving them fine-grained control over their projects.
Additionally, the tool provides the option to “Hide All Contours” for a clean slate, from which users can then selectively reveal parts of their design.
This functionality is invaluable for creating intricate, personalized designs, and it significantly expands the creative possibilities available to Cricut users.
How to Use Contour in Cricut Design Space?
Using contour in Cricut Design Space is a valuable technique that allows you to customize and edit your designs with precision.
Contouring lets you hide or modify specific portions of an image or text, giving you greater control over your projects.
Whether you’re a beginner or an experienced Cricut user, learning how to use contour can enhance your crafting capabilities.
Here’s a step-by-step guide on how to use contour in Cricut Design Space:
Open Cricut Design Space
To get started, launch the Cricut Design Space software on your computer or mobile device.
When you haven’t done so, sign in to your Cricut account. This step is essential for saving and accessing your work across devices, ensuring that your projects are always available when you need them.
Create or Open a Project
Depending on your creative goals, you can either initiate a new project from scratch or open an existing one where you intend to use the contouring feature.
When starting a new project, consider the dimensions, colors, and elements you want to incorporate to guide your design process.
Add an Image or Text
Begin by inserting the image or text you wish to work with onto your design canvas.
You can achieve this by clicking the “Upload” button to incorporate your custom images or by utilizing the Text tool to create personalized text. Take the time to position and size your elements according to your design preferences.
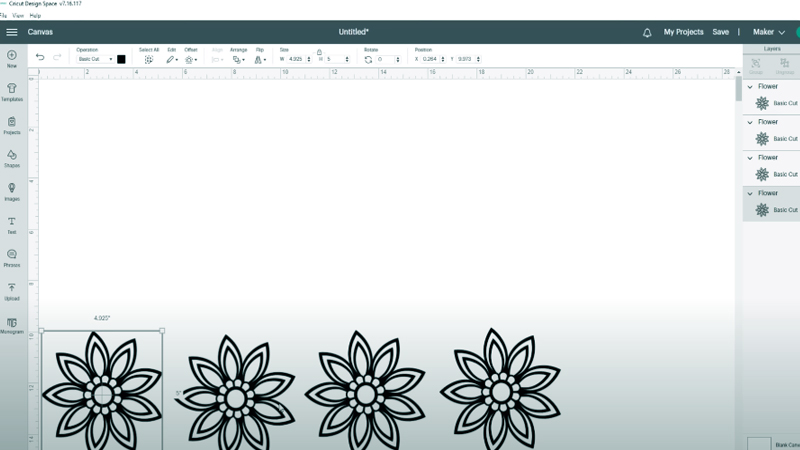
Select the Image or Text
Once you’ve placed your image or text, you’ll notice a bounding box surrounding it. This bounding box indicates that the element is ready for further adjustments and modifications.
Access the Contour Tool
To access the Contour tool, direct your attention to the Layers panel on the right side of the screen. Within this panel, you’ll find the “Contour” button. Click on it to open the Contour panel, which will provide you with a detailed view of your selected image or text.
Contour Your Design
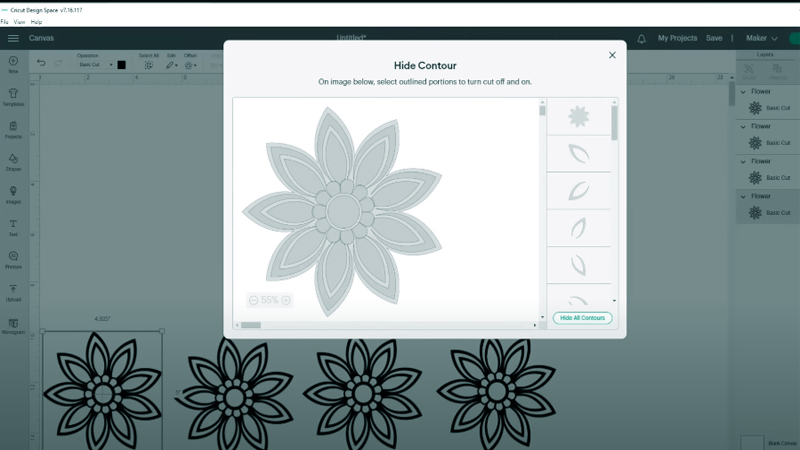
Inside the Contour panel, you’ll see a preview of your chosen element. To hide specific portions, simply click on the individual contour lines representing those areas.
As you do so, the contour lines will darken to indicate that they are now hidden. Alternatively, you can begin with a clean slate by clicking “Hide All Contours” and then selectively revealing the parts you want to keep.
Preview Your Design
After making your contour adjustments, click the “X” button within the Contour panel to close it. This will allow you to review your design on the canvas and ensure it aligns with your creative vision.
Make Additional Edits
At this stage, you have the freedom to continue refining your design. This might involve resizing elements, rotating them, changing colors, or adding further details to enhance the overall composition.
Save or Cut Your Project
Once you are satisfied with your design, consider your next steps. You can choose to save your project for future use, which is particularly useful if you plan to recreate the design or make further modifications in the future.
Alternatively, you can proceed with the cutting process to bring your digital creation to life.
Load Material and Cut
Following the prompts provided within Cricut Design Space, prepare the appropriate material for cutting.
Ensure that your Cricut machine is correctly set up and connected. Initiate the cutting process, and watch as your design is transformed from a digital concept into a tangible, craftable creation.
What Types of Images Can You Use Contour on in Cricut Design Space?
In Cricut Design Space, the Contour tool offers a versatile approach to customizing designs. You can use it on various types of images and text to achieve precise and personalized results.
Here’s a breakdown:
Basic Shapes
The Contour tool in Cricut Design Space can be effectively applied to basic geometric shapes. This feature allows for the creation of customized designs with clean lines and distinct angles.
Whether you’re crafting logos, patterns, or intricate backgrounds, the Contour tool provides the precision needed to achieve your desired results.
Complex Designs
When working with intricate designs composed of multiple elements, the Contour tool simplifies the process.
By allowing you to focus on individual components, it streamlines the customization of complex artwork. This capability is particularly valuable for projects where attention to detail is crucial.
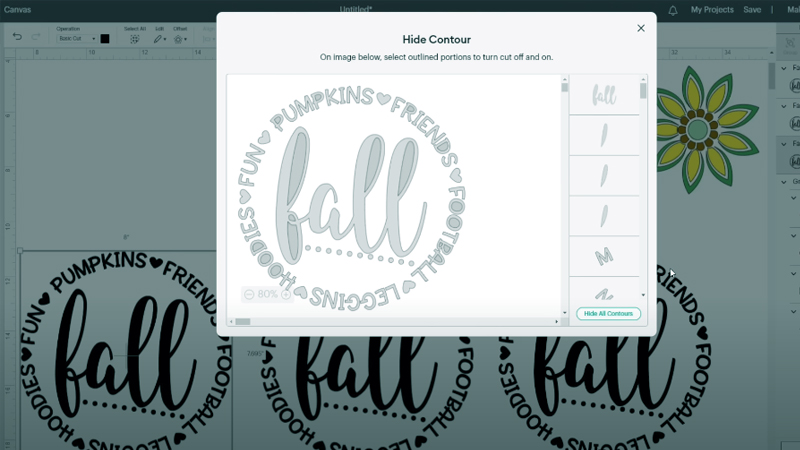
Text and Fonts
Contouring can be skillfully applied to text in Cricut Design Space. This feature empowers you to create unique and stylized fonts, adding a personalized touch to your projects.
It’s an excellent tool for crafting invitations, cards, and any project where custom typography is desired.
Clipart and Graphics
Imported clipart or graphics can also benefit from the Contour tool. It provides the means to fine-tune these images, ensuring they seamlessly integrate into your overall project.
By customizing clipart, you can achieve a cohesive and professional look that aligns perfectly with your creative vision.
Vector Images
Vector images, defined by their use of mathematical paths rather than pixels, are ideal candidates for contouring.
This allows for precise customization without any loss in image quality. Whether it’s resizing, reshaping, or refining, the Contour tool handles vector images with exceptional accuracy.
SVG Files
Scalable Vector Graphics (SVG) files, a popular format for digital graphics, can be contoured within Cricut Design Space.
This capability opens up a world of possibilities for creating intricate and customized designs. The Contour tool enhances your ability to manipulate and refine SVG files to suit your specific creative needs.
Layered Designs
The Contour tool is particularly useful for layered designs. It grants you the ability to refine each layer individually, ensuring they fit together seamlessly to create a cohesive and visually appealing final product.
This feature is invaluable for projects that involve intricate layering and detailing.
Hand-Drawn Images
When you’ve created your own hand-drawn images or designs, the Contour tool can be used to refine and customize them further.
This allows you to give your handmade creations a polished finish, adding a professional touch to your original artwork.
Silhouettes and Outlines
Contouring is effective for manipulating silhouettes or outlines. This tool empowers you to adjust the details and shapes within the outline, creating unique and visually striking designs.
Whether it’s refining a natural landscape or stylizing a portrait, the Contour tool offers the precision needed for impactful results.
Custom Logos and Branding
For businesses and individuals seeking to create custom logos and branding materials, the Contour tool provides a powerful way to refine and personalize your visual identity.
This feature ensures that your logo is a perfect representation of your brand’s unique style and message.
Benefits of Using Contour in Cricut Design Space
Utilizing the Contour tool in Cricut Design Space offers a multitude of advantages, making it an indispensable feature for crafters and designers alike.
Here are some notable benefits:
Precision Customization
Contouring allows for precise customization of your designs by enabling you to selectively hide or reveal specific elements within images or text. This level of precision ensures your creations align perfectly with your creative vision.
Complex Design Simplification
For intricate designs with numerous components, Contour simplifies the process by letting you focus on individual elements. It streamlines complex designs, making them more manageable.
Versatile Creativity
The Contour tool provides versatility in design. You can use it to create unique compositions by combining and manipulating shapes, unlocking endless creative possibilities.
Efficiency and Time-Saving
By fine-tuning your designs with Contour, you reduce the need for starting from scratch. This efficiency saves valuable crafting time, allowing you to complete projects more quickly.
Error Correction
Contour serves as a helpful tool for correcting design errors or making adjustments on the fly. You can undo changes if necessary, ensuring your designs are just right.
Personalization
Contouring lets you personalize your projects extensively. Whether it’s customizing text or images, you can create one-of-a-kind designs that reflect your unique style.
Professional Results
Achieve professional-level results in your crafting and design endeavors. Contouring enables intricate detailing and refinement, elevating the quality of your finished products.
Layered Complexity
For those looking to add depth and complexity to their designs, Contour allows you to layer elements and textures seamlessly, resulting in visually captivating creations.
Experimentation and Learning
The Contour tool encourages experimentation and learning. It’s an excellent way to develop your skills and gain confidence in using Cricut Design Space to its full potential.
Creativity Unleashed
Above all, Contour empowers you to unleash your creativity. It puts you in control of your designs, allowing you to craft projects that truly stand out and express your unique artistic flair.
Difference Between Contour and Slice in Cricut Design Space
Cricut Design Space offers several powerful features to manipulate and customize designs, and two of the most commonly used functions are Contour and Slice.
Each serves a distinct purpose, and understanding the difference between them is essential for achieving your desired results.
The contour in Cricut Design Space
Contour is a tool primarily used for editing and customizing the appearance of an image or text within a single layer.
Here’s how it works:
- Hiding or Revealing Portions: Contour allows you to selectively hide or reveal specific portions or elements within an image or text. This provides precise control over the design’s details, allowing you to create intricate and personalized patterns.
- Non-Destructive Editing: The Contour tool is non-destructive, meaning it doesn’t permanently alter your original image or text. You can easily undo changes or reset the design to its initial state.
- Single-Layer Editing: Contour operates within a single layer, making it ideal for customizing elements without affecting other parts of the design.
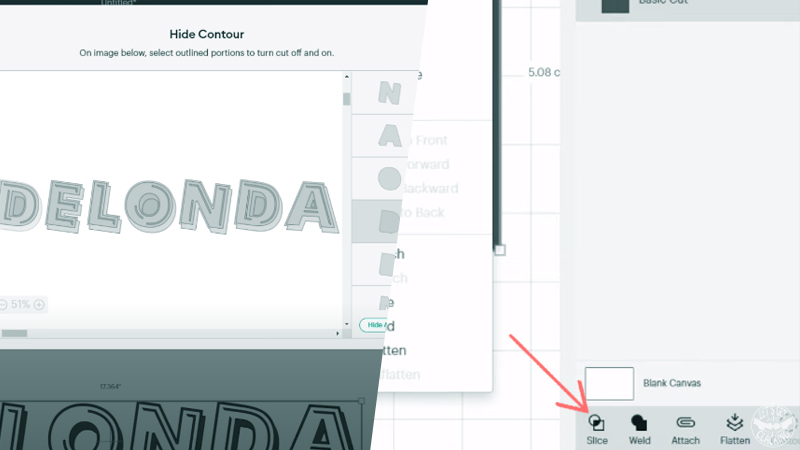
Slice in Cricut Design Space
Slice, on the other hand, is a function used for creating new shapes by cutting one or more overlapping images or layers.
Here’s how it differs from Contour:
- Creating New Shapes: Slice is used to create entirely new shapes by cutting where two or more layers or images overlap. It physically separates the selected portions, resulting in distinct shapes.
- Permanent Alteration: Unlike Contour, which is non-destructive, Slice permanently alters your design by removing the selected portions. You cannot undo a Slice operation.
- Multiple Layers: Slice operates on multiple layers or images simultaneously, allowing you to create complex compositions and designs by combining different elements.
Tips for Using the Contour Tool in Cricut Design Space
When working with Cricut Design Space, mastering the Contour tool can be a game-changer for your crafting projects.
This tool allows you to precisely customize your designs by hiding or revealing specific elements within an image or text.
Here are some valuable tips for using the Contour tool effectively:
Selectively Edit
Before delving into contouring, ensure you’ve precisely selected the image or text element you want to modify. Click on it to make sure it’s highlighted and ready for editing. This step sets the stage for precise customization.
Understanding Contours
Take a moment to familiarize yourself with the contours within your design. Each contour line represents a specific cut or shape.
Clicking on a contour line will either hide or reveal that particular element, giving you granular control over the design.
Experiment and Undo
Don’t hesitate to experiment with the Contour tool. You can always undo changes by clicking the undo arrow in the top menu bar if you’re not satisfied with the results. This encourages creative exploration without fear of making irreversible alterations.
Hide All Contours
When you want to start with a clean slate, click “Hide All Contours” to remove all elements. From there, you can selectively bring back the parts you want.
This provides a fresh canvas to work with and facilitates more intricate customization.
Complex Designs
When working on complex designs, zoom in and take your time. It’s much easier to work on intricate details up close.
This allows for a more precise and detailed contouring process, especially when dealing with fine or intricate elements.
Multiple Contours
Understand that you can use the Contour tool multiple times on a single image or text element.
This enables you to create layers of customization, combining different contours for intricate and detailed designs. It’s a versatile tool that can be applied in a variety of ways.
Combining Shapes
Remember that the Contour tool isn’t limited to hiding elements. You can also use it creatively to combine multiple elements, generating entirely new shapes.
This expands the range of design possibilities, allowing you to experiment with unique compositions.
Preview Your Design
Always take the time to preview your design on the canvas before finalizing it.
This ensures that the contours are applied as you intended and that the design aligns with your creative vision. Previewing helps catch any unexpected changes or missed elements.
Save Versions
When you’re uncertain about the changes you’re making, consider saving different versions of your design.
This way, you can compare and contrast them to choose the one that best suits your vision. It’s a prudent way to maintain a record of your design process.
Practice Makes Perfect
Like any skill, practice is key to mastering the Contour tool. The more you work with it, the more proficient you’ll become.
Don’t be afraid to experiment and learn from your experiences. With time, you’ll develop a keen eye for contouring possibilities.
FAQs
What is the Contour tool in Cricut Design Space?
The Contour tool is a feature in Cricut Design Space that allows users to selectively hide or reveal specific parts of an image or text, providing precise control over designs.
How do I access the Contour tool?
To access the Contour tool, select the image or text you want to edit, then click on the “Contour” button in the Layers panel on the right side of the screen.
Can I bring back hidden contours?
Yes, you can. If you hide a contour by mistake or want to revert changes, simply click on the hidden contour again to restore it to its original state.
Can I use the Contour tool on complex designs?
Yes, the Contour tool is versatile and can be used on both simple and complex designs. You can zoom in to work on intricate details.
How can I create new shapes with Contour?
Besides hiding elements, you can use the Contour tool to combine multiple elements and create entirely new shapes, expanding your design possibilities.
Wrap Up
Mastering contouring in Cricut Design Space is a powerful tool for precision and creativity in crafting. By understanding how to manipulate shapes and lines, users can create intricate designs with ease.
It allows for the customization of images, ensuring they fit seamlessly into projects. Furthermore, contouring empowers users to control the intricacies of their cuts, reducing material waste and refining details.
With practice, one can achieve professional-grade results, whether it’s for paper crafts, vinyl decals, or fabric designs.
Embracing contouring expands the possibilities within Cricut Design Space, turning visions into tangible, beautifully crafted realities. So, dive in, explore, and let your creativity flourish!
Leave a Reply