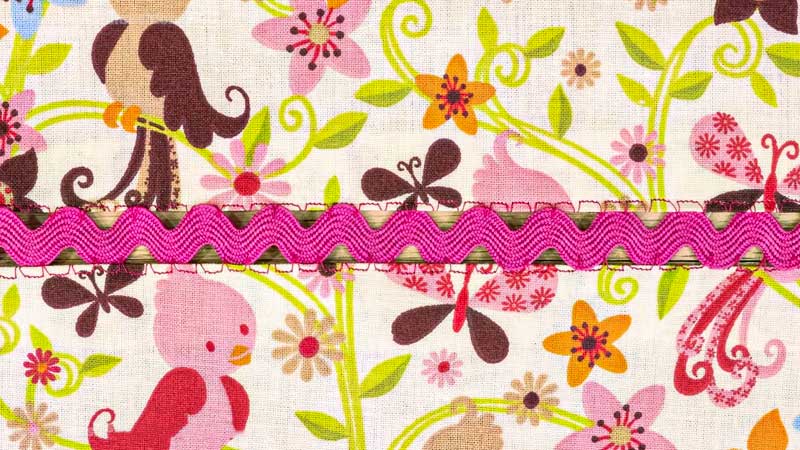
Ric Rac, with its playful zigzag pattern, is a versatile and charming trim that can add flair to a wide range of sewing projects. Whether you’re embellishing garments or adding a touch of whimsy to accessories, sewing with Ric Rac is a delightful and creative endeavor.
But how to sew a Ric Rac? In this comprehensive guide, we’ll take you on a journey through the ins and outs of sewing with Ric Rac.
From choosing the right type and size of Ric Rac to step-by-step instructions on sewing it neatly onto your projects, we’ve got you covered.
Discover the myriad ways you can use Ric Rac to enhance the aesthetics of your creations and let your imagination run wild with the endless possibilities it offers.
So, grab your Ric Rac and sewing supplies, and let’s dive into the world of decorative stitching as we explore how to sew Ric Rac with precision and style.
How to Sew Ric Rac?
Sewing ric rac trim onto your sewing projects is a fun and creative way to add decorative flair. Here’s a step-by-step guide on how to sew ric rac:
Materials You’ll Need
- Ric rac trim in your desired color and size
- Fabric or project where you want to attach ric rac
- Sewing machine with matching thread
- Straight pins or clips
- Fabric scissors
- Iron and ironing board
Step 1: Prepare Your Fabric
Ensure your fabric or project is clean, pressed, and ready for embellishment. Decide where you want to attach the ric rac and mark the placement with fabric chalk or pins.
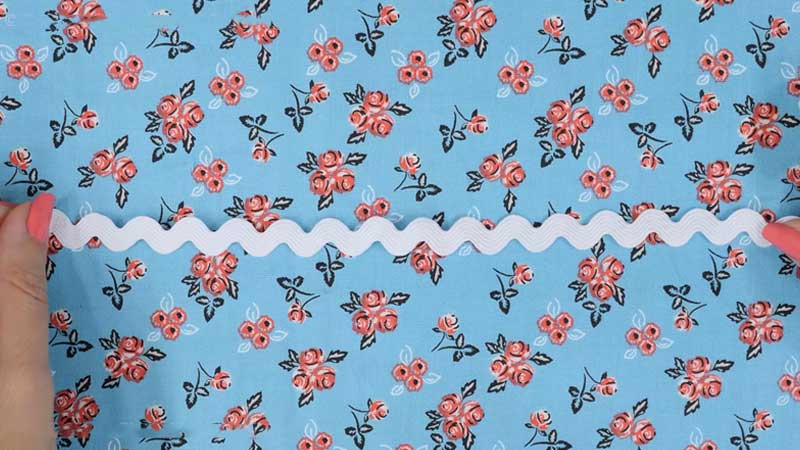
Step 2: Position the Ric Rac
Place the ric rac trim along the marked line on your fabric, with the zigzag edge facing outward.
You can choose to sew it along straight lines or curves, depending on your design.
Step 3: Pin or Clip in Place
Use straight pins or fabric clips to secure the ric rac in place. Pin it at regular intervals to keep it flat and prevent shifting during sewing.
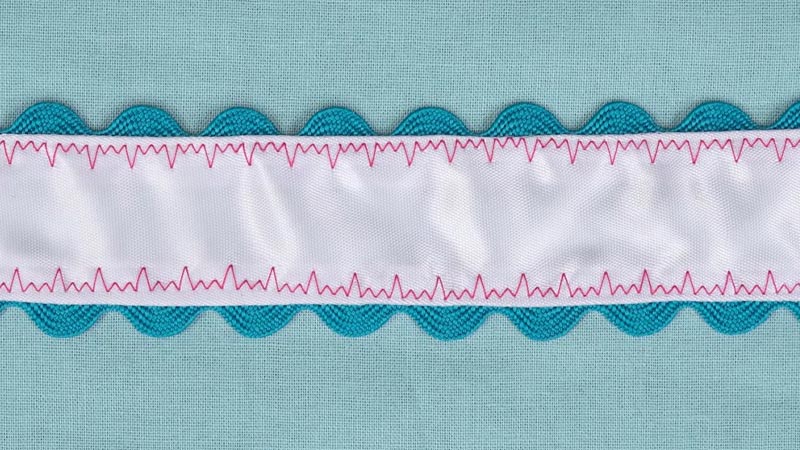
Step 4: Sew the Ric Rac
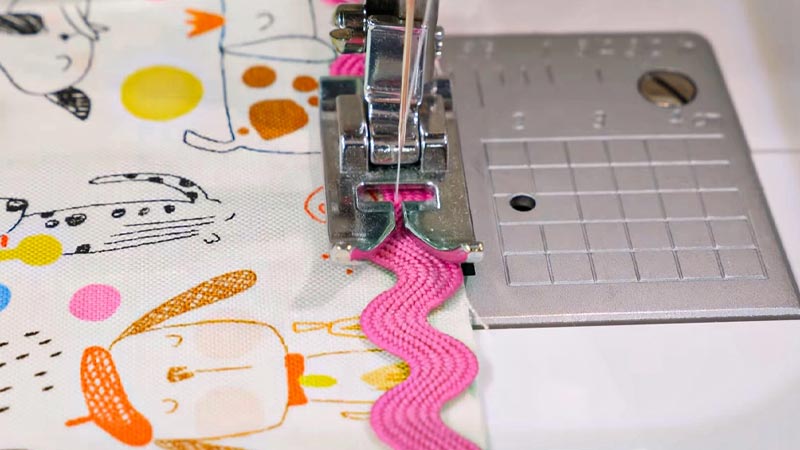
Set your sewing machine to a straight stitch or zigzag stitch, depending on your preferred look. Position the fabric with the pinned ric rac under the presser foot, ensuring the zigzag edge of the ric rac aligns with the marked line.
Start sewing slowly, securing the beginning of the ric rac with a few backstitches to prevent unraveling.
As you sew, guide the fabric gently, keeping the ric rac aligned with the marked line. Ensure the stitches catch both sides of the ric rac to secure it firmly.
When you reach the end of the ric rac or your desired stopping point, sew a few backstitches to secure the trim.
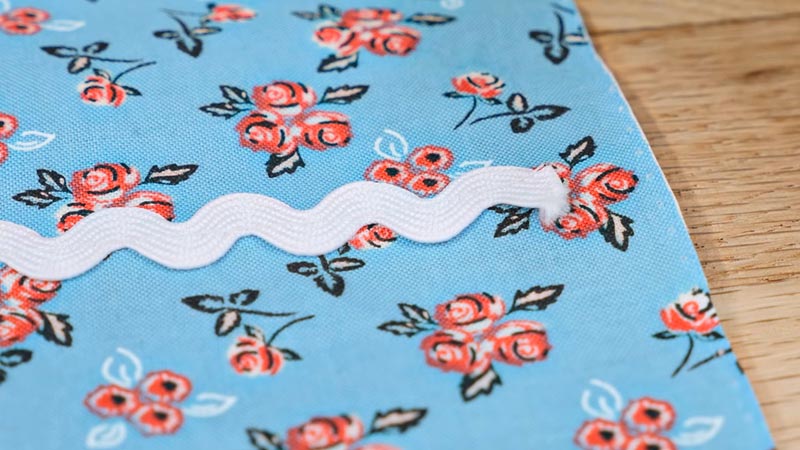
Step 5: Trim and Finish
Trim any excess ric rac using fabric scissors, leaving a little extra at the end to tuck under. If your project requires multiple sections of ric rac, repeat the above steps for each section.
Step 6: Press and Clean Up
After sewing, gently press the fabric and ric rac with an iron to set the stitches and create a polished appearance. Remove any stray threads or fabric chalk marks.
That’s it! You’ve successfully sewn ric rac onto your fabric or project, adding a touch of decorative charm.
Be creative with your ric rac placements and color choices to achieve the desired effect in your sewing projects.
How Do I Stop My Ric Rac from Fraying?
Preventing ric rac from fraying is essential for maintaining its neat and polished appearance in your sewing projects. Here are some methods to stop ric rac from fraying:
Use a Zigzag Stitch
When sewing ric rac onto your fabric, use a zigzag stitch instead of a straight stitch. A zigzag stitch not only secures the ric rac but also creates a clean edge that helps prevent fraying.
Overcast or Overlock Stitch
If you have access to an overlock or serger machine, consider using it to sew ric rac. These machines are designed to prevent fraying by neatly encasing the edges of the fabric or trim.
Use Fray Check or Fray Block
Apply a fabric fray prevention product, such as Fray Check or Fray Block, to the ends of the ric rac before sewing.
These products create a barrier that helps secure the threads and prevent fraying.
Heat-Seal the Ends
Gently heat-seal the ends of the ric rac by using a small flame from a lighter or a candle. Be extremely cautious while doing this to avoid scorching or melting the ric rac.
Quickly pass the ends of the ric rac near the flame to melt the threads slightly, creating a sealed edge.
Machine Tack the Ends
Sew a few backstitches or secure the ends of the ric rac with a tight zigzag stitch at the beginning and end of your ric rac placement. This can help anchor the threads and prevent fraying.
Pinking Shears
Trim the ends of the ric rac with pinking shears. The zigzag pattern of pinking shears creates a serrated edge that reduces fraying.
Apply Clear Nail Polish (Not Recommended for High-Visibility Areas)
In a pinch, you can apply a tiny amount of clear nail polish to the ends of the ric rac. However, this method may not be suitable for projects where the ends of the ric rac will be highly visible.
Choose the method that best suits your project and materials. Keep in mind that it’s essential to practice these techniques on scrap fabric or ric rac to ensure you achieve the desired results without damaging your project.
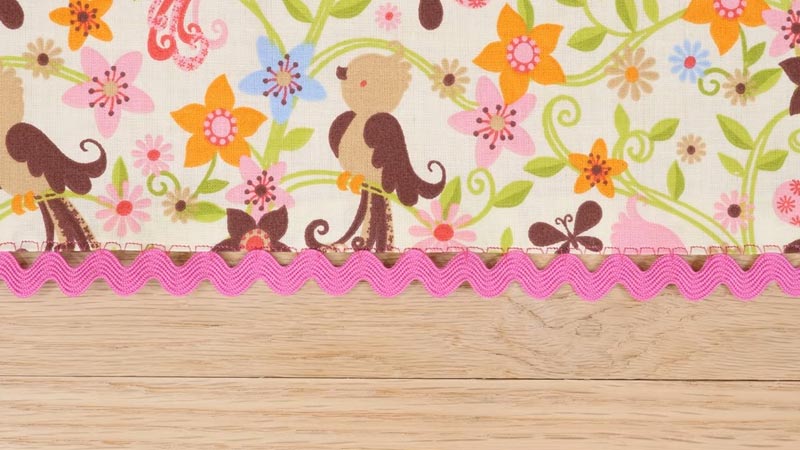
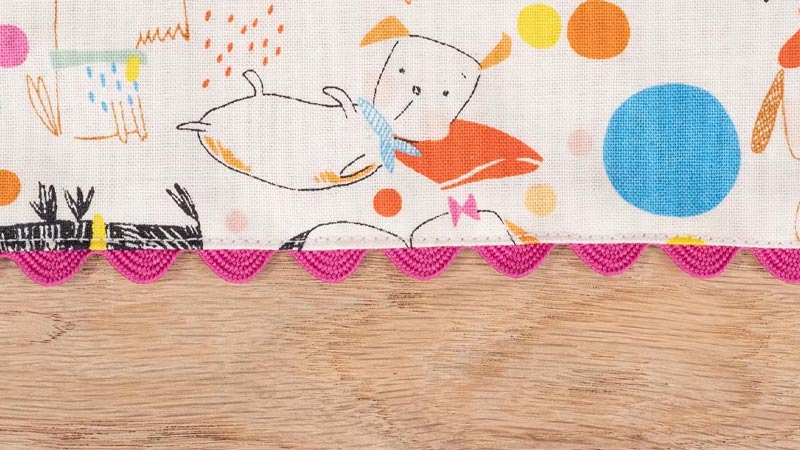
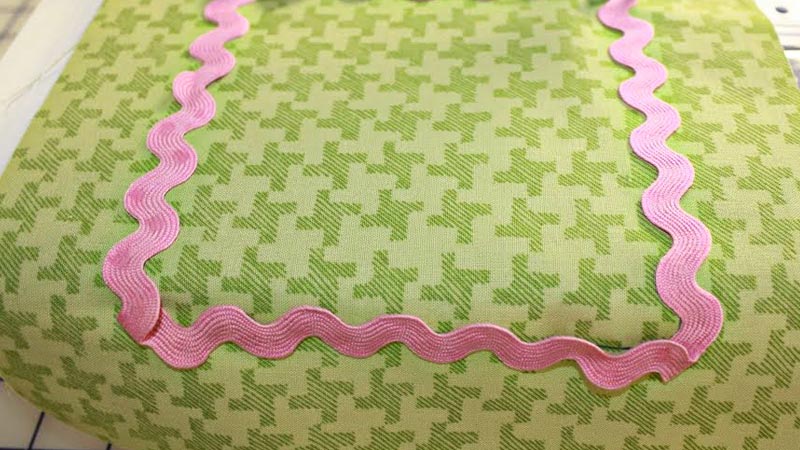
How to Edge with Ric Rac? 6 Steps
Edging with ric rac is a creative and charming way to add decorative borders to your sewing projects.
Whether you’re embellishing clothing, home decor, or accessories, here’s how to edge with ric rac:
Materials You’ll Need
- Fabric or project to be edged
- Ric rac trim in your desired color and size
- Sewing machine with matching thread
- Straight pins or clips
- Fabric scissors
- Iron and ironing board
Step 1: Prepare Your Fabric
Ensure your fabric or project is clean, pressed, and ready for edging. Decide where you want to attach the ric rac and mark the placement with fabric chalk or pins.
Step 2: Position the Ric Rac
Place the ric rac trim along the edge of your fabric or project, with the zigzag edge facing outward.
You can choose to sew it along straight lines or curves, depending on your design.
Step 3: Pin or Clip in Place
Use straight pins or fabric clips to secure the ric rac in place. Pin it at regular intervals to keep it flat and prevent shifting during sewing.
Step 4: Sew the Ric Rac
Set your sewing machine to a straight stitch or zigzag stitch, depending on your preferred look.
Position the fabric with the pinned ric rac under the presser foot, ensuring the zigzag edge of the ric rac aligns with the fabric edge.
Start sewing slowly, securing the beginning of the ric rac with a few backstitches to prevent unraveling. As you sew, guide the fabric gently, keeping the ric rac aligned with the fabric edge.
Ensure the stitches catch both sides of the ric rac to secure it firmly. When you reach a corner or your desired stopping point, sew a few backstitches to secure the trim.
Step 5: Trim and Finish
Trim any excess ric rac using fabric scissors, leaving a little extra at the end to tuck under. If your project requires multiple sections of ric rac, repeat the above steps for each section.
Step 6: Press and Clean Up
After sewing, gently press the fabric and ric rac with an iron to set the stitches and create a polished appearance. Remove any stray threads or fabric chalk marks.
By following these steps, you can edge your sewing projects with ric rac, adding a delightful decorative touch to your creations.
Be creative with your ric rac placements and color choices to achieve the desired effect in your projects.
What Is the Purpose of Ric Rac?
Ric rac trim, with its distinctive zigzag pattern, serves various decorative and functional purposes in sewing projects. Here are some common purposes of ric rac:
Decorative Edge
The primary purpose of ric rac is decorative. It adds a charming and playful accent to garments, home decor items, and accessories.
The zigzag pattern can be used to create eye-catching borders and embellishments, enhancing the visual appeal of the project.
Embellishment
Ric rac is often used to embellish clothing items such as dresses, skirts, blouses, and children’s clothing. It can be applied to hems, sleeves, collars, and pockets to add a touch of whimsy and style.
Trimming
Ric rac can serve as trim along the edges of tablecloths, napkins, placemats, and other table linens, providing a decorative border and a finished look to these items.
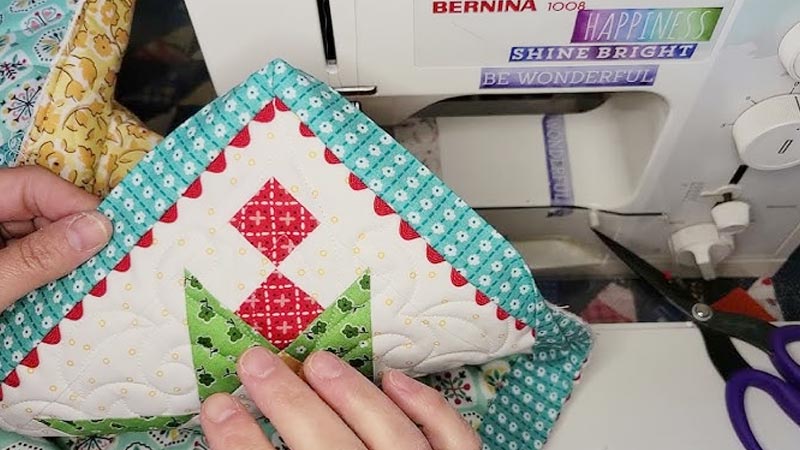
Quilting
In quilting projects, ric rac can be used as an attractive border between quilt blocks or as a decorative element within quilt patterns, adding texture and dimension to the design.
Crafts and Accessories
Ric rac is a favorite choice for crafting and making accessories. It can be used to embellish tote bags, headbands, hair bows, and even holiday ornaments, allowing for creative and personalized designs.
Kids’ Clothing
Ric rac is often featured in children’s clothing as it adds a playful and whimsical touch. It can be used on the cuffs, collars, and hems of kids’ garments.
Sewing Repairs
In some cases, ric rac can be used for functional purposes, such as covering frayed edges or seams, providing a decorative solution to sewing repairs.
Historical and Vintage Fashion
Ric rac trim has been used historically in fashion, especially during the mid-20th century. It’s still appreciated for its retro and vintage aesthetics in contemporary sewing projects.
In summary, ric rac trim is a versatile and decorative element that can enhance the aesthetics of sewing projects, adding visual interest, texture, and a touch of whimsy.
Its popularity endures in both traditional and modern sewing, making it a favorite choice for crafters and sewers alike.
FAQs
To secure the ends of ric rac, you can backstitch a few times at the beginning and end of your stitching line. Alternatively, you can fold the ends under and sew over them to prevent fraying.
Yes, you can usually machine-wash projects with ric rac trim. However, it’s essential to check the care instructions for both the fabric and the ric rac itself.
Use a gentle cycle and consider placing the item in a garment bag to protect the ric rac during washing.
Single-sided ric rac has the characteristic zigzag pattern on one side, while the other side is flat.
Double-sided ric rac has the zigzag pattern on both sides, making it reversible. Double-sided ric rac is often preferred for projects where both sides are visible.
Ric rac can be sewn onto both straight and curved edges. When working with curves, sew slowly, and gently guide the ric rac to follow the curve.
You may need to ease the ric rac around tight curves by making small snips along the seam allowance.
There are numerous creative uses for ric rac beyond simple edging. You can create decorative patterns, flowers, or even letters by arranging and sewing ric rac in unique ways. Experiment with colors and sizes to add a personalized touch to your projects.
Conclusion
Mastering the art of sewing with Ric Rac adds a touch of whimsy and creativity to your sewing projects. Throughout this guide, we’ve explored the diverse applications and techniques for working with this charming trim.
From enhancing the beauty of garments to infusing personality into home decor and accessories, Ric Rac offers a world of possibilities.
As you’ve learned, selecting the right type, size, and color of Ric Rac is just the beginning. The precision and style with which you sew it onto your creations can make a significant difference in the final result.
Whether you choose to use Ric Rac as an accent, a border, or a playful embellishment, attention to detail and creativity are your allies.
With the knowledge gained from this guide, you’re well-equipped to embark on Ric Rac-inspired sewing adventures. So, let your imagination soar, and may your sewing projects shine with the joy and personality.
Leave a Reply