Perler bead crafts offer a vibrant avenue for creative expression, enabling individuals to craft intricate designs with small, plastic beads.
The question arises once the crafting is complete: What to do with these colorful creations? The possibilities are as diverse as the designs themselves.
From transforming them into personalized jewelry and stylish accessories to functional items like magnets and coasters, Perler beads can be incorporated into everyday life.
Beyond practical applications, these crafts can adorn your home as framed art or become charming additions to handmade greeting cards.
Whether sharing your passion through teaching, turning them into portable keychains, or even considering a venture into small-scale sales, Perler bead crafts offer endless avenues for artistic exploration and personal enjoyment.

10 Cool Things to Make With Perler Beads
Perler bead crafts are a popular and versatile form of creative expression that allows individuals to make colorful and intricate designs using small plastic beads.
Once you’ve completed your Perler bead creations, there are various ways to enjoy and display them.
Here are some ideas on what to do with Perler bead creations:
1. Make Jewelry
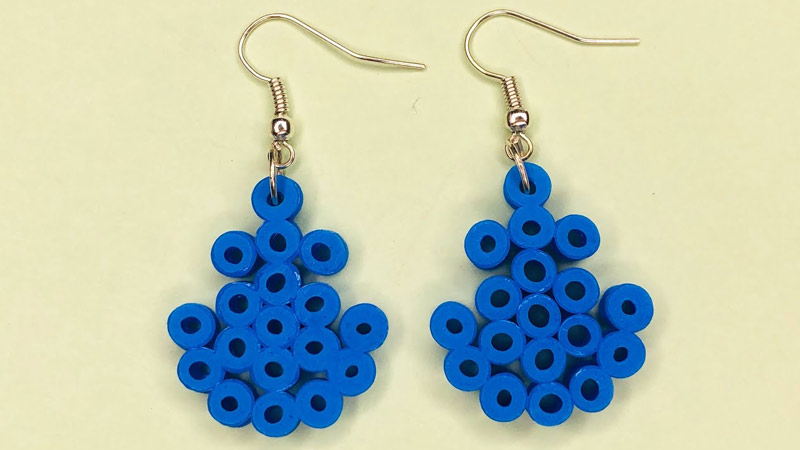
Transforming your Perler bead designs into jewelry is a fantastic way to showcase your creativity.
Attach jump rings to the beads and connect them to ear wires to make earrings. For necklaces and bracelets, string the beads onto a wire or thread, adding clasps for closure.
The versatility of Perler beads allows you to experiment with colors and patterns, creating personalized accessories that complement your style.
2. Decorate Accessories
Elevate your everyday accessories by incorporating Perler bead designs. Use a strong adhesive to attach beads to items like hair clips, headbands, phone cases, or sunglasses.
This customization adds a unique flair to your accessories, allowing you to express your personality through small, vibrant details. It’s an easy and fun way to breathe new life into ordinary items.
3. Create Magnets
Turn your Perler bead crafts into functional art pieces by transforming them into magnets. Glue small magnets to the back of your designs.
These magnets can be used to decorate your fridge, filing cabinets, or any metal surface in your home.
The magnetic feature makes it easy to change the display whenever you feel like refreshing your space with a burst of color.
4. Design Coasters
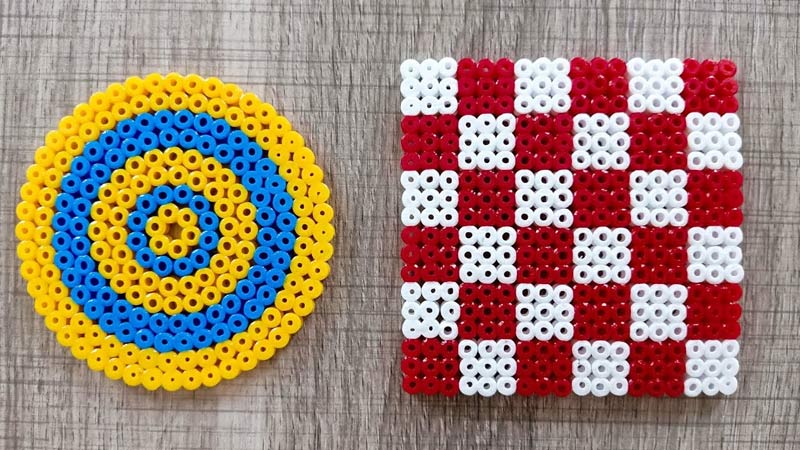
Protecting your surfaces doesn’t have to be dull – turn it into an opportunity to showcase your Perler bead creations.
Glue the beads together in a desired pattern, iron them to fuse, and then attach a cork or felt backing.
The result is not only practical but also a visually appealing addition to your home decor. Create a set of coasters with coordinating designs to add a cohesive touch to your living space.
5. Build 3D Structures
Take your Perler bead crafting to the next level by experimenting with three-dimensional structures.
Construct boxes, containers, or even small sculptures by carefully interlocking or gluing the beads together.
This adds a playful and unique touch to your home decor, allowing you to showcase your Perler bead creations in a more dynamic way.
These 3D structures can be eye-catching centerpieces or conversation starters in your living space.
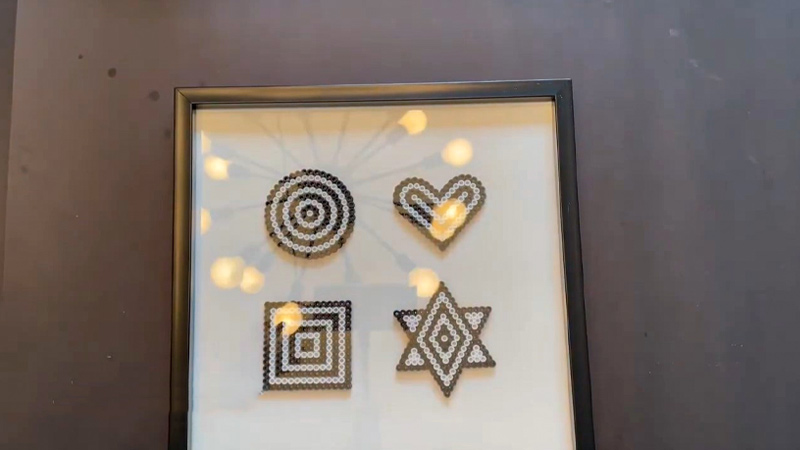
6. Frame Your Art
Transform your Perler bead creations into stunning wall art by framing them. Opt for a shadow box or a deep-set frame to protect and showcase your designs.
This preserves your creations and turns them into captivating conversation pieces for your home.
Experiment with arranging multiple pieces in a collage for a visually striking display that reflects your artistic prowess.
7. Make Greeting Cards
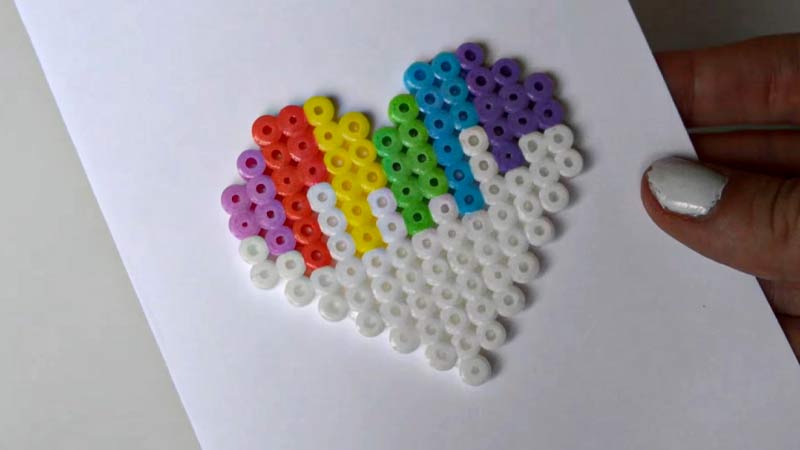
Elevate your greeting cards by incorporating Perler bead designs, adding a unique and handmade touch to your heartfelt messages.
Whether you choose to make the beads a focal point or integrate them into the background, they can enhance the charm of your cards for various occasions such as birthdays, holidays, or special events.
Consider creating themed designs matching the card’s sentiment, making your greetings memorable.
8. Create Keychains
Turn your Perler bead designs into portable works of art by attaching small keyring loops. Crafting custom keychains allows you to carry your favorite designs wherever you go, showcasing your creativity on a daily basis.
These personalized accessories also make thoughtful and unique gifts for friends and family, allowing them to enjoy your handmade creations in their everyday lives.
9. Teach and Share
Share the joy of Perler bead crafting by hosting crafting sessions or workshops. Use the opportunity to teach others how to create their own Perler bead designs. This spreads the joy of crafting and fosters creativity in others.
Building a community around your shared passion can lead to meaningful connections and exchanging ideas, making the crafting experience even more enjoyable.
10. Sell or Gift
If you have a surplus of Perler bead creations, consider turning your hobby into a small business.
Sell your creations at local craft fairs, through online platforms, or even social media. Alternatively, generously gift your handmade designs to friends and family, spreading joy and showcasing your artistic talents.
Whether for profit or pleasure, sharing your Perler bead crafts adds a personal touch to the lives of those who receive them.
Creative Ways to Display Perler Bead Crafts
Displaying your Perler bead crafts creatively can turn your creations into eye-catching decor pieces.
Here are some imaginative ways to showcase your Perler bead designs:
Framed Wall Art
Frame your favorite Perler bead creations in deep-set or shadow boxes. Arrange them in a visually appealing pattern to create a stunning gallery wall.
This method protects your designs and transforms them into a sophisticated and personalized art display.
Floating Shelves or Shadow Boxes
Install floating shelves or use shadow boxes to create a three-dimensional display. Arrange your Perler bead crafts on different levels, creating an interesting and dynamic visual impact. This method allows for easy rearrangement and updates to your display.
Hanging Mobiles or Garlands
Attach Perler bead creations to strings or threads and create hanging mobiles or garlands.
Suspend them from the ceiling or along a wall to add movement and a touch of whimsy to your space. This method works particularly well in craft rooms or areas with ample natural light.
Perler Bead Bouquets
Combine several smaller Perler bead designs to create vibrant bouquets. Arrange them in decorative vases or jars to make colorful and lasting floral displays. This adds a unique and playful touch to tabletops or shelves.
Backlit Displays
Place LED lights or fairy lights behind your Perler bead creations to create a backlit display.
This technique enhances the vibrancy of the colors and adds a warm, inviting glow to your designs. Consider using this method for a captivating night-time effect.
Themed Displays
Organize your Perler bead crafts based on themes. Create displays for specific seasons, holidays, or even moods.
For example, craft spooky Halloween designs or festive Christmas patterns and arrange them together for a themed showcase.
Interactive Magnetic Boards
Turn your Perler bead creations into magnets and display them on a magnetic board. This provides an interactive element, allowing you to easily rearrange and customize your display whenever you feel like it. It’s a versatile and engaging way to showcase your designs.
Gallery Frames with Mats
Frame your Perler bead creations in traditional gallery frames with mats. This adds a touch of elegance to your display, and the white matting can help emphasize the vibrant colors of your designs. Arrange multiple framed pieces for a cohesive look.
Incorporate with Planters or Terrariums
Combine Perler bead crafts with small plants or succulents. Place your creations in planters or terrariums to create a harmonious blend of natural and crafted elements. This brings a fresh and lively feel to your display.
Personalized Shadow Puppets
Illuminate your Perler bead creations from behind to create personalized shadow puppets. Mount them on a lightbox or use a lamp to cast shadows on a blank wall. This unique and playful display method adds an element of storytelling to your creations.
FAQs
Can I wear Perler bead creations?
Absolutely! Transform your designs into unique jewelry pieces like earrings, necklaces, bracelets, or even keychains. Mix and match different patterns to suit your personal style.
How can I incorporate Perler beads into my home decor?
Showcase your creations as wall art by framing them in shadow boxes or deep-set frames.
Additionally, experiment with crafting three-dimensional structures like boxes or small sculptures for a playful touch.
Can I use Perler beads to personalize accessories?
Yes, indeed! Add flair to everyday items by gluing or attaching Perler bead designs to accessories like hair clips, headbands, phone cases, or sunglasses. It’s a fun and creative way to express your personality.
Can I turn Perler bead crafting into a small business?
Absolutely! If you have a surplus of creations, consider selling them at local craft fairs or online platforms or gifting them to friends and family.
Last Words
The versatility of Perler bead crafts transforms them from simple creations into multifaceted art forms with myriad applications.
Whether adorning your attire with personalized jewelry, adding flair to accessories, or bringing functionality with magnets and coasters, these colorful beads have the power to infuse creativity into every aspect of daily life.
Framed as wall art, embedded in handmade cards, or fashioned into portable keychains, Perler beads become a unique reflection of personal style.
Moreover, the joy of sharing this craft through teaching and possibly turning it into a small business underscores the enduring appeal and endless potential of Perler bead creations in fostering creativity and connection.
Leave a Reply