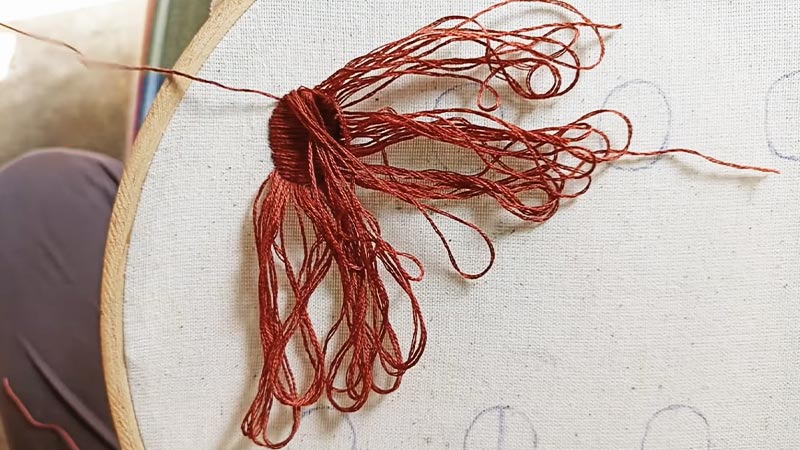
Embarking on the art of embroidery is an exciting journey, but the frustration of encountering a messy outcome can be disheartening.
The intricate dance of thread and fabric sometimes leads to less-than-desirable results, leaving creators puzzled about where they went wrong.
The reasons behind messy embroidery are diverse, from uneven stitches to thread tension woes.
This exploration aims to unravel the mysteries behind lackluster stitching, shedding light on common pitfalls and providing insights into transforming those less-than-perfect projects into polished, professional masterpieces.
Discovering the intricacies of embroidery aesthetics can turn frustration into an opportunity for skill refinement and artistic growth.
Why Does My Embroidery Look Messy?
Embroidery can look messy for various reasons, and understanding these factors is crucial for improving the overall quality of your stitching.
Here are some common reasons why your embroidery might appear messy:
Incorrect Stitch Selection
Choosing the wrong stitches for a particular design can result in an unfinished or messy appearance. Each design may require specific stitches to achieve the desired texture and detail.
Machine Maintenance Issues
Neglecting the maintenance of your embroidery machine can lead to various problems. Uneven thread tension, erratic thread distribution, and incomplete patterns can occur if the machine is not properly cleaned, oiled, or adjusted.
Thread Quality and Compatibility
Using low-quality or old threads can cause breakage, inconsistent tension, and messy results. Ensure you use high-quality threads suitable for your embroidery project, and check their compatibility with your machine.
Fabric Considerations
Ignoring the unique characteristics of the used fabric can lead to messy embroidery. Different fabrics may require thread tension, needle type, or stabilizer adjustments. It’s essential to consider the fabric’s texture, thickness, and stretchiness.
Lack of Practice
Embroidery is a skill that improves with practice. If you haven’t practiced regularly, your stitches may appear uneven or inconsistent, contributing to a messy look.
Tool Maintenance
Using dull needles and scissors or neglecting tool cleanliness can impact the quality of your embroidery. Ensure your tools are well-maintained, sharp, and clean for optimal results.
Hooping Errors
Improper hooping of the fabric can lead to distortion and uneven stitching. Ensure the fabric is hooped tightly and evenly to maintain proper tension throughout the embroidery process.
Complexity of Design
Overly complex designs, especially for beginners, may result in messy embroidery. Starting with simpler designs allows you to develop your skills and better control the stitching gradually.
Thread Tension Issues
Incorrect thread tension settings can cause loose or tight stitches, affecting the overall appearance of the embroidery. Adjust the tension according to the specifications of your project and fabric.
Bobbin Problems
Issues with the bobbin, such as incorrect winding or installation, can lead to stitching irregularities. Ensure that the bobbin is correctly wound and inserted into the machine.
How Do You Fix Messed Up Embroidery?
Fixing messed-up embroidery can be a challenging yet rewarding process. Whether dealing with uneven stitches, tension issues, or misplaced designs, addressing the problems effectively requires a systematic approach.
Here’s a step-by-step guide on how to fix messed-up embroidery:
Assess the Issue
Carefully examine the embroidery to identify specific problems. Determine whether the issue is uneven stitches, tension, design placement, or other factors.
Trim Loose Threads
Use small, sharp scissors to trim any loose or excess threads. This helps clean up the embroidery and gives you a clearer view of the underlying issues.
Check and Adjust Thread Tension
Review the thread tension settings on your embroidery machine. Adjust the tension if needed to ensure the stitches are even and balanced. Experiment with tiny test stitches to find the optimal tension.
Rethread the Machine
If you encounter issues like thread breakage or inconsistent stitching, consider rethreading both the top and bobbin threads. Ensure the threads are seated correctly in the machine.
Correct Hooping Issues
Rehoop the fabric, making sure it is taut and evenly stretched. Ensure the fabric is centered correctly within the hoop to avoid distortion or misalignment.
Remove and Redo Problematic Sections
If a specific section of the embroidery is particularly messy, consider removing the stitches in that area using a seam ripper. Carefully redo the stitches, paying attention to the details of the design.
Address Stitch Direction
Check the machine settings and the orientation of the design. If the stitches are not following the desired direction, adjust the settings accordingly to align with the intended direction.
Stabilizer Adjustment
Puckering or instability issues may be resolved by adjusting the stabilizer. Ensure you use the appropriate stabilizer for the fabric type and adapt as needed.
Correct Needle Issues
Confirm that you are using the correct needle for the fabric and design. A dull or bent needle can lead to various problems, so replace it if necessary.
Practice and Learn
If messy embroidery is a recurring challenge, practice and refine your skills. Regular practice contributes to improved technique and better control over the embroidery process.
Consult the Embroidery Design
Review the embroidery design itself. Check for any included instructions or guidance. Sometimes, the design file may contain information to help you address specific issues.
Consider Professional Help
If all else fails, and you find it challenging to resolve the issues alone, consider seeking assistance from a professional embroidery service or consulting with experienced embroiderers.
Tips for Avoiding Messy Embroidery
Embroidery is an art that demands precision and attention to detail. Avoiding messy embroidery involves a combination of proper technique, machine maintenance, and thoughtful planning.
Here are some valuable tips to help you achieve clean and professional-looking results in your embroidery projects:
Select the Right Stabilizer
Choose a stabilizer that suits the fabric and design. Stabilizers provide support, reducing the risk of distortion and contributing to cleaner stitching.
Invest in High-Quality Threads
Opt for high-quality embroidery threads that match the requirements of your project. Quality threads are less prone to breakage and contribute to smoother, more consistent stitching.
Regular Machine Maintenance
Keep your embroidery machine in top condition by regularly cleaning, oiling, and adjusting it. Proper maintenance helps prevent issues such as uneven tension and erratic stitching.
Test Stitch on Scrap Fabric
Before beginning your main project, perform test stitches on scrap fabric. This allows you to fine-tune thread tension, color choices, and overall design before embroidering the final piece.
Understand Fabric Characteristics
Consider the unique characteristics of the fabric you’re working with, such as thickness, stretchiness, and texture. Adjust thread tension, needle type, and stabilizer based on the specific properties of the fabric.
Secure Starting and Ending Threads
Tie knots or use backstitches to secure both the starting and ending threads. This practice prevents unraveling and contributes to a neat back on your embroidery.
Minimize Jump Stitches
Reduce the use of jump stitches between design elements. Trim and tie off jump stitches neatly on the back to avoid tangling and create a clean appearance.
Pay Attention to Bobbin Winding
Ensure the bobbin is wound correctly to maintain even tension. Uneven bobbin tension can lead to irregularities on the back of the embroidery.
Practice Proper Hooping Techniques
Hoop the fabric correctly to ensure it is taut and evenly stretched. Proper hooping prevents distortion and ensures even stitching throughout the embroidery process.
Check Needle Compatibility
Use the correct type and size of needle for your fabric and design. Different fabrics may require specific needle types, and using the wrong needle can result in messy embroidery.
Plan Color Changes Strategically
Strategically plan color changes to minimize the number of thread tails on the back. This reduces the likelihood of threads becoming tangled or creating a messy appearance.
Maintain a Clean Workspace
Keep your workspace organized and free of loose threads or debris. A clean environment reduces the risk of interference during the embroidery process.
Practice Regularly
Regular practice enhances your embroidery skills and familiarity with your machine. Increased proficiency leads to more controlled and neater stitching.
Learn from Mistakes
When mistakes occur, take the time to analyze and learn from them. Understanding the cause of a problem empowers you to make informed adjustments for future projects.
FAQs
Can you fix messy embroidery on hand?
Yes, carefully undo stitches, secure loose threads, adjust tension, and make necessary corrections by hand for a neater embroidery outcome.
How does fabric choice contribute to messy embroidery?
Ignoring fabric characteristics can result in unpleasant effects. Different fabrics require adjustments in thread tension, needle type, and stabilizer. Considering the unique aspects of the chosen fabric is crucial for clean embroidery.
What to do if you mess up embroidery?
Assess the issue, undo stitches if needed, secure loose threads, adjust tension, and learn from the mistake for improved embroidery outcomes.
What are hooping techniques to prevent messy embroidery?
Ensure the fabric is taut and evenly stretched in the hoop. Hoop correctly, avoiding distortion. Proper hooping minimizes the risk of messy embroidery results.
To Recap
The embroidery journey is adorned with challenges and triumphs in the tapestry of creativity. As we conclude our exploration into messy embroidery, it becomes evident that behind every imperfect stitch lies an invaluable lesson.
Understanding the nuances of stitches, machine maintenance, and fabric considerations transforms frustration into an opportunity for improvement. Embracing imperfections and learning from missteps are integral to the growth of any embroiderer.
With knowledge, practice, and a dash of creativity, we can elevate our craftsmanship, turning each project into a canvas of intricate beauty. Let the quest for flawless embroidery be a continuous adventure where challenges pave the way for mastery and artistry.
Leave a Reply