Discovering that your crochet circle is curling can be frustrating for crafters. This perplexing phenomenon often arises due to factors ranging from tension issues and inappropriate hook sizes to yarn characteristics and stitch choices.
In this intricate crochet world, achieving a perfectly flat circle requires a keen understanding of these variables.
This guide delves into the reasons behind a curling crochet circle and offers practical insights and solutions.
Whether you are a seasoned crocheter or just beginning your journey, unravel the mystery of curling circles and learn how to navigate these challenges, ensuring your crochet projects lay flat and showcase the beauty of your craft.
Why Does My Crochet Circle Curl? 7 Reasons
If your crochet circle is curling, there are several common reasons for this issue. Understanding these factors can help you troubleshoot and adjust to ensure your crochet projects lay flat.
Here are some reasons why your crochet circle might be curling:
1. Tension Issues
Uneven tension can manifest in different ways, with tight stitches pulling the fabric inward and loose stitches causing a lack of structure.
If you notice tightness in your work, consciously relax your grip on the yarn and hook. Conversely, consider firming up your tension slightly if your stitches are too loose.
Consistency is vital; practice will help you find a comfortable and even tension that suits your style, preventing the distortion that can lead to a curled circle.
2. Hook Size
The hook size determines the size and tightness of your stitches. If your project is curling, assess whether your hook aligns with the yarn’s recommended size.
A smaller hook than advised can create a dense and compact fabric, while a larger hook might result in a loose and floppy texture.
Experiment with different hook sizes within the recommended range to balance stitch tightness and flexibility.
3. Yarn Type
Different yarns exhibit diverse properties, including elasticity and drape. If your circle curls, evaluate the yarn’s characteristics.
Highly elastic yarns tend to contract, pulling the edges inward, while less elastic yarns may struggle to maintain the circular shape.
Select yarns based on the project requirements, considering the desired drape and structure to mitigate potential curling issues.
4. Stitch Selection
The choice of stitches significantly impacts your crochet fabric’s overall texture and tightness.
Some stitches, like single crochet or half-double crochet, create a denser and tighter fabric, potentially contributing to curling.
Explore open and airy stitches, such as double or treble crochet, to introduce flexibility and counteract curling tendencies. Experiment with stitch combinations until you achieve the desired balance.
5. Blocking
Blocking is a transformative step in crochet, allowing you to shape your project and set the stitches. When dealing with a curling circle, blocking becomes even more crucial.
Wet your project, shape it to the desired dimensions, and let it air dry. Blocking relaxes the yarn fibers, promoting a more even tension and discouraging the fabric from curling.
Embrace this technique as an essential part of your crochet finishing process.
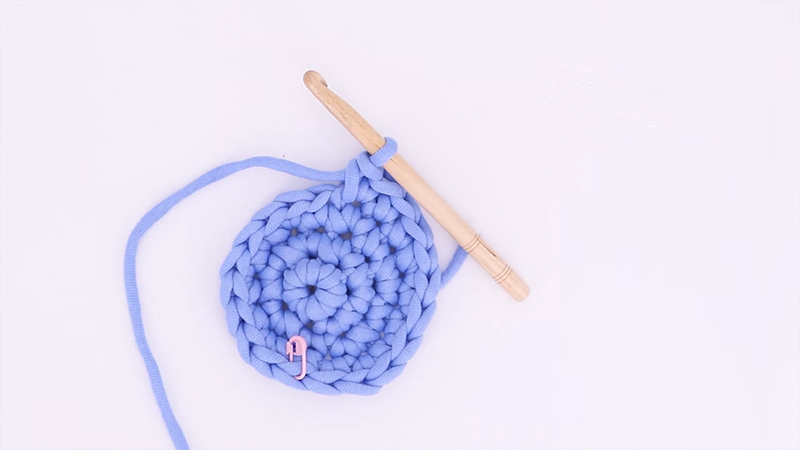
6. Starting Ring
The starting ring sets the foundation for your circle, and its size and tightness can impact the overall curvature.
If you notice a tight center causing curling, try starting with a larger ring. Alternatively, consider adjusting the initial stitches to provide a more open and balanced foundation for subsequent rounds.
Experiment with different starting methods to find the one that minimizes curling and enhances the symmetry of your circles.
7. Stitch Count
Maintaining the correct stitch count is crucial for a well-shaped crochet circle. Adding or skipping stitches disrupts the circular symmetry, leading to a distorted shape that may curl.
Use stitch markers diligently to mark the beginning and end of each round, and periodically check your stitch count to catch any discrepancies early on.
Consistent stitch count ensures your circle maintains its intended shape and lays flat without curling.
How to Fix Curling Crochet Circle? Step-By-Step Instructions
If you find that your crochet circle is curling, several effective methods exist to fix the issue and ensure your project lays flat.
Here are step-by-step instructions on how to fix a curling crochet circle:
Blocking
Blocking is a transformative process that can rectify a curling crochet circle. Begin by gently wetting the completed circle with lukewarm water, avoiding aggressive wringing or agitation that could damage the delicate fibers.
Lay the circle flat on a blocking mat or another padded surface, delicately shaping it to the desired dimensions.
Use rust-proof pins or blocking wires to secure the edges, maintaining your desired shape. Allow the project to air-dry completely, ensuring it takes on the intended form before removing the pins.
This method relaxes the yarn fibers and encourages the crochet circle to settle into a flat and well-defined shape.
Steam Blocking
Steam blocking is an efficient alternative to traditional wet blocking. Hover a steam iron a few inches above the crochet circle, being cautious not to touch the yarn directly with the hot iron.
Steam the entire circle, moving the iron slowly, sweepingly to cover the surface. As you steam, gently shape the circle, encouraging it to lay flat.
Once the steaming process is complete, allow the project to cool and dry thoroughly before handling.
Steam blocking is particularly useful for projects where water may not be the preferred method, providing a convenient and effective solution.
Adjust Tension
Uneven tension during the crochet process can lead to a curling effect in your circle. If stitches appear tight, employ a gentle approach to pull them, evening out the tension across the fabric.
For those instances where stitches seem loose, consider using a smaller hook size or adjusting your tension to create more compact and well-defined stitches.
Fine-tuning your tension technique can create a more balanced and flat crochet circle.
Change Hook Size
The size of the crochet hook plays a pivotal role in the overall structure of your project. If your circle is curling, carefully assess whether the hook used aligns with the yarn’s recommended size.
Switching to a larger hook can create more open and relaxed stitches if it’s too tiny, preventing the tightness contributing to curling.
Conversely, if the hook is too large, transitioning to a smaller size can produce more defined and compact stitches, counteracting the tendency to curl.
Choose the Right Yarn
The yarn selection is a crucial factor influencing the behavior of your crochet circle. Examine the characteristics of the yarn, focusing on elasticity and drape.
If the yarn is excessively stretchy, it might contribute to curling. Opt for a yarn with less elasticity or a blend with better structural support.
On the other hand, if the yarn lacks elasticity, consider choosing a type with more bounce to help the circle maintain its intended shape.
Stitch Selection
The choice of stitches significantly impacts your crochet fabric’s overall texture and tightness.
Experiment with different stitch patterns, noting that some naturally produce a tighter or looser fabric. Introducing more open and airy stitches into your circle can counteract curling tendencies.
Switching to stitches with a looser structure provides the necessary flexibility, contributing to a flat and well-shaped crochet circle.
Revisit Starting Ring
The starting ring sets the foundation for your crochet circle, and adjustments to its size and tightness can influence the overall curvature.
If the center appears too tight, consider starting with a larger ring. Alternatively, adjust the initial stitches to create a more open and balanced foundation for subsequent rounds.
Experiment with different starting methods to find the one that minimizes curling and enhances the symmetry of your circles.
Verify Stitch Count
Maintaining the correct stitch count is paramount to preventing a curled crochet circle. Regularly check that you are following the prescribed stitch count for each round.
Adding or skipping stitches disrupts the circular symmetry, leading to an irregular shape that may curl.
Use stitch markers diligently to denote the beginning and end of each round, ensuring a consistent stitch count throughout your project.
A disciplined approach to stitch count ensures that your crochet circle maintains its intended shape and lays flat.
Tips to Prevent Curling Crochet Circle
Preventing a crochet circle from curling requires attention to various aspects of your technique, yarn choice, and project handling.
Here are tips to help you achieve a flat and well-shaped crochet circle:
Choose the Right Yarn
When selecting yarn for your crochet project, delve into the world of fibers to find the perfect balance. Aim for a yarn that marries elasticity with structural integrity.
Excessively stretchy yarns may lead to unwanted curling, while those lacking elasticity might struggle to hold the intended shape.
Conduct experiments with various yarn types to discover which complements your specific project needs and minimizes the risk of curling, ensuring your finished piece stands out in both form and function.
Select an Appropriate Hook Size
The crochet hook is a pivotal tool in determining the outcome of your project. To prevent curling, it’s crucial to align your hook size with the recommendations on the yarn label.
A hook that is too small may result in tight stitches, exacerbating the curling effect, while a too large hook could lead to loose stitches.
Adhering to the suggested hook size establishes the desired tension, providing a sturdy foundation that prevents unsightly curling and ensures the longevity of your crochet creation.
Mind Your Tension
Tension in crochet is an art that requires finesse. Consistency is critical – whether you’re working on intricate stitch patterns or simpler designs.
An even tension throughout your project is a powerful deterrent against curling. Strive for a comfortable and uniform tension, adjusting it according to the demands of different stitch patterns and project specifications.
Mastering tension control not only enhances the aesthetics of your work but also plays a significant role in maintaining a flat and well-shaped crochet piece.
Experiment with Stitch Patterns
Stitch patterns influence the fabric’s tightness and flexibility. Consider exploring a repertoire of open and airy stitch patterns to mitigate curling.
These patterns add visual interest and promote a more pliable fabric, reducing the likelihood of curling.
Mix and match different stitch types within your circle, strategically introducing variety to achieve a harmonious and balanced structure.
Start with a Larger Ring
The initiation of your crochet circle sets the stage for its overall form. If curling manifests due to a tight center, consider a strategic adjustment by starting with a larger initial ring.
This initial space accommodates subsequent increases more gracefully, diminishing the tendency for the circle to tighten and curl as you progress through each round.
This simple modification can significantly affect the overall appearance and resilience of your crochet project.
Alternate Stitch Types
Injecting variety into your crochet circle is a dynamic strategy for preventing curling. You can distribute tension more uniformly across the fabric by alternating between tighter and more open stitch types.
This deliberate alternation counteracts any inherent tendencies for the circle to curl, resulting in a more cohesive and visually appealing finished product.
Experimenting with stitch combinations adds a creative dimension to your crochet work while promoting a balanced structure.
Check Stitch Count Regularly
Stitch count serves as the backbone of a well-structured crochet circle. Monitoring and maintaining a consistent stitch count for each round is imperative to uphold circular symmetry and thwart curling tendencies.
Using stitch markers to delineate the beginning and end of each round is a valuable aid in tracking your progress.
This meticulous approach ensures a uniform stitch count, creating a flawless and evenly shaped crochet circle.
Block Your Finished Project
The art of blocking is a transformative technique that should not be underestimated.
Incorporating blocking into your finishing process, whether through wet blocking or steam blocking, offers a final touch that relaxes yarn fibers and sets stitches.
This process is especially effective in promoting a flat and well-shaped final result, minimizing the risk of curling.
Please pay special attention to the edges and overall form of the circle during blocking, allowing the yarn to settle into its intended shape.
Use Proper Handling Techniques
Beyond stitches and hooks, how you handle your crochet project is crucial in preventing curling.
Adopt gentle and controlled handling techniques, avoiding overly tight stitches or forceful pulling on the fabric.
Such careful treatment ensures the yarn maintains its integrity and structure, significantly reducing the likelihood of unwanted curling. Approach your work with patience and mindfulness to achieve the desired outcome.
Experiment with Yarn Blends
Dive into yarn blends to harness the combined strengths of different fibers. Choosing a blend incorporating natural and synthetic fibers or one tailored for specific projects can provide a harmonious balance of elasticity and structure.
This deliberate selection minimizes the risk of curling, offering a versatile solution that enhances your crochet creations’ overall quality and resilience.
Experimenting with various yarn blends allows you to tailor your choice to the unique requirements of each project, ensuring a consistent and pleasing result.
FAQs
Can the starting ring size affect the curling of my crochet circle?
Yes, a small starting ring can lead to a tighter center, contributing to curling. Consider starting with a larger ring or adjusting the initial stitches to create a more even foundation.
Is it necessary to check the stitch count regularly to prevent curling?
Yes, maintaining a consistent stitch count for each round is essential. Adding or skipping stitches can disrupt the circular symmetry, leading to distortion and potential curling.
Can a hook size different from the recommended size cause curling in a crochet circle?
Yes, using a hook that is too small can result in tight stitches and curling, while a hook that is too large may lead to loose stitches. Adhering to the suggested hook size promotes the desired tension and helps prevent curling.
To Recap
Understanding why a crochet circle may curl is pivotal in honing one’s crochet skills.
Crafters can troubleshoot and apply practical solutions by recognizing the impact of tension, hook size, yarn characteristics, stitch patterns, and other variables.
Embracing techniques such as blocking, adjusting starting rings, alternating stitch types, and maintaining proper stitch count empower creators to achieve flat and aesthetically pleasing circles.
This journey into unraveling the mysteries of curling circles enhances the final presentation of crochet projects and deepens one’s mastery of the craft.
With these insights, crocheters can confidently address and prevent the common challenge of curling, ensuring their creations showcase the precision and artistry inherent in crochet work.
Leave a Reply