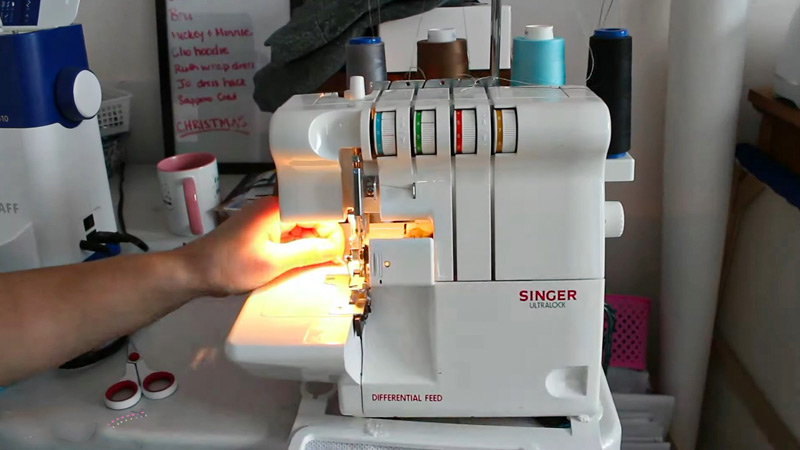
A serger, often referred to as an overlock machine, is a powerful tool that can elevate your sewing projects to a professional standard.
Unlike a regular sewing machine, a serger is specifically designed to create clean, durable finishes on fabric edges.
It trims excess material while neatly encasing the edge in a strong, multi-thread stitch. This not only prevents fraying but also adds a polished, high-quality look to your creations.
With its ability to handle stretch fabrics, reinforce seams, and efficiently finish edges, a serger is an invaluable companion for any dedicated sewist looking to take their work to the next level of precision and durability.
What Is a Serger?
A serger, also known as an overlock machine, is a specialized sewing machine designed to finish fabric edges and create strong, neat seams.
It differs from a regular sewing machine in that it trims the fabric edge, encloses it with multiple threads, and sews it in one swift motion.
This results in a clean, professional finish that prevents fraying and adds durability. Sergers typically use between two to eight threads, allowing for various stitch options.
They excel in handling stretchy fabrics like knits and are indispensable for creating activewear, lingerie, and other garments.
Additionally, sergers can gather, ruffle, and create decorative edges, providing versatility in sewing projects.
Their speed and efficiency make them essential tools for sewists aiming for high-quality, polished outcomes.
Why to Use Serger While Sewing?
Using a serger, also known as an overlock machine, can greatly enhance the quality and durability of your sewing projects.
Here are several compelling reasons why you should consider using a serger while sewing:
Seam Finishing
Sergers excel at providing a clean edge to your fabric. This is especially crucial for delicate or loosely woven fabrics that tend to fray easily.
By neatly wrapping the edge, a serger prevents fraying, resulting in a more durable and visually appealing finish.
Professional-Looking Garments

The meticulous finish a serger offers elevates the overall look of your garments.
Whether you’re sewing for yourself, clients, or as a business venture, the professional touch a serger provides can make a significant difference in the perceived quality of your work.
Strengthens Seams
The multiple threads used in serging create a robust seam that can withstand the rigors of everyday use. This is particularly vital for items subjected to stress, like the inseams of trousers or the seams of bags and purses.
Stretch Fabrics
Working with stretchy fabrics like knits can be challenging on a regular sewing machine. A serger’s overlock stitch is specially designed to accommodate these materials.
It stretches with the fabric, ensuring that the finished garment remains comfortable and retains its shape over time.
Speed and Efficiency
Sergers are time-savers. With a serger, you can trim and finish edges in a single pass. This efficiency is especially beneficial for those working on larger projects, batches of garments, or on a tight schedule.
Clean and Tidy Inside
The interior of your garment often deserves just as much attention as the exterior. A serger ensures that the inside looks as clean and polished as the outside.
This is particularly significant for unlined garments, where the interior is more visible.
Versatile Stitch Options
Beyond its basic overlock stitch, modern sergers offer an array of stitch options. This versatility allows you to add decorative edges or unique finishes to your projects, giving you creative freedom in your sewing endeavors.
Gathering and Ruffling
Many sergers come equipped with attachments or settings that facilitate gathering or ruffling fabric as you sew.
This feature can save a substantial amount of time and effort, especially when working on projects that require large amounts of gathered fabric.
Seam Reinforcement
Certain areas of a garment, such as crotch seams, armholes, or areas prone to stress, benefit from additional reinforcement.
A serger can provide this reinforcement, ensuring that these critical areas remain intact and durable.
Flat Seams
Undergarments, sportswear, and other close-fitting garments benefit greatly from flat seams.
These reduce bulk and eliminate potential points of irritation or chafing against the skin, ensuring a more comfortable wearing experience.
Professional Finish
Whether you’re creating curtains, pillows, or other home décor items, a serger ensures a clean and long-lasting finish.
This is especially important for items that will be regularly used or subjected to wear and tear in a household.
How to Use a Serger Effectively?
Using a serger effectively involves several key steps and considerations to ensure clean, professional-looking finishes on your sewing projects.
Here’s a comprehensive guide to help you make the most of your serger:
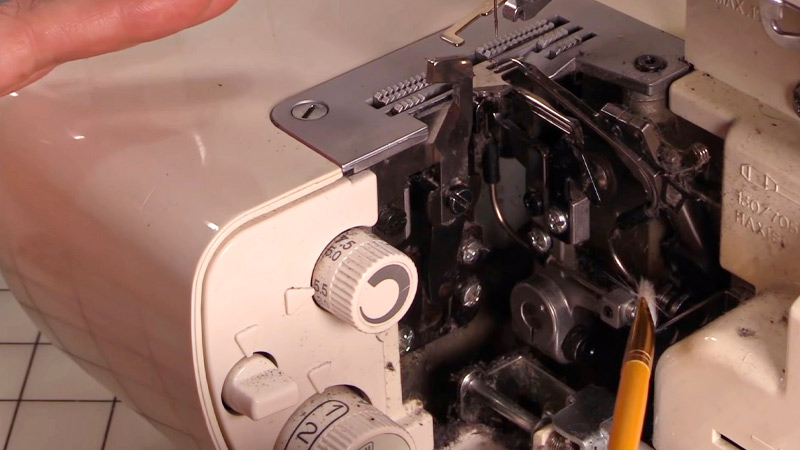
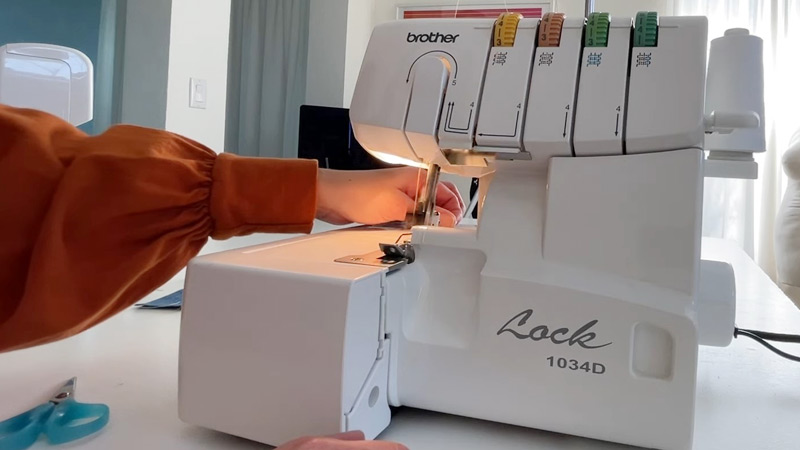
Threading
Proper threading is crucial for a serger to function effectively. Follow the threading guide provided in your serger’s manual.
Take your time and double-check that each thread is correctly fed through all the guides, tension disks, and loopers.
Tension Settings
Adjust the tension according to your fabric and project. Experiment with different tension settings on scrap fabric to find the optimal balance. Generally, balanced tension results in even, flat seams.
Test Stitches
Before starting your main project, test different stitches on a scrap piece of fabric. This allows you to fine-tune settings for your specific fabric type and project requirements.
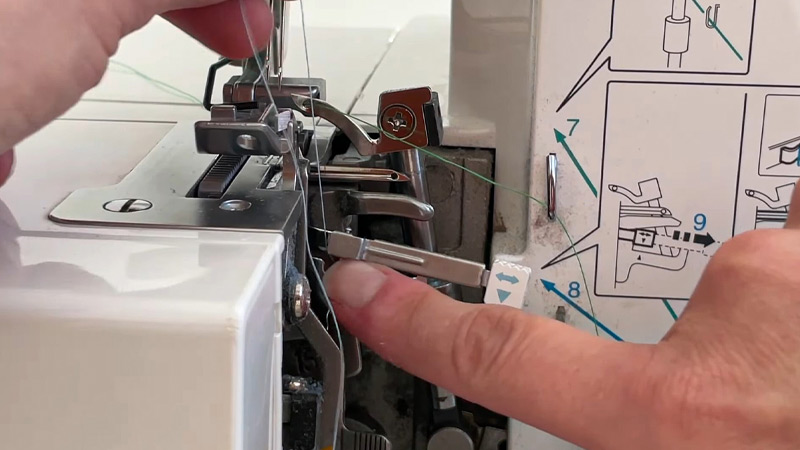
Knife Position
Adjust the knife position if your serger allows it. Depending on your project, you may want to trim more or less fabric. Keep the knife well-maintained and sharp to ensure clean cuts.
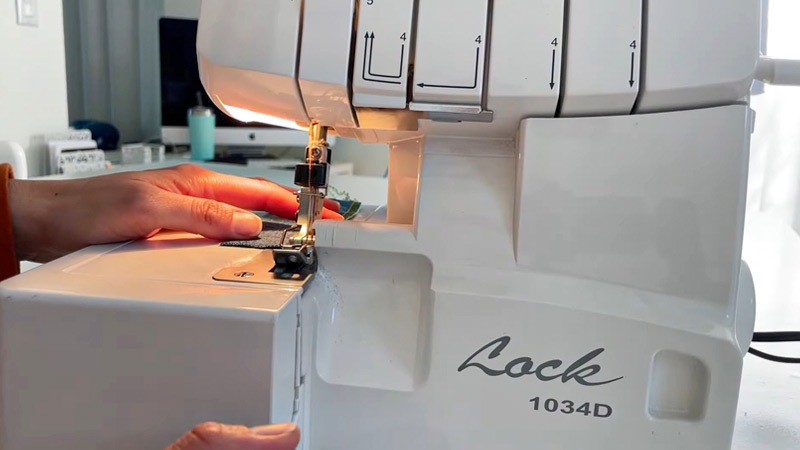
Stitch Selection
Choose the appropriate stitch for your project. Most sergers offer a range of stitches including overlock, rolled hem, flatlock, and more. Selecting the right stitch ensures the desired finish.
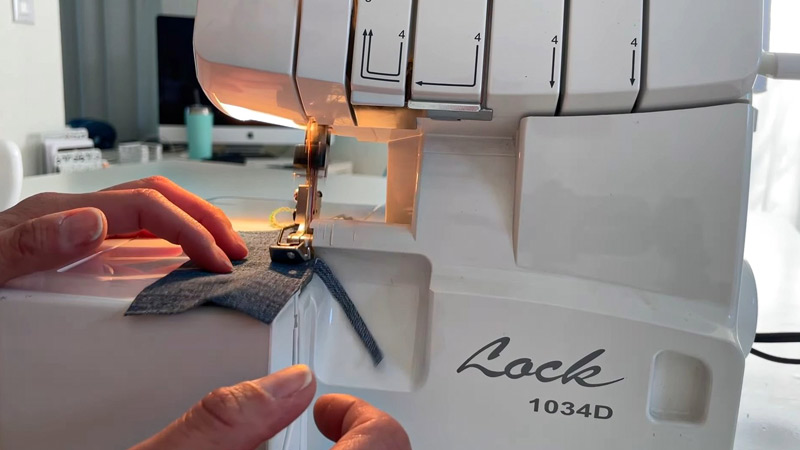
Aligning Fabric Edges
Ensure the edges of the fabric are properly aligned before feeding them through the serger. For precise seams, match the raw edges accurately. For finishing edges, slightly overhang the fabric.
Maintain Steady Speed
Control the speed using the foot pedal. Start at a comfortable pace and gradually increase as you become more comfortable. Consistent speed helps maintain even stitches.
Keep Fabric Moving
Guide the fabric steadily through the serger. Avoid tugging or pulling, as this can result in uneven stitches or fabric distortion. Allow the serger to feed dogs to do the work.
Cornering and Curves
Take extra care when sewing corners or curves. Slow down, pivot the fabric gently, and continue sewing. Practice on scraps first to get a feel for how your serger handles curves.
Backstitching
Sergers typically do not have a backstitch function. To secure the beginning and end of a seam, you can either overlap the stitching slightly or tie off the thread tails manually.
Finishing Seams
For seam finishing, align the fabric edge with the cutting blade. For joining seams, align the edges perfectly and guide them through the machine.
Ensure both layers of fabric are caught by the stitches.
Tips for Using a Serger While Sewing
Using a serger effectively requires some practice and attention to detail.
Here are some tips to help you get the best results when using a serger:
Read the Manual
Start by thoroughly reading your serger’s instruction manual. Understanding your specific machine’s features, threading instructions, and recommended settings is crucial for successful serging.
Threading
Pay careful attention to threading your serger correctly. Each thread should follow the designated path according to your machine’s threading guide.
Proper threading ensures smooth operation and prevents thread jams.
Practice on Scraps
Before tackling your main project, practice on scraps of the same fabric. This allows you to test different stitch settings, tensions, and techniques to achieve the desired result.
Tension Adjustment
Adjust the tension settings based on your fabric and project requirements. Balanced tension results in even, flat seams.
Refer to your serger’s manual for guidance on proper tension settings.
Knife Position
Learn how to adjust the cutting knife’s position. Depending on your project, you may want to trim more or less fabric. Ensure the knife is sharp to achieve clean cuts.
Guiding the Fabric
Guide the fabric smoothly through the serger, avoiding tugging or pulling, which can result in uneven stitches or fabric distortion.
Allow the serger’s feed dogs to advance the fabric.
Differences Between a Serger and a Regular Sewing Machine
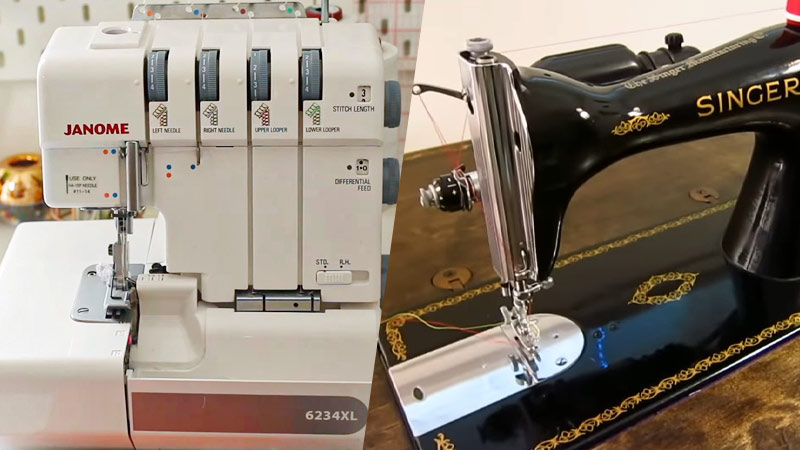
Sergers and regular sewing machines serve distinct but complementary functions in the realm of sewing.
Here are the key differences between the two:
Stitch Types
- Sergers: Sergers specialize in creating overlock stitches. These stitches trim the fabric edge and encase it in thread, preventing fraying and providing a neat finish. Sergers can also create other specialty stitches like rolled hems and flatlocks.
- Regular Sewing Machines: Regular sewing machines offer a wide range of stitch options, including straight stitches, zigzag stitches, decorative stitches, and more. They are versatile for various sewing applications.
Number of Threads
- Sergers: Sergers use multiple threads (usually between 2 and 8) to create a strong and secure stitch. This multi-threading capability is essential for creating the overlock stitch.
- Regular Sewing Machines: Most regular sewing machines use one to two threads, depending on the stitch being used.
Edge Finishing
- Sergers: Sergers excel at finishing raw edges of fabric. They trim excess fabric while simultaneously encasing the edge in a neat, clean stitch. This prevents fraying.
- Regular Sewing Machines: While regular sewing machines can finish edges using zigzag stitches or overcasting stitches, they do not provide the same level of edge finishing as a serger.
Seam Types
- Sergers: Sergers are primarily used for finishing seams, especially in garments made with stretchy or knit fabrics. They can also join fabrics together with a secure, stretchable seam.
- Regular Sewing Machines: Regular sewing machines are versatile in creating a wide variety of seams, including straight, zigzag, reinforced, and decorative stitches. They are used for constructing garments, quilts, and various fabric items.
Ease of Use
- Sergers: Sergers can be more complex to thread and set up compared to regular sewing machines. They require practice and familiarity with threading paths and tension adjustments.
- Regular Sewing Machines: Regular sewing machines are generally considered more user-friendly, especially for beginners. Threading is typically simpler, and they have a broader range of stitch options.
Versatility
- Sergers: Sergers are specialized machines primarily used for finishing edges and creating certain types of seams. While they excel in these areas, they have limited applications compared to regular sewing machines.
- Regular Sewing Machines: Regular sewing machines are highly versatile and can handle a wide range of sewing tasks, including garment construction, quilting, embroidery, and various fabric crafts.
Cost
- Sergers: Sergers tend to be more expensive than regular sewing machines due to their specialized functions and features.
- Regular Sewing Machines: Basic models of regular sewing machines are generally more affordable compared to sergers.
FAQS
What is a serger and how does it work?
A serger is a type of sewing machine that can create professional-looking seams, hems, and edges.
Why should I use a serger instead of a regular sewing machine?
A serger specializes in finishing edges, creating strong, stretchable seams, and providing a professional look.
Can a serger replace a regular sewing machine?
While a serger is an invaluable tool for finishing edges and creating durable seams, it doesn’t replace a regular sewing machine.
Is using a serger difficult for beginners?
While it may seem intimidating initially, with practice and patience, beginners can learn to use a serger effectively.
Can I use a serger for delicate fabrics like silk or chiffon?
Yes, a serger can be used for delicate fabrics. However, it’s important to practice on scrap pieces first to get the tension and settings right.
To Wrap Up
Using a serger in your sewing endeavors offers a multitude of advantages. Its unique ability to neatly finish fabric edges, create strong seams, and work effortlessly with stretch materials sets it apart from a regular sewing machine.
Whether you’re crafting garments, home décor items, or accessories, a serger ensures a polished, professional appearance both inside and out.
Moreover, its time-saving efficiency and versatility in handling various fabrics make it an essential tool for sewists of all skill levels.
With a serger, you can take your sewing projects to new heights, achieving clean, durable results that stand up to scrutiny and wear.
Leave a Reply