Embarking on sewing projects often involves incorporating functional elements like buttonholes.
Mastering the art of crafting precise buttonholes is a fundamental skill, and the process becomes remarkably efficient when using a Brother sewing machine.
This guide demystifies the steps to create flawless buttonholes with your Brother machine, offering a seamless experience for both beginners and seasoned sewists.
From selecting the appropriate stitch attaching the buttonhole foot to marking placements and completing the stitching, this tutorial provides a comprehensive walkthrough.
Unlock the potential of your Brother sewing machine as we delve into the intricacies of producing polished and professional buttonholes for your sewing endeavors.
What Is a Buttonhole?
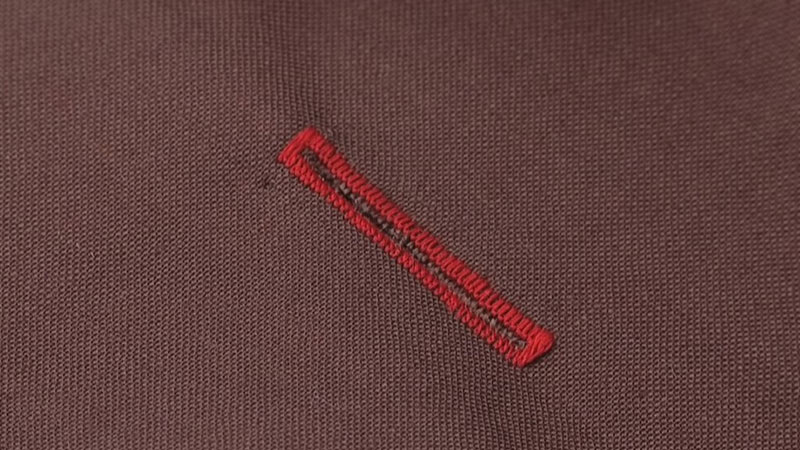
A buttonhole is a small, reinforced opening in fabric designed to secure buttons for fastening garments.
Typically rectangular or keyhole-shaped, it accommodates a button’s passage, ensuring a snug fit and preventing the button from slipping through.
Buttonholes are integral components in clothing construction, found on shirts, blouses, jackets, and various other garments.
Crafting a precise buttonhole involves careful stitching and reinforcement, often done with a sewing machine equipped with a specialized buttonhole foot.
The quality and durability of a buttonhole contribute significantly to the functionality and aesthetic appeal of the finished garment.
11 Steps on How to Sew a Buttonhole With a Brother Sewing Machine?
Making a buttonhole with a Brother sewing machine is a straightforward process, and most modern Brother machines come equipped with an automatic buttonhole function.
Follow these general steps to create a buttonhole using your Brother sewing machine:
Materials and Tools:
- Brother sewing machine with a buttonhole foot
- Fabric
- Thread
- Scissors
- Seam gauge or ruler
- Marking tools (chalk, fabric marker, or pins)
Step-by-Step Guide:
1. Choose the Buttonhole Stitch
Begin by identifying the buttonhole stitch on your Brother sewing machine. Depending on the model, this setting is often found on the stitch dial or displayed digitally.
Look for an icon or label that represents a buttonhole. Consult your machine’s manual if you’re unsure. Selecting the correct stitch is crucial for a precise and functional buttonhole.
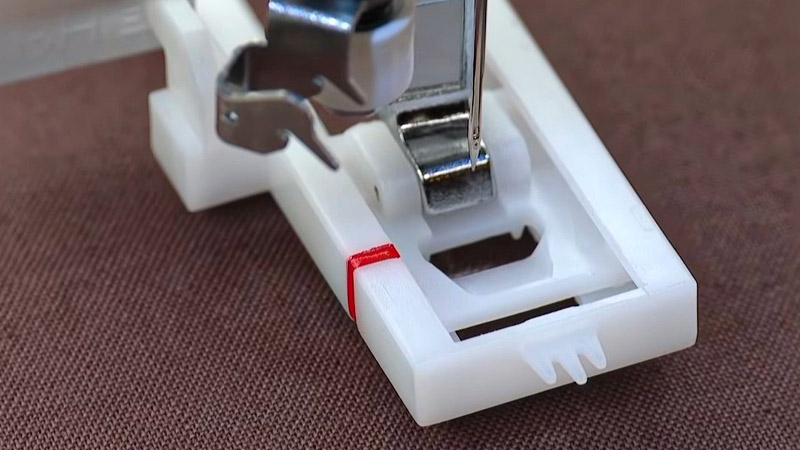
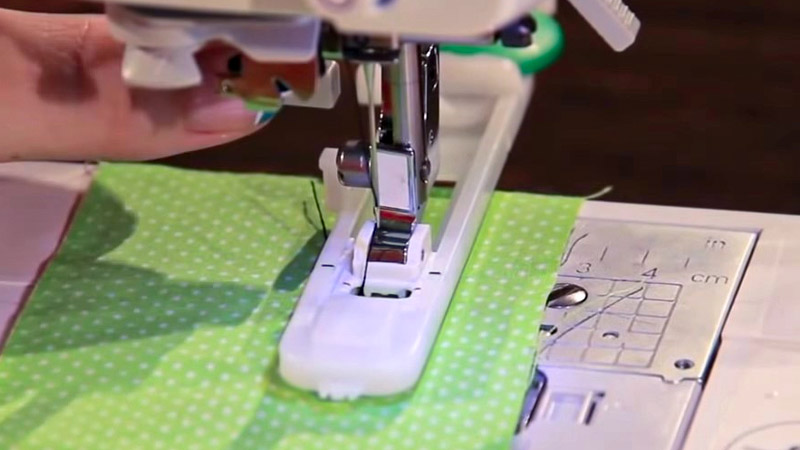
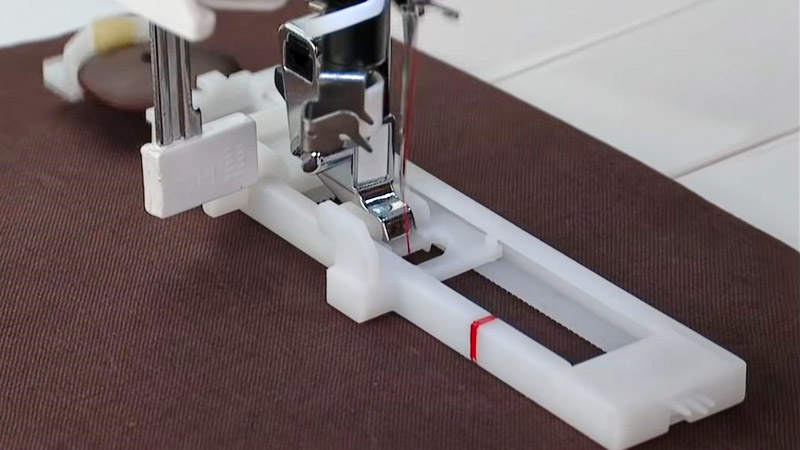
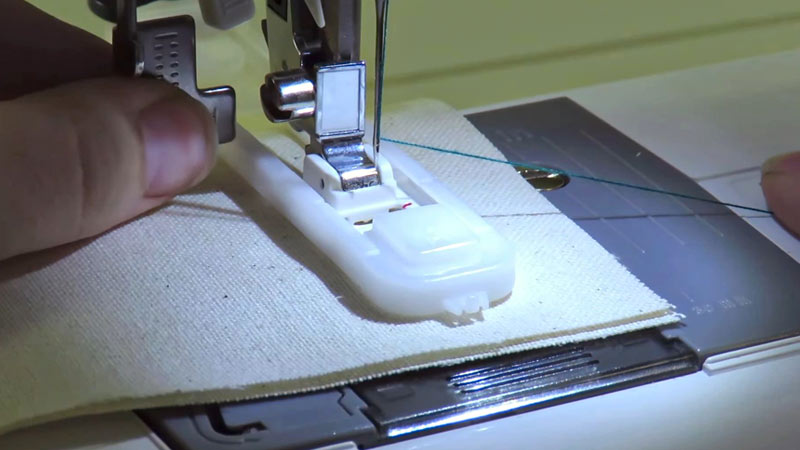
2. Attach the Buttonhole Foot
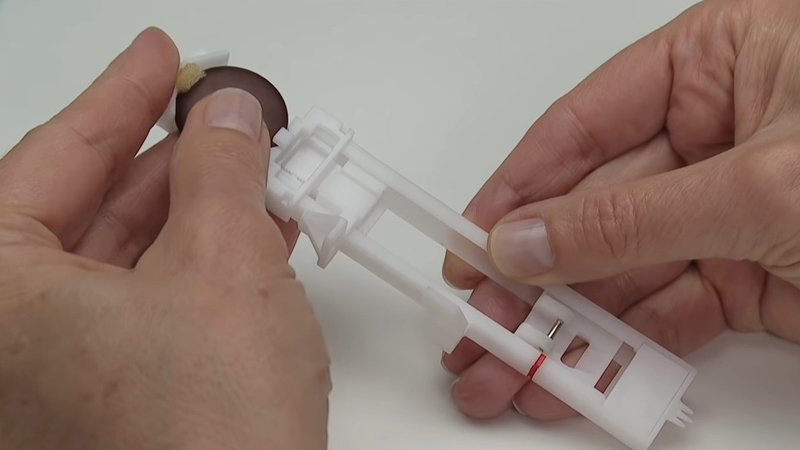
Find the dedicated buttonhole foot that accompanies your Brother sewing machine. This foot is specially designed for creating buttonholes and typically features a slot to hold the button securely.
Attach the buttonhole foot securely to your machine according to the instructions in your manual. Ensure it is firmly in place to prevent any shifting during stitching.
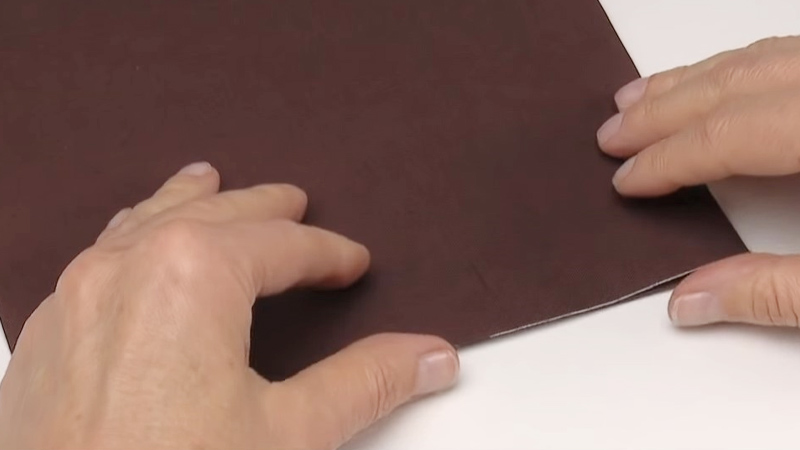
3. Mark the Buttonhole Placement

Before stitching, mark the buttonhole placement on your fabric. Use a seam gauge, ruler, or other measuring tools to determine the correct position.
Measure the actual button and mark the starting and ending points accordingly. Center the buttonhole on your project, ensuring it aligns with your design and serves its functional purpose.
4. Set the Stitch Length

Adjust the stitch length to match your machine’s specifications for buttonholes. Check your sewing machine manual for the recommended settings.
In many cases, modern machines have an automatic setting for buttonholes, simplifying the process.
The correct stitch length is crucial for creating a buttonhole that fits the button securely and looks professional.
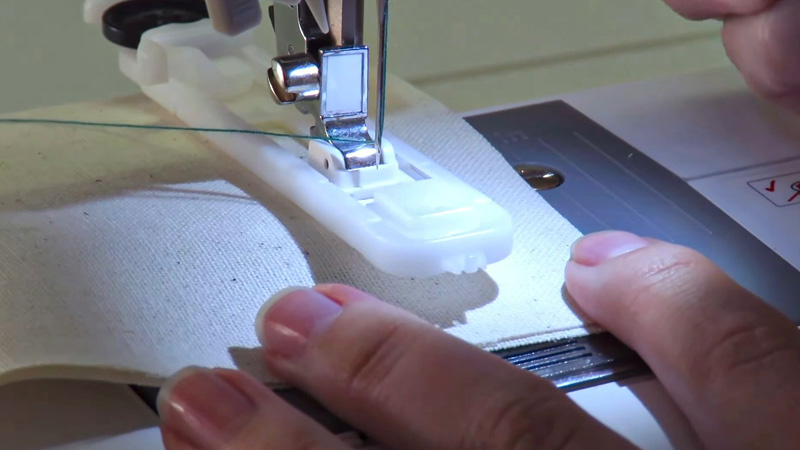
5. Place the Fabric Under the Presser Foot
With the buttonhole foot attached, position your fabric under the presser foot. Align the starting point of the buttonhole on the fabric with the corresponding marking on the buttonhole foot.
Ensure that the fabric is flat and properly positioned before lowering the presser foot. This step sets the foundation for a well-aligned and accurately placed buttonhole.
6. Lower the Presser Foot
Once the fabric is properly positioned, lower the presser foot to secure it in place. This step is crucial for maintaining stability and preventing any fabric movement during the buttonhole stitching process. The presser foot holds the fabric firmly, allowing for precise and even stitching.
7. Initiate the Buttonhole Stitch
With the presser foot lowered, start the sewing machine. If your Brother sewing machine has an automatic buttonhole function, it will take care of the entire buttonhole stitching process.
The machine will sew the left bar tack, which secures the beginning of the buttonhole, followed by straight stitches along the length of the buttonhole, and finally, the right bar tack to secure the other end.
8. Complete the Buttonhole
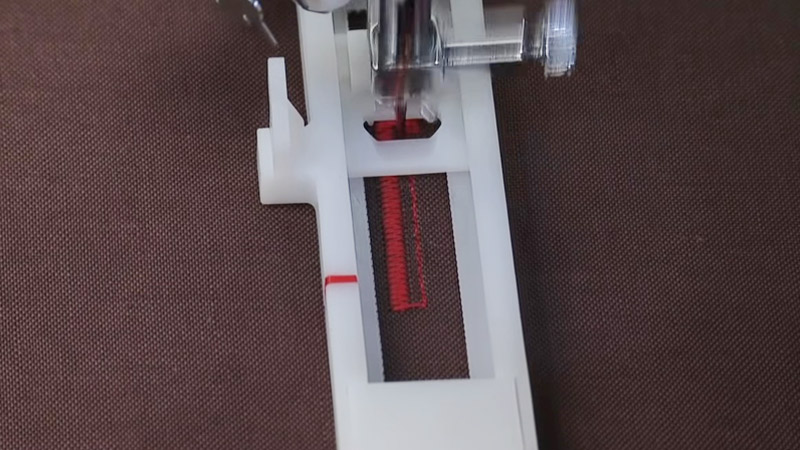
Allow the machine to complete the buttonhole stitching. Modern Brother sewing machines are often equipped with sensors that can detect the buttonhole length and automatically stop when finished.
If your machine doesn’t stop automatically, refer to your manual for the recommended buttonhole length and stop the machine accordingly.
9. Reinforce the Buttonhole
For added durability, consider reinforcing the buttonhole. You can achieve this by adding a few extra stitches at the beginning and end of the buttonhole or using a zigzag stitch over the entire buttonhole.
This optional step is particularly useful for projects that will undergo frequent use or stress.
10. Cut Open the Buttonhole
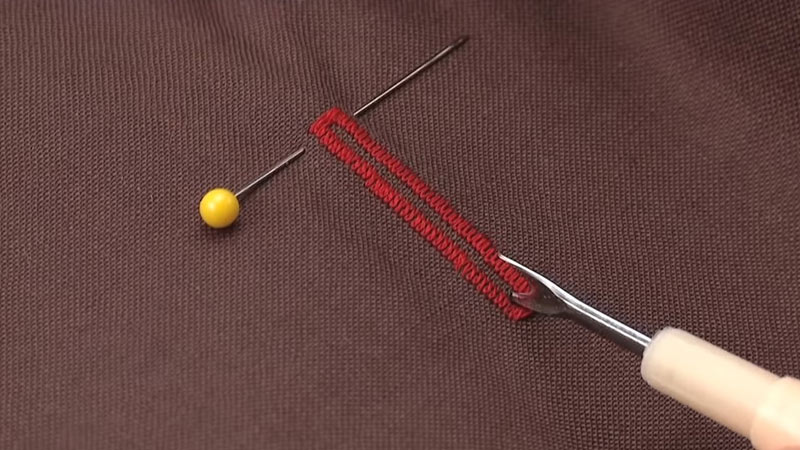
Carefully cut open the buttonhole using sharp scissors. Position the scissors at the center of the buttonhole, ensuring not to cut into the stitches.
To prevent accidental over-cutting, you may want to place a pin at each end of the buttonhole as a guide. This step completes the functional aspect of the buttonhole.
11. Remove Excess Threads
Trim any loose threads with scissors to give your buttonhole a clean and polished appearance.
Removing excess threads enhances the overall look of your sewing project and ensures that the buttonhole maintains its neat finish. Take care not to cut into the stitches while trimming the threads.
Tips to Make a Buttonhole With a Brother Sewing Machine
Crafting perfect buttonholes with a Brother sewing machine requires attention to detail and precision.
Here are some essential tips to ensure successful buttonhole creation:
Select the Right Stitch
Familiarize yourself with the various buttonhole stitches available on your Brother sewing machine.
Choose the appropriate one for your fabric and project. Whether it’s a basic buttonhole, keyhole, or stretch stitch, understanding the options ensures a tailored approach.
Use the Correct Buttonhole Foot
The buttonhole foot is designed to hold the fabric steady while creating the buttonhole.
Ensure it is securely attached and aligned with the needle. Using the wrong foot may result in uneven buttonholes or difficulty in stitching.
Test on Scrap Fabric
Before committing to your actual project, practice on a scrap piece of fabric. This allows you to test stitch settings, buttonhole size, and fabric compatibility without the risk of errors on your main piece.
Mark Buttonhole Placement Accurately
Precision in marking is crucial. Measure the button and mark the starting and ending points accordingly. Centering the buttonhole on your fabric ensures a balanced and visually appealing result.
Stabilize the Fabric
Lightweight or stretchy fabrics may benefit from stabilizers to prevent distortion. Follow your machine’s recommendations for suitable stabilizers, as this enhances the buttonhole’s structure and appearance.
Adjust Stitch Length and Width
Customize stitch length and width based on your fabric’s thickness. Adjusting these settings ensures that the buttonhole is appropriately sized, allowing the button to pass through comfortably.
Reinforce if Needed
Depending on the garment’s stress points, reinforcing the buttonhole with extra stitches at the beginning and end enhances durability. Alternatively, a zigzag stitch can provide additional strength.
Take Advantage of Automatic Features
If your Brother sewing machine offers automatic buttonhole features, leverage them for efficiency.
Automatic settings can simplify the process and maintain consistency across multiple buttonholes.
Check Button Size
Verify that the selected buttonhole size matches the button you intend to use. Adjust settings accordingly to ensure a snug fit, preventing buttons from slipping out or being too tight.
Cut Carefully
When cutting open the buttonhole, use sharp scissors and cut precisely at the center. If concerned about over-cutting, place pins at each end as a guide. Taking care during this step preserves the integrity of the buttonhole.
Maintain Your Machine
Regularly clean and oil your Brother sewing machine, paying attention to the buttonhole mechanism.
Proper maintenance ensures smooth operation, preventing jams or uneven stitching during the buttonhole creation process.
FAQs
How do I choose the buttonhole stitch?
Look for the buttonhole stitch on the stitch dial or display. Refer to your manual for guidance.
How do I mark buttonhole placement on fabric?
Use chalk or pins to mark starting and ending points. Measure for accuracy.
Should I reinforce the buttonhole, and how?
Reinforcement is optional. Add extra stitches or use a zigzag stitch for durability.
How do I cut open the buttonhole safely?
Use sharp scissors, centering your cut. Pins at each end can prevent over-cutting. Trim loose threads for a neat finish.
To Recap
Mastering the art of crafting buttonholes with a Brother sewing machine enhances your sewing repertoire, offering a blend of precision and efficiency.
The detailed steps, from selecting the appropriate stitch to cutting open the buttonhole, empower both novices and experienced sewists.
Utilizing the buttonhole foot, the process becomes seamless, ensuring secure and polished buttonholes for various garments.
As you delve into the intricacies of this essential skill, the reliable functionality of a Brother sewing machine, coupled with thoughtful reinforcement options, guarantees professional and durable results.
Elevate your sewing projects by embracing these techniques, transforming buttonholes from mere fasteners to meticulously crafted elements that enhance the overall quality of your creations.
Leave a Reply