Embarking on a creative endeavor often involves the intricate art of embroidery, but what if a change of design or an unwanted mistake prompts the need to remove embroidery from fabric?
In such instances, understanding effective techniques becomes essential. “How To Remove Embroidery From Fabric” guides you through various methods, ensuring precision without compromising the fabric’s integrity.
From using seam rippers for detailed work to employing steam or freezing methods for controlled removal, this comprehensive guide empowers you with the knowledge to undo embroidery with care and finesse.
Dive into these techniques to master the art of giving your fabric a fresh start.
How To Remove Embroidery From Fabric?
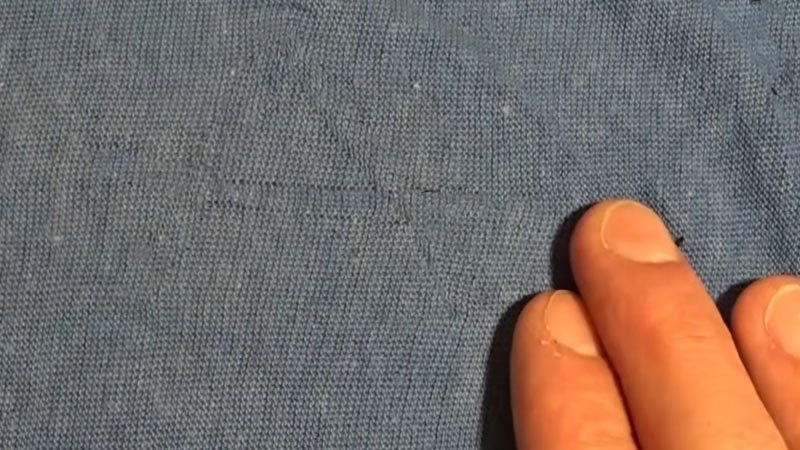
Discovering the need to remove embroidery from fabric can be a common dilemma, whether due to a mistake or a change in design. Fear not, as we delve into seven simple methods to guide you through the process of how to remove embroidery with precision and care.
Each technique ensures that you can undo stitches without causing damage to the fabric, allowing for a clean slate in your embroidery project.
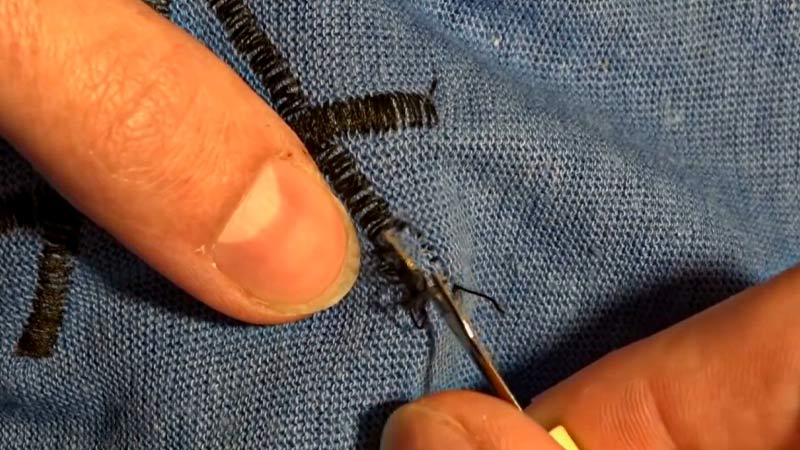
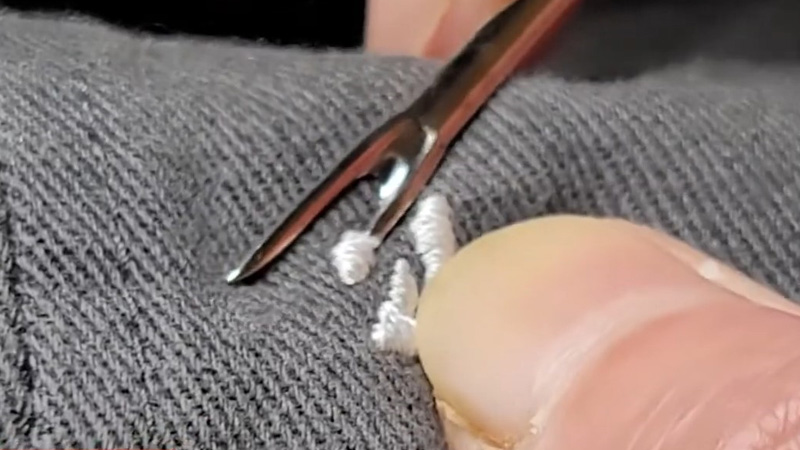
Unpicking Stitches with Seam Ripper

Gently use a seam ripper to cut and remove each stitch carefully. Work from the back of the fabric, ensuring you avoid damaging the material while preserving its integrity.
Using Small Scissors for Precision
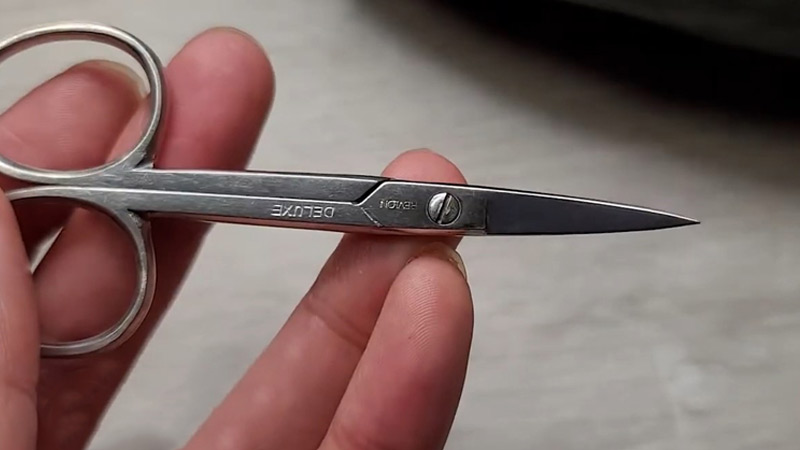
Employ small, sharp embroidery scissors to cut individual stitches precisely. This method allows for detailed removal, especially in intricate designs or tight spaces.
Steam and Pull Technique
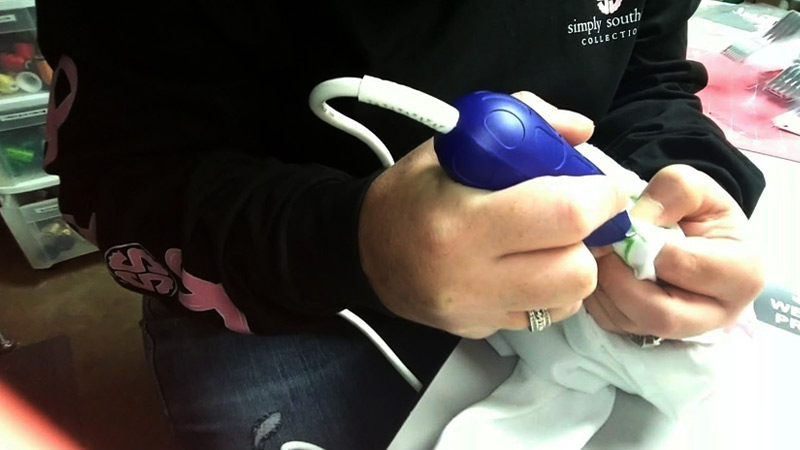
Apply steam to the embroidered area using a hot iron or a garment steamer. Once the threads are relaxed, delicately pull them out with tweezers or your fingers, gradually undoing the embroidery.
Freezing for Easy Removal
Place the fabric in the freezer for a few hours. The frozen threads become more rigid, making it easier to pick them out with minimal resistance and potential damage.
Use of a Razor Blade
Employ a razor blade or a sharp craft knife to carefully cut through the stitches. Exercise caution to avoid cutting the fabric and focus on precision in removing the embroidery.
Chemical Solvent for Thread Dissolution
Apply a small amount of thread-dissolving solvent to the back of the embroidery. This solution weakens the threads, allowing for easier removal without harming the fabric.
Seam Cutting for Bulk Removal
If removing large sections of embroidery, consider cutting along the fabric’s seams. This method facilitates the removal of the entire embroidered section, making it easier to rework or repurpose the fabric.
These seven methods empower you with diverse techniques to effectively remove embroidery from fabric.
Whether you prefer precision with small scissors or ease with the steam and pull technique, each approach ensures a careful undoing of stitches, allowing you to start anew in your embroidery endeavors.
How To Find Embroidery Removal Service?

When in need of professional assistance to remove embroidery, finding a reliable service is crucial. Whether it’s correcting mistakes or repurposing a garment, explore these seven effective ways to locate an embroidery removal service near you.
Each method ensures a hassle-free and precise solution to meet your specific needs.
Local Embroidery Shops
Start by checking with local embroidery shops or sewing centers. Many offer removal services or can recommend specialists in the area, ensuring proximity and convenience.
Online Service Platforms
Utilize online service platforms that connect users with local professionals. Platforms like Yelp or Angie’s List often feature customer reviews, helping you choose a reputable embroidery removal service nearby.
Social Media Groups
Join local sewing or crafting groups on social media platforms. Seek recommendations from community members who may share their experiences with embroidery removal services, providing valuable insights.
Specialty Cleaning Services
Contact specialty cleaning services that cater to delicate fabrics and textiles. These services may offer embroidery removal as part of their expertise in handling intricate and sensitive materials.
Tailoring and Alteration Services
Consult with tailoring or alteration services in your area. These professionals often have experience in both embroidery and fabric modification, making them well-equipped to handle removal requests.
Local Fabric Stores
Visit local fabric or craft stores and inquire about embroidery removal services. Store staff may have information about skilled individuals or services that specialize in undoing embroidery without damaging fabrics.
Online Freelancer Platforms
Explore online freelancer platforms where skilled embroiderers or seamstresses offer their services. Many freelancers can provide embroidery removal assistance remotely or in person, depending on your location.
By utilizing these seven methods, you can confidently find an embroidery removal service near you. Whether through local businesses, online platforms, or community recommendations, these avenues ensure that you locate a skilled professional to address your embroidery removal needs with precision and care.
How Can You Remove Embroidery At Home?
Embarking on a home project often involves the need to remove embroidery, whether it’s to correct mistakes or repurpose garments. Discover seven effective ways to remove embroidery at home, ensuring precision without compromising the fabric’s integrity.
Unpicking Stitches with Seam Ripper
Utilize a seam ripper to gently unpick each stitch. Work from the back of the fabric, carefully cutting through the threads without causing damage. This method allows for detailed removal, especially in intricate designs.
Using Small Scissors for Precision
Employ small, sharp embroidery scissors to cut individual stitches with precision. This technique is ideal for carefully navigating around delicate fabrics or intricate patterns, ensuring minimal impact on the surrounding material.
Steam and Pull Technique
Apply steam to the embroidered area using a hot iron or a garment steamer. Once the threads are relaxed, delicately pull them out with tweezers or your fingers, gradually undoing the embroidery without causing stress to the fabric.
Freezing for Easy Removal
Place the fabric in the freezer for a few hours. The frozen threads become more rigid, making it easier to pick them out with minimal resistance. This method is particularly useful for bulk removal or larger embroidery sections.
Use of a Razor Blade
Employ a razor blade or a sharp craft knife to carefully cut through the stitches. Exercise caution to avoid cutting the fabric, focusing on precision in removing the embroidery without damaging the surrounding material.
Chemical Solvent for Thread Dissolution
Apply a small amount of thread-dissolving solvent to the back of the embroidery. This solution weakens the threads, making it easier to remove without causing damage to the fabric.
Seam Cutting for Bulk Removal
If removing large sections of embroidery, consider cutting along the fabric’s seams. This method facilitates the removal of the entire embroidered section, allowing you to rework or repurpose the fabric seamlessly.
With these seven home-friendly methods, you can confidently remove embroidery without the need for professional assistance.
From precision techniques with scissors to utilizing steam or freezing methods, these approaches ensure a meticulous undoing of stitches, providing a clean slate for your embroidery projects at home.
How To Remove Embroidered Logo?
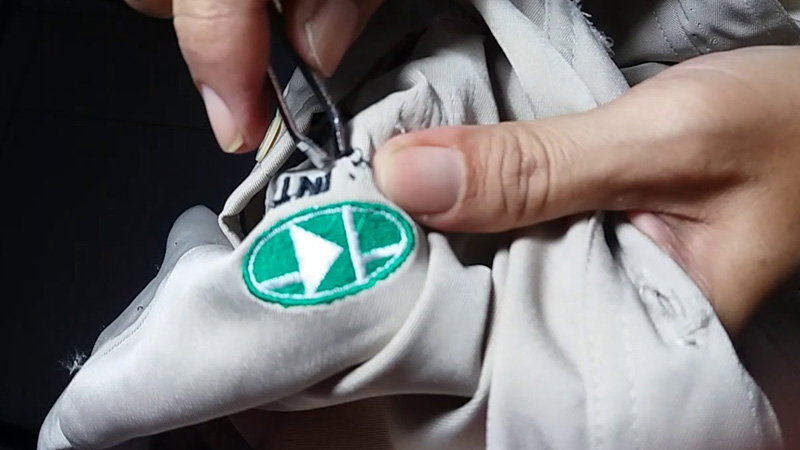
Whether for rebranding purposes or a change in design, there are instances when removing an embroidered logo becomes necessary.
Discover five effective ways to tackle this task without compromising the integrity of the fabric or the surrounding material.
Each method outlined ensures a careful and meticulous approach to how to remove embroidery from clothes or other items.
Seam Ripper Technique
Begin by using a seam ripper to carefully cut through the stitches of the embroidered logo. Work from the backside of the fabric, gently unpicking the threads to avoid causing damage.
This method allows for precise removal while minimizing any impact on the surrounding material.
Steam and Pull Method
Apply steam to the embroidered logo using a hot iron or a garment steamer. Once the threads are relaxed, use tweezers or your fingers to delicately pull them out. This technique gradually undoes the logo without causing stress to the fabric.
Freezing for Controlled Removal
Place the fabric with the embroidered logo in the freezer for a few hours. The frozen threads become more rigid, making it easier to pick them out without resistance. This method is particularly useful for bulk removal or larger logo sections.
Chemical Solvent for Thread Dissolution
Apply a small amount of thread-dissolving solvent to the back of the embroidered logo. This solution weakens the threads, allowing for easier and less intrusive removal without causing damage to the fabric.
Careful Cutting with Scissors
Utilize small, sharp scissors to carefully cut through the stitches of the embroidered logo. This method requires precision, especially when working with intricate designs, to ensure a clean removal without harming the surrounding material.
These five methods offer a range of options for removing an embroidered logo with precision and care.
Whether employing a seam ripper for detailed work, utilizing steam or freezing methods for controlled removal, or using chemical solvents for a less intrusive approach, these techniques allow you to effectively undo an embroidered logo without compromising the fabric’s integrity.
FAQs
Will removing embroidery damage the fabric?
Careful removal techniques, such as using seam rippers or freezing methods, minimize the risk of fabric damage. Precision is key to preserving the fabric’s integrity.
Can I remove embroidery without professional help?
Absolutely. DIY methods like seam ripping, steam application, or freezing allow for effective embroidery removal at home without the need for professional assistance.
What if the embroidery is on a large area?
For larger sections, freezing or cutting along fabric seams offers a more manageable approach to undoing the embroidery without causing unnecessary stress.
Are there specific methods for intricate embroidery designs?
Yes, using small scissors or seam rippers ensures precision when dealing with intricate designs. This allows for careful removal without affecting the surrounding fabric.
Can embroidery be removed for reworking or repurposing projects?
Certainly. The varied removal methods provided in our guide empower you to undo embroidery for reworking or repurposing fabric in creative and personalized projects.
Conclusion
As you navigate the realm of embroidery, the need to remove stitches from fabric may arise for various reasons. “How To Remove Embroidery From Fabric” equips you with a repertoire of techniques, allowing you to undo stitches with precision and care.
Whether opting for the controlled removal of freezing methods, employing steam for delicate fabrics, or using seam rippers for intricate designs, these methods ensure a clean slate for your creative projects.
By understanding these removal techniques, you not only preserve the fabric’s integrity but also gain the confidence to experiment and refine your embroidery skills, ensuring a seamless and enjoyable crafting journey.
Leave a Reply